JobNect Documentation: This tab contains the web documentation.
Getting Started
Welcome to JobNect
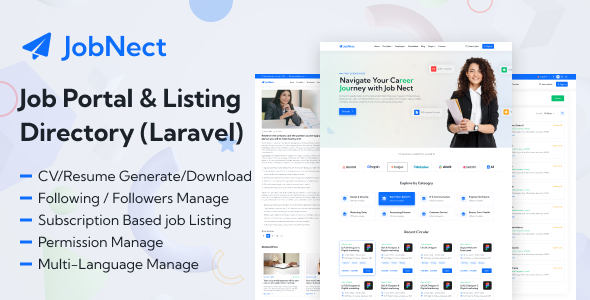
Thank you for choosing JobNect — a powerful and scalable job portal & listing directory solution built with Laravel. Whether you're building a career platform, a job marketplace, or a recruitment tool, JobNect empowers you with everything you need to get started fast and scale confidently.
This documentation is designed to guide developers, administrators, and product owners through JobNect’s features, installation process, core modules, and customization possibilities. With an intuitive structure, flexible permission systems, and multi-language support, JobNect helps you deliver a seamless recruitment experience.
- Generate and manage resumes directly in-app
- Subscription-based job listing system
- Multi-language, permission, and follower support
- Built with clean Laravel code for easy scalability
Let’s begin your journey in delivering an efficient and modern hiring platform.
Name: JobNect – Job Portal & Listing Directory (Laravel)
Version: 1.x
Author: BugBuild Labs | Email: [email protected]
WhatsApp: +8801811843300 | Website: https://bugbuild.com
License: Commercial – Single or Extended Use
Requirements
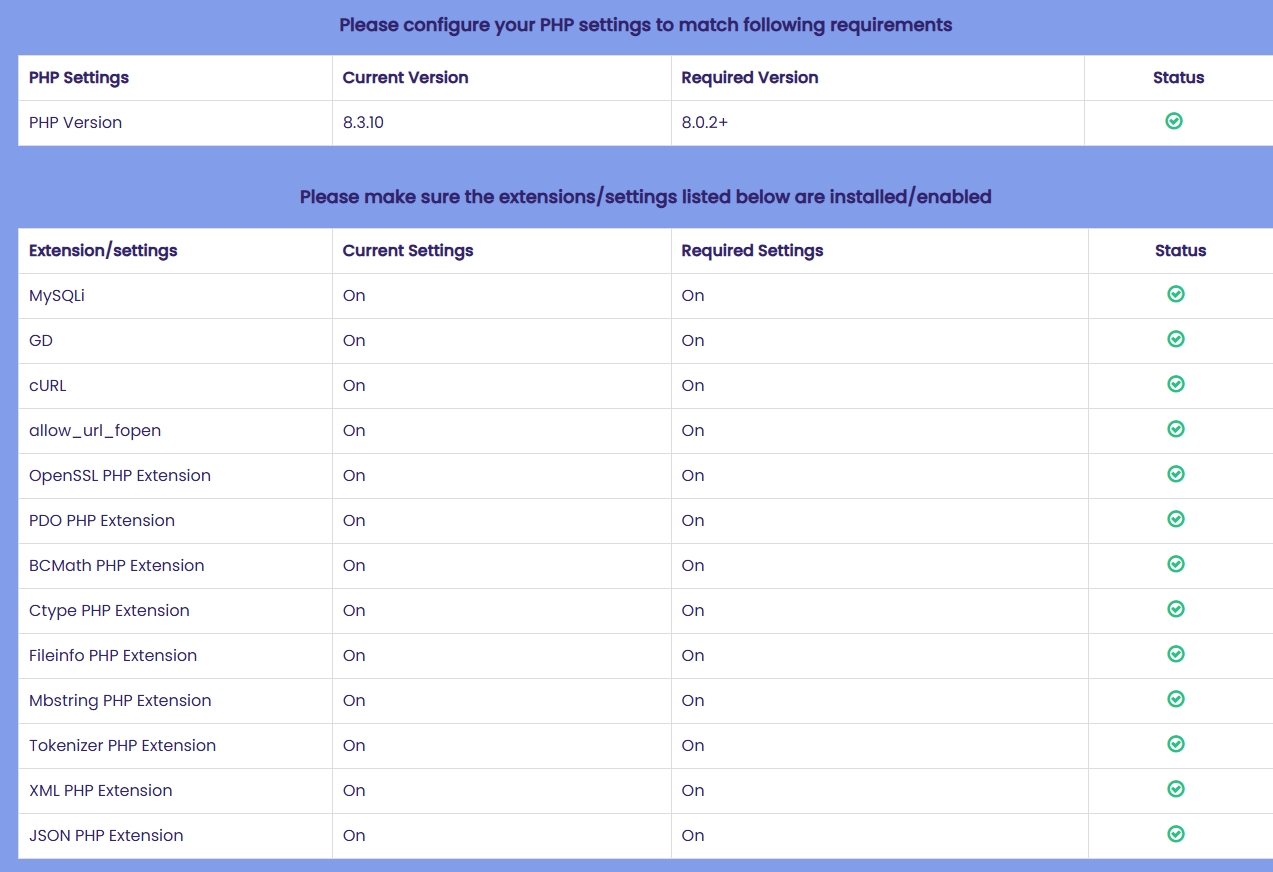
Ensure your server meets the following requirements before installing JobNect – Job Board Listing Directory.
PHP Settings:
- PHP Version: 8.1 or higher
Required PHP Extensions:
- MySQLi
- GD
- cURL
- allow_url_fopen
- OpenSSL
- PDO
- BCMath
- Ctype
- Fileinfo
- Mbstring
- Tokenizer
- XML
- JSON
Database Setup (via cPanel)
Use the following steps to create a database using cPanel.
Step 1 – Login to cPanel:
Access your hosting account’s cPanel (usually at https://yourdomain.com/cpanel).
Step 2 – Open MySQL® Database Wizard:
From the cPanel dashboard, search for and open MySQL® Database Wizard.
Step 3 – Create Database:
Enter a name for your new database and click Next Step.
Step 4 – Create Database User:
Enter a username and a strong password. Click Create User and save these credentials securely.
Step 5 – Add User to Database:
Select All Privileges to give full access to the database, then click Next Step to finish.
✅ You should now have these ready:
- Database Name
- Database Username
- Password
Upload Files & Set Permissions
Step 1 – Upload Application:
Download Main_Files.zip from CodeCanyon. Extract it locally. Inside SourceCode, zip the contents and upload to public_html or www. Extract the contents on the server.
Step 2 – Set Writable Permissions:
Ensure the following folders and files are writable by the web server:
./routes./resources./public./storage./.env
Command (Linux): chmod -R 775 storage routes resources public .env
Installation
To install the JobNect – Job Board Listing Directory Laravel Script, follow these steps carefully:
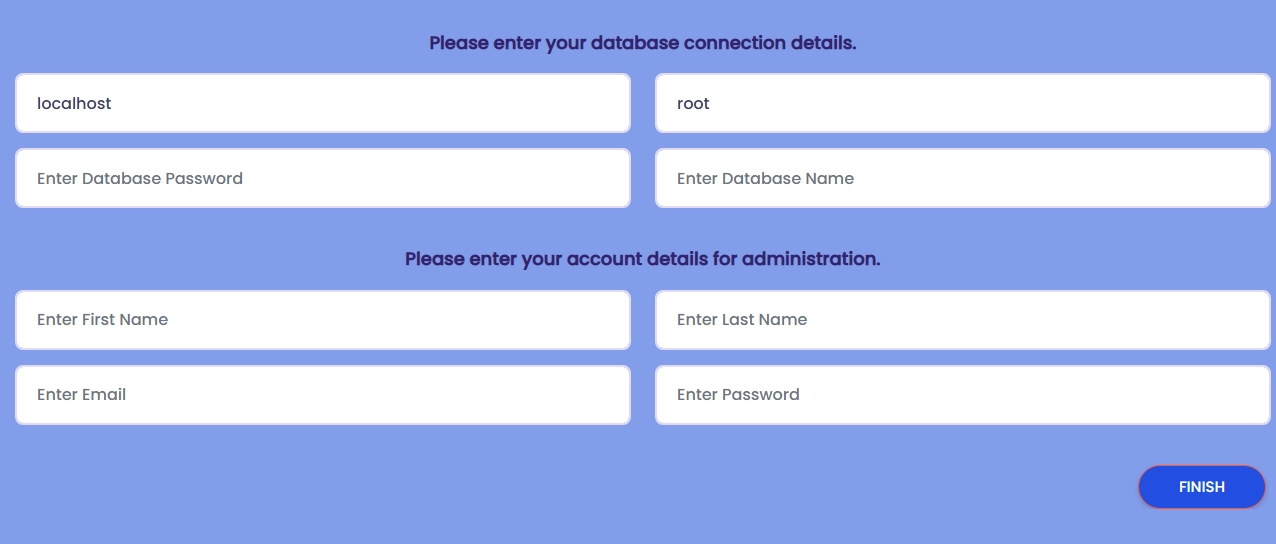
1. Launch the Installer:
Visit your domain (e.g., https://yourdomain.com) in a browser. This will open the installation wizard.
2. Enter Database Configuration:
Enter the database host as localhost, set the username, enter your database password, and provide the name of the database where the application will be installed.
3. Setup Admin Account:
Provide administrator credentials to access the backend of the system. These details will be used to log in after installation is complete.
first name, last name, email, and a secure password
4. Complete Installation: After filling out all required fields and ensuring proper permissions, click the FINISH button to finalize the installation process.
Login
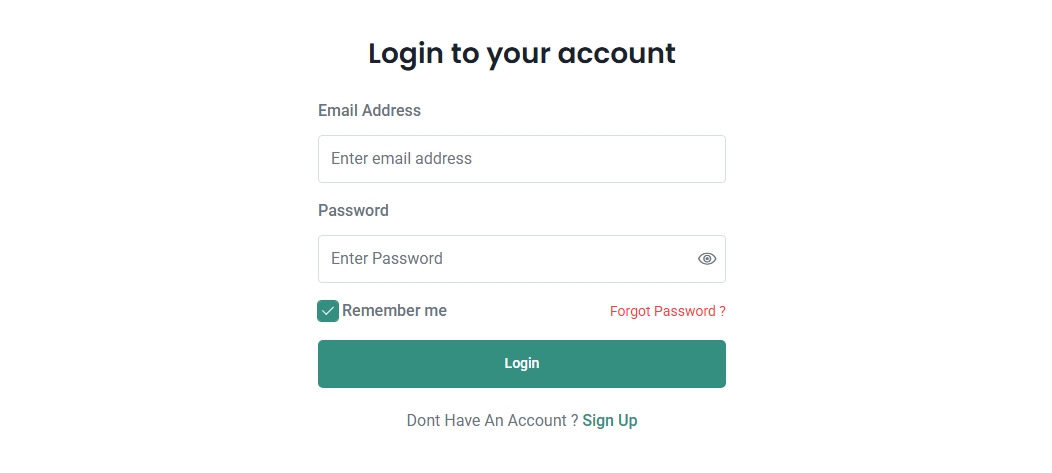
To access the system, navigate to the login page and enter your credentials.
Step 1: Enter your registered Email Address in the email field.
Step 2: Type your Password into the password field. You can click the eye icon to toggle password visibility.
Step 3: Optionally, check the Remember me box to stay logged in across sessions.
Step 4: Click the Login button to proceed into the application.
If you forgot your password, click the Forgot Password? link to start the reset process.
If you do not have an account yet, click the Sign Up link at the bottom to create a new one.
Sign Up
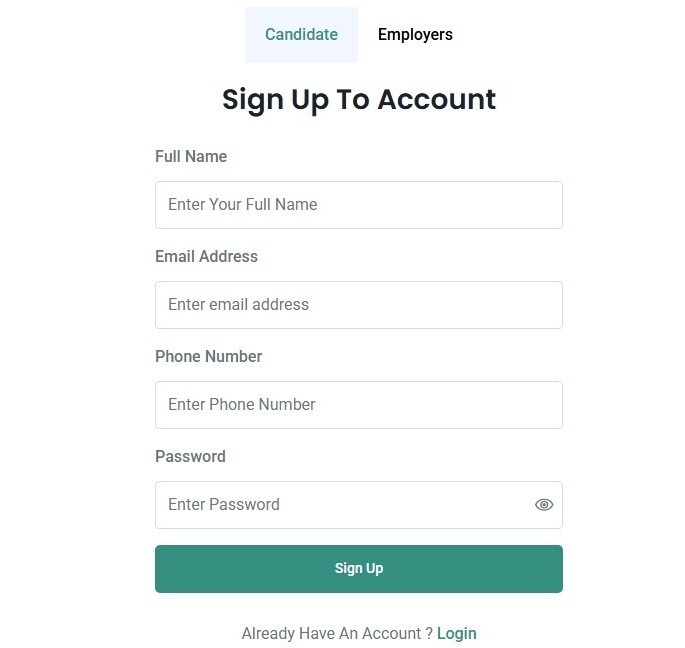
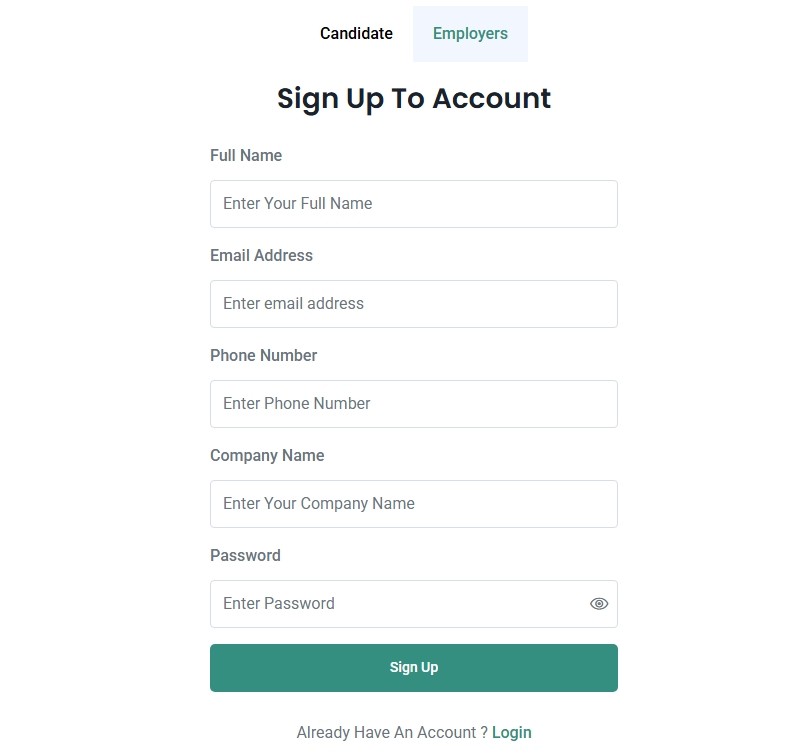
The sign-up process allows new users to create an account in the system. There are two types of user roles during signup: Candidate and Employer. Users can toggle between these roles using the selector at the top of the form.
Candidate Sign Up:
Candidates need to provide their Full Name, Email Address, Phone Number, and create a secure Password. After submitting the form, they can log in to access job listings and related features.
Employer Sign Up:
Employers need to provide their Full Name, Email Address, Phone Number, Company Name, and a Password. Upon successful registration, they can log in to manage job postings and company profiles.
At the bottom of the form, existing users can click on the Login link to return to the login page if they already have an account.
Forget Password
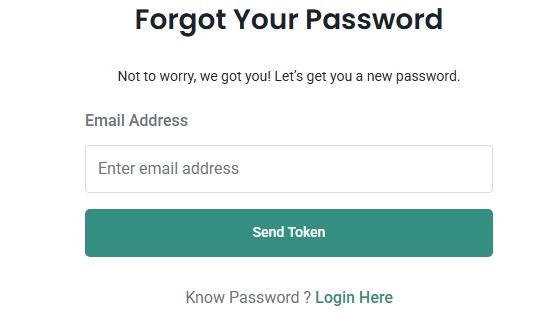
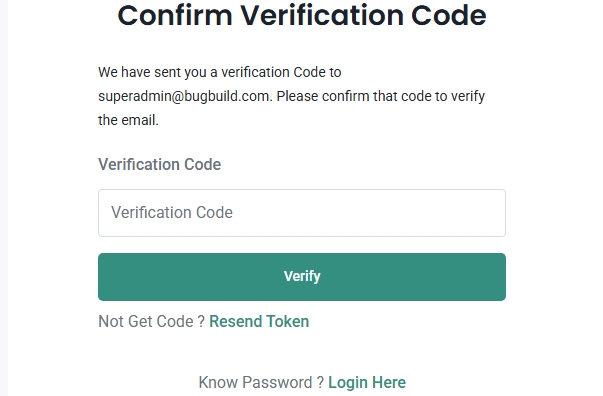
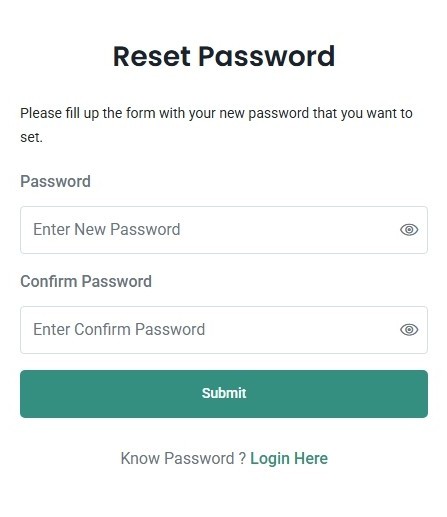
If a user forgets their password, they can securely reset it using the "Forgot Password" feature. This process includes three simple steps to verify identity and update login credentials.
Step 1 – Request Token:
The user starts by entering their registered email address on the Forgot Password page and clicking Send Token. This triggers a verification code to be sent to their email inbox.
Step 2 – Verify Code:
On the Confirm Verification Code screen, the user enters the code received via email and clicks Verify. There is an option to resend the code if it wasn't received.
Step 3 – Reset Password:
Once the code is verified, the user is redirected to the Reset Password page, where they can enter a new password and confirm it. On successful submission, the password is updated and the user can log in with the new credentials.
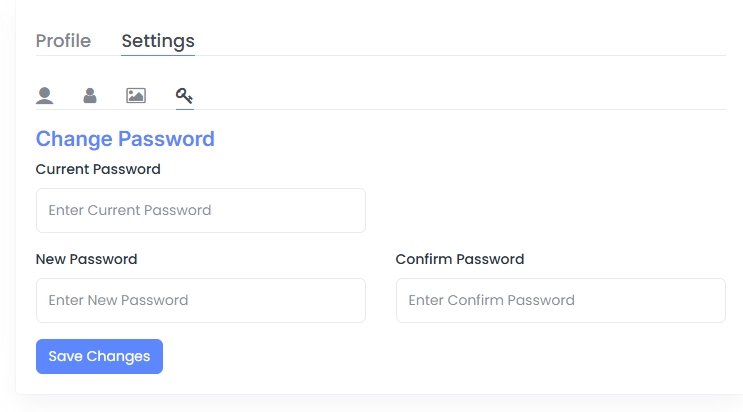
Change Password
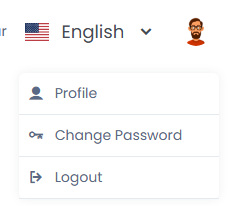
Users can securely update their account password at any time through the Change Password option available in the user dropdown menu.
Step 1: Click the user avatar on the top right corner of the navigation bar and select Change Password from the dropdown menu.
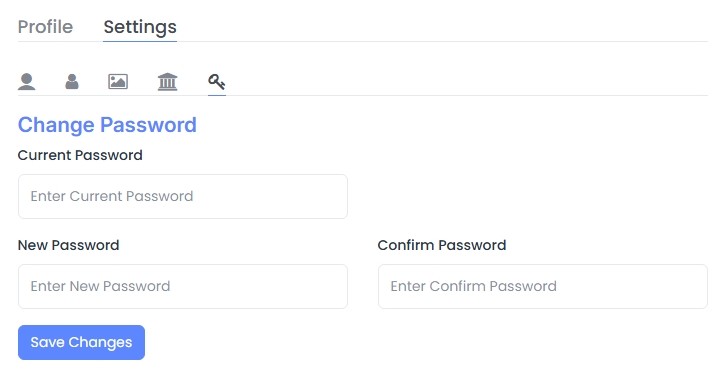
Step 2: On the settings page, go to the Change Password tab. Enter your current password, then input a new password and confirm it in the corresponding fields.
Step 3: Click the Save Changes button to update your password. A confirmation message will appear if the change is successful.
Profile Management
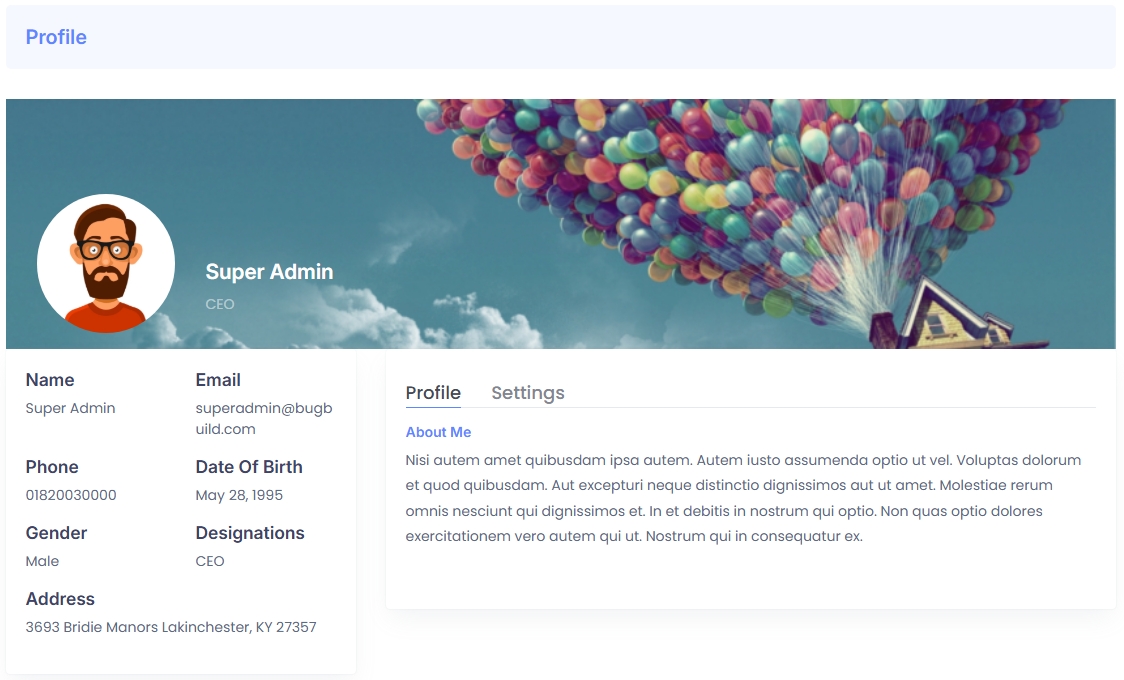
The Profile Management module allows users to view and update their personal information, including name, contact details, profile photo, and more. This feature enhances user control over their account information and user interface personalization.
Step 1 – View Profile:
On the profile screen, users can see their basic details like name, email, phone number, date of birth, gender, and address along with their profile and cover photo.
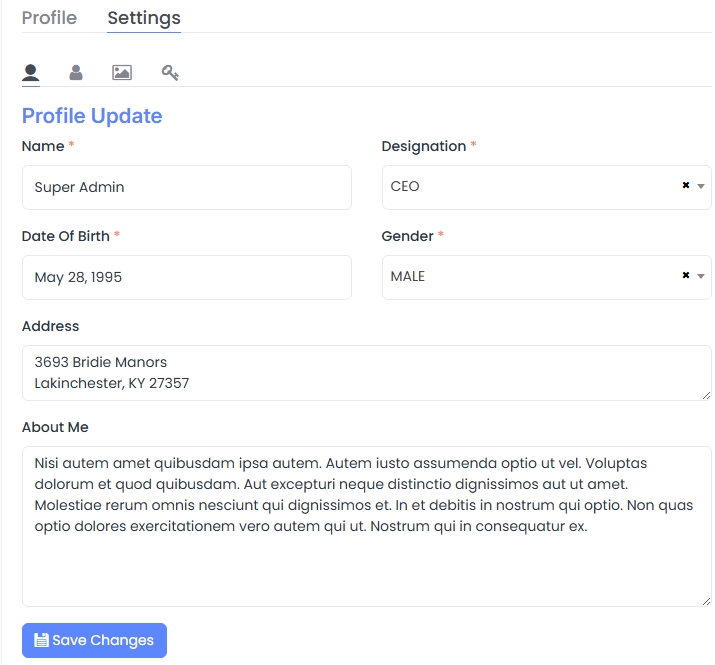
Step 2 – Edit Information:
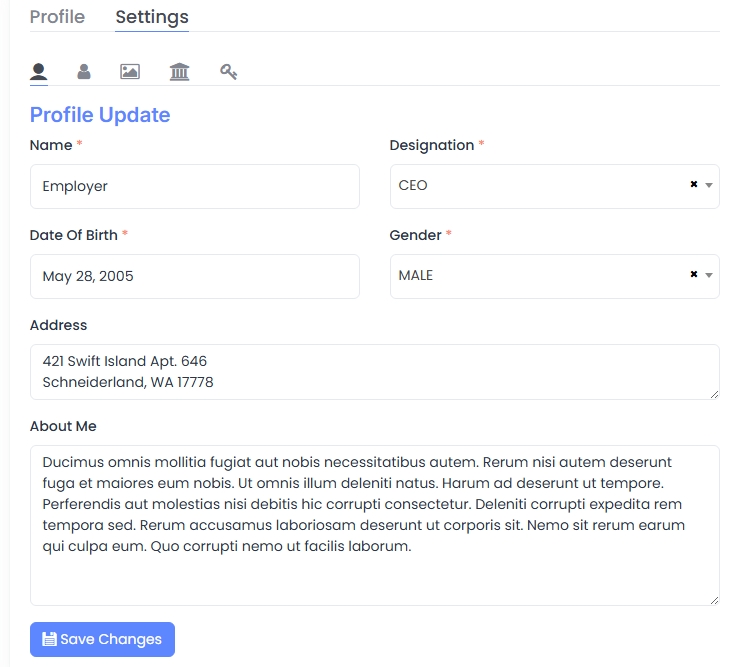
By navigating to the Settings tab, users can update their basic details such as name, gender, designation, date of birth, and address. All fields marked with an asterisk (*) are mandatory.
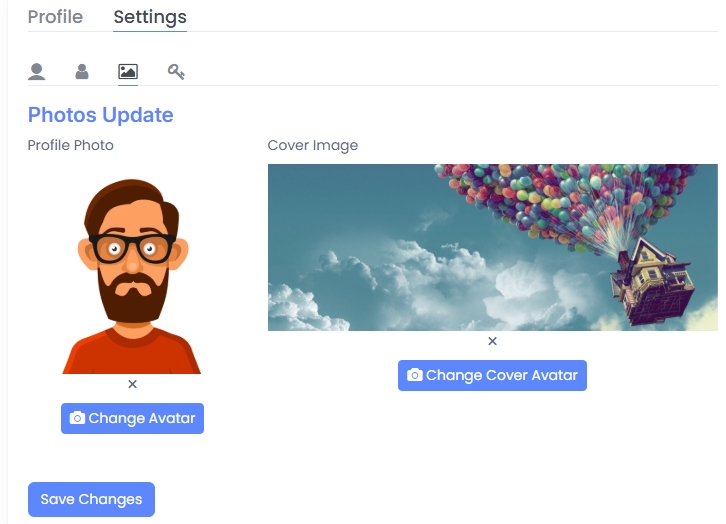
Step 3 – Update Photos:
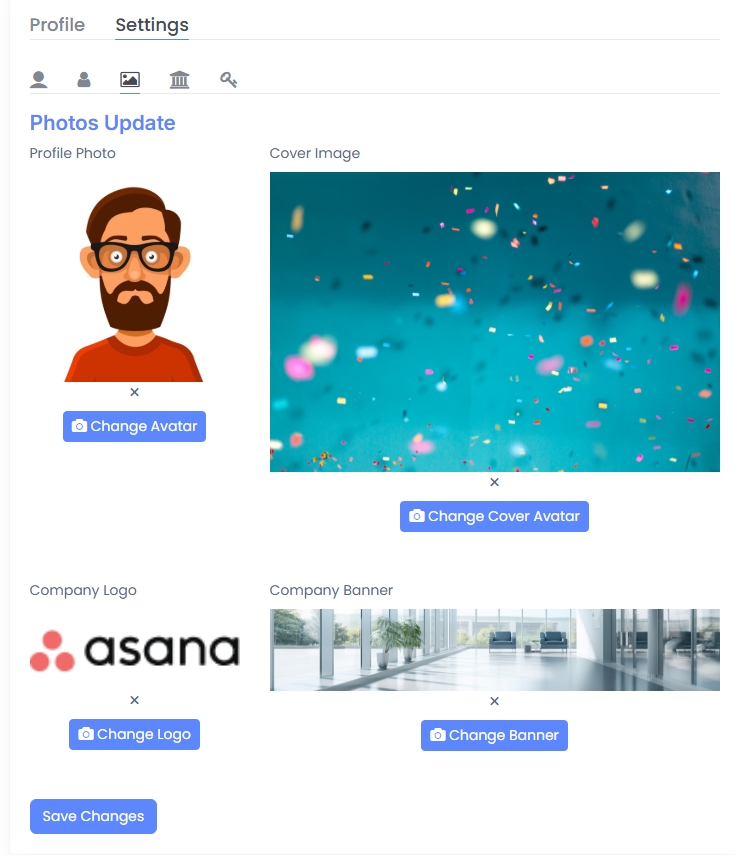
In the Settings tab, users can also change their profile avatar and cover image with easy upload buttons.
Step 4 – Account Info:
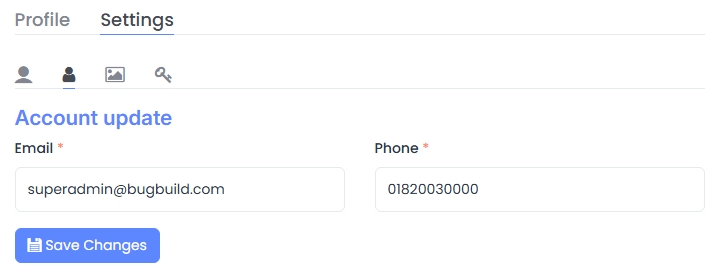
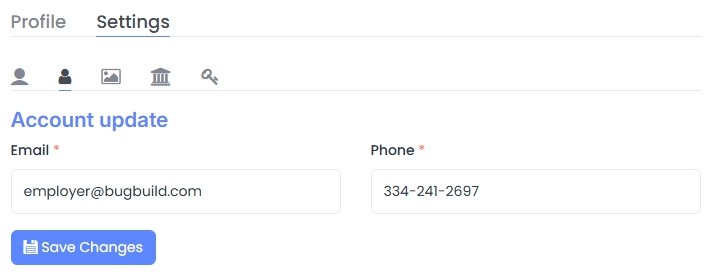
Users can separately update account-level information like email and phone number under the Account update section in the Settings tab.
Dashboard Overview
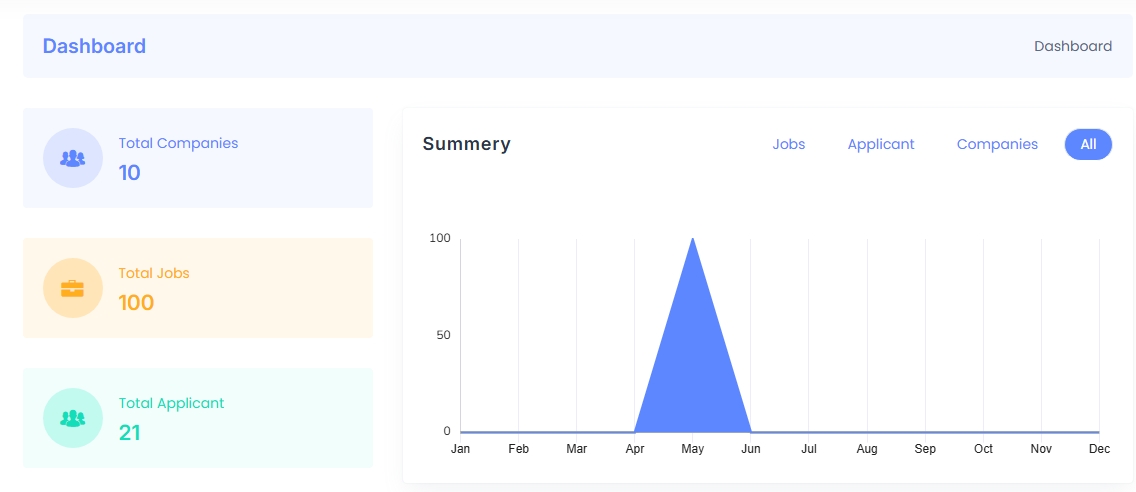
The Dashboard provides a quick overview of platform activity, offering real-time insights for administrators and employers.
Summary Cards:
At the top, summary cards show key metrics such as the total number of companies, jobs posted, and applicants registered. Each card is color-coded for easy visual distinction.
Analytics Chart:
A monthly performance graph visualizes job-related activity. You can filter the chart by Jobs, Applicants, Companies, or view all combined for comparison.
Login Activity Map:
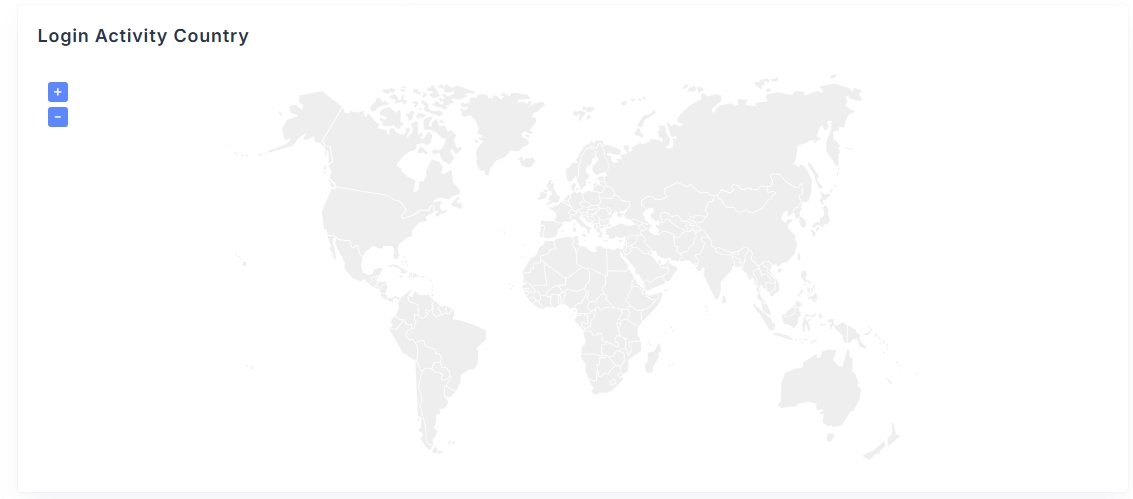
This section displays a world map highlighting login activity by country, providing geographic insights into user engagement.
Jobs List:
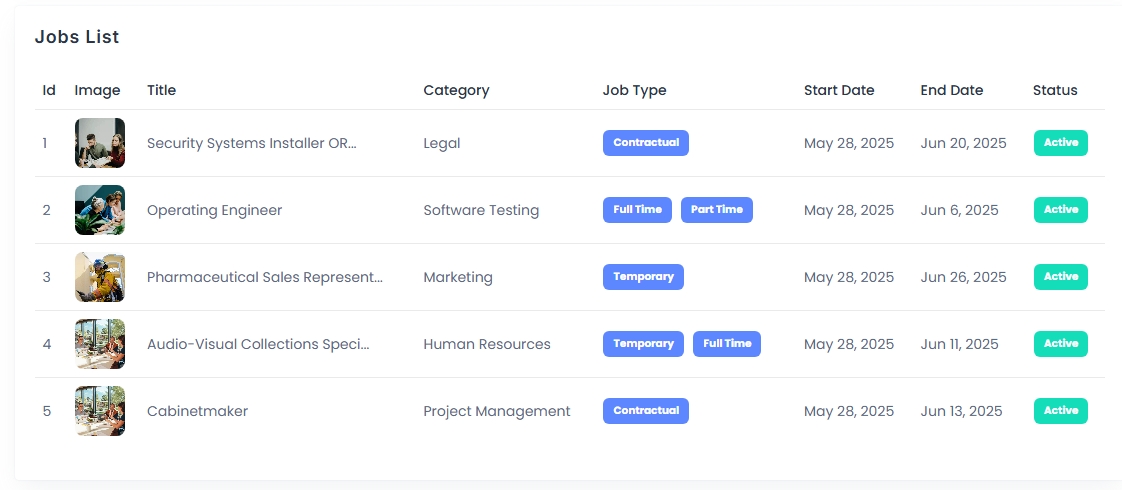
The lower section includes a list of active job postings with key details like category, job type (e.g. Full-Time, Temporary), start and end dates, and status.
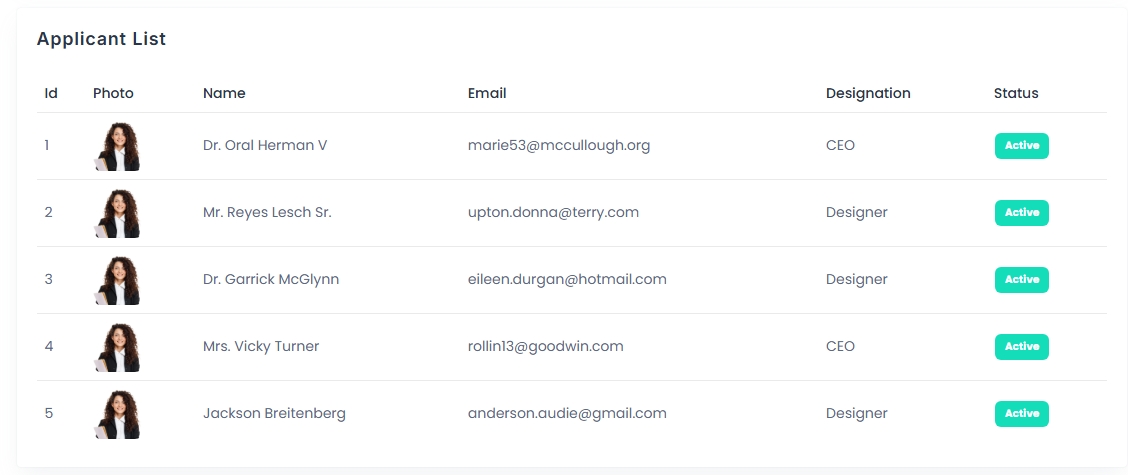
Applicant List:
A table of recently registered applicants showing their name, email, designation, and status, helping you monitor user activity at a glance.
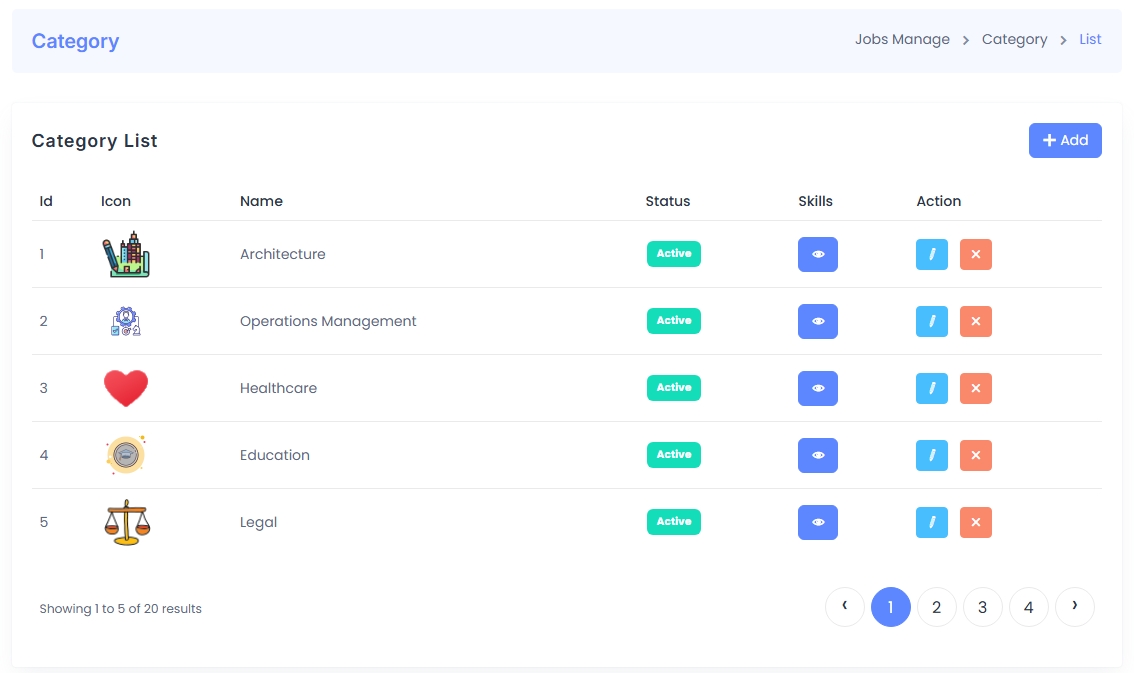
Category List
The Category List page under the Jobs Manage module displays all existing job categories. Each category represents a job specialization or industry sector that employers can assign when posting a job.
Features:
- Icon: Each category includes a unique icon to visually represent the type of job.
- Name: The label assigned to the category (e.g., Healthcare, Education).
- Status: Indicates whether the category is Active or not. Only active categories are available in job posting forms.
- Skills: Clicking the "eye" icon opens a modal or page listing all associated skills for that category.
- Actions: You can Edit or Delete any category using the buttons provided in the Action column.
The pagination at the bottom helps navigate through large numbers of categories. You can also click the Add button to create a new category.
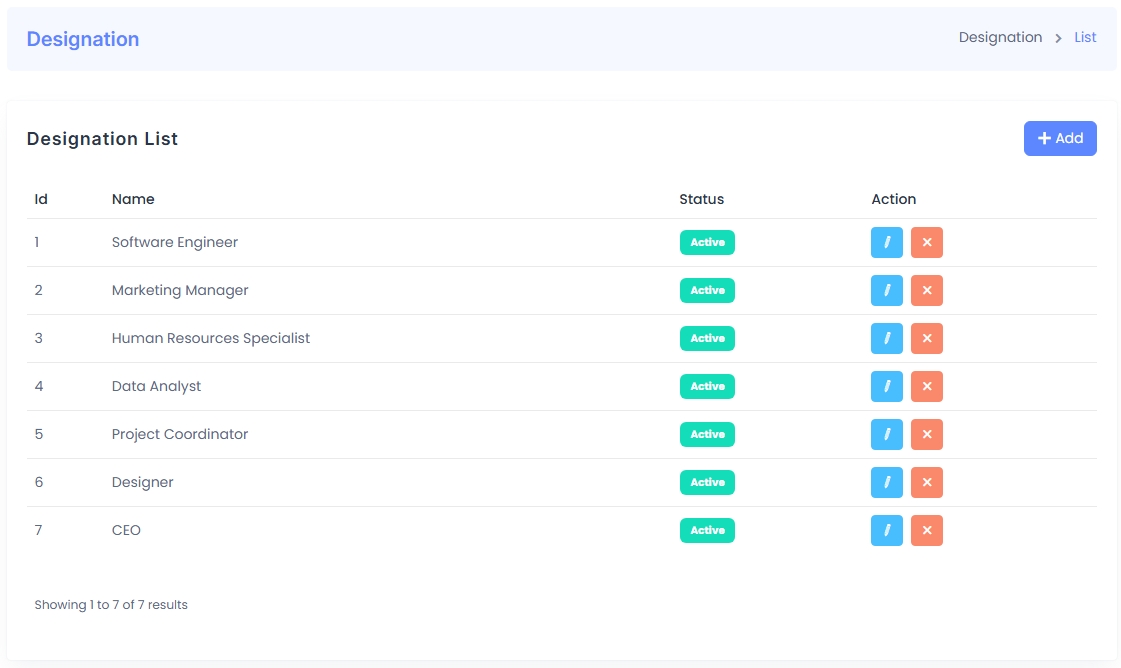
Designation List
The Designation List module displays all the designations or job titles available on the platform. This list is commonly referenced in various job posting or applicant profile sections for assigning or filtering roles.
Table Columns:
- Name: Name of the designation such as "Software Engineer" or "Designer".
- Status: Indicates whether the designation is currently Active.
- Action: Allows Edit or Delete of a designation using respective buttons.
To add a new designation, click the + Add button at the top right. You can manage an unlimited number of designation records through this list.
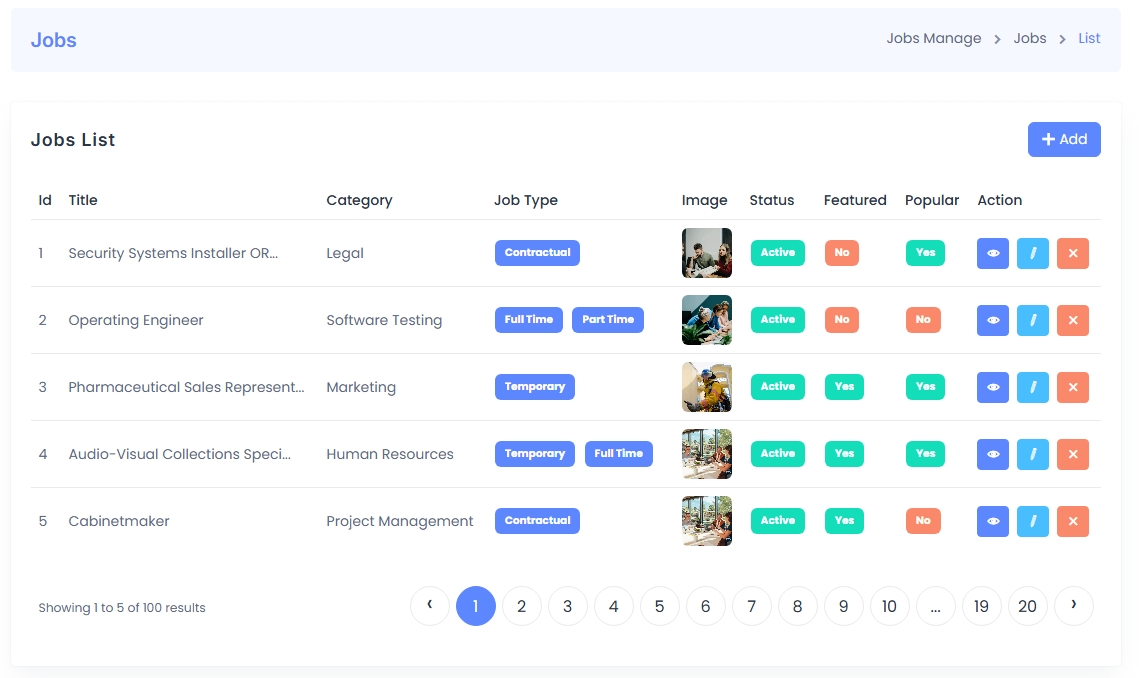
Jobs List
The Jobs List page under the Jobs Manage module displays all job postings submitted by employers or admins. Each job entry includes essential details and actionable options.
Key Fields:
- Title: The name of the job position being advertised.
- Category: The department or field the job falls under (e.g., Legal, Marketing).
- Job Type: Labels such as Full Time, Part Time, Temporary, Contractual, etc.
- Image: A representative photo or company image for the listing.
- Status: Indicates whether the job is currently Active.
- Featured: Marks jobs that are highlighted in special listings.
- Popular: Flags whether the job is marked as popular for visibility.
- Action: Admins can view, edit, or delete each job using the respective icons.
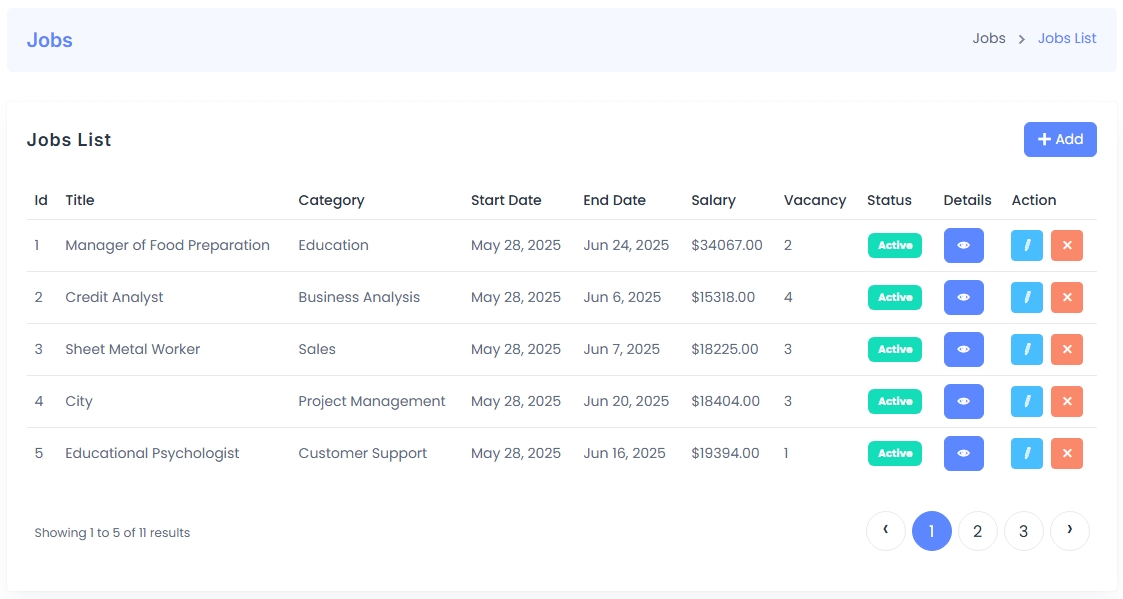
Use the pagination at the bottom of the list to browse through a large number of job records. Click the Add button on the top right to post a new job.
Jobs Create
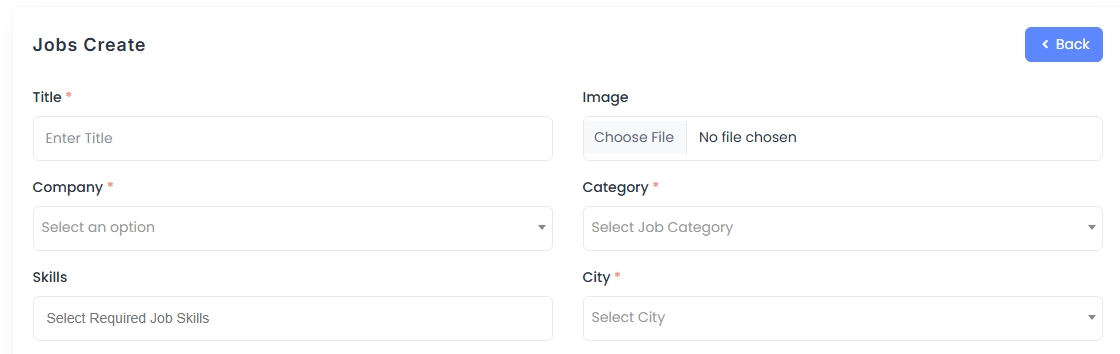
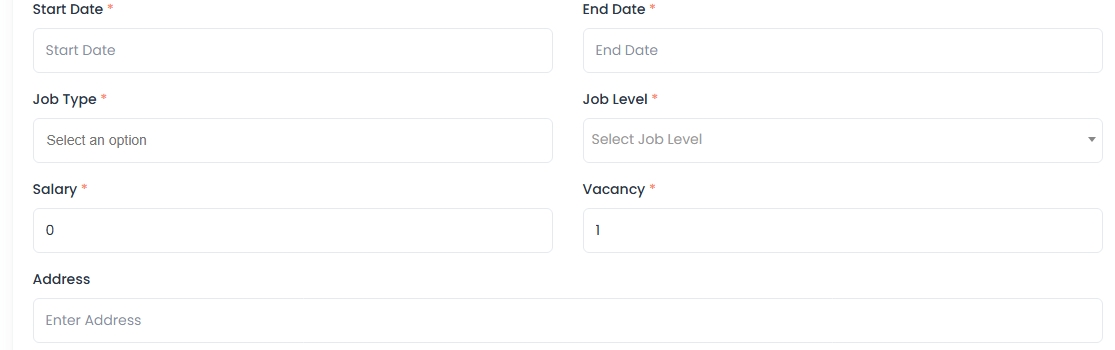
The Jobs Create form allows admins and employers to post new job openings. It’s a multi-field form designed to capture detailed information about the position.
Main Fields:
- Title: Job title that will appear in listings.
- Company, Category, City: Select dropdowns for associating the job with an organization, its industry, and its location.
- Skills: Multi-select input for tagging required job skills.
- Start Date / End Date: Defines the job's duration.
- Job Type & Job Level: Select job classification options such as Full-Time, Part-Time, Entry-Level, etc.
- Salary & Vacancy: Numeric inputs defining compensation and openings.
- Image: Upload field for a visual representation.
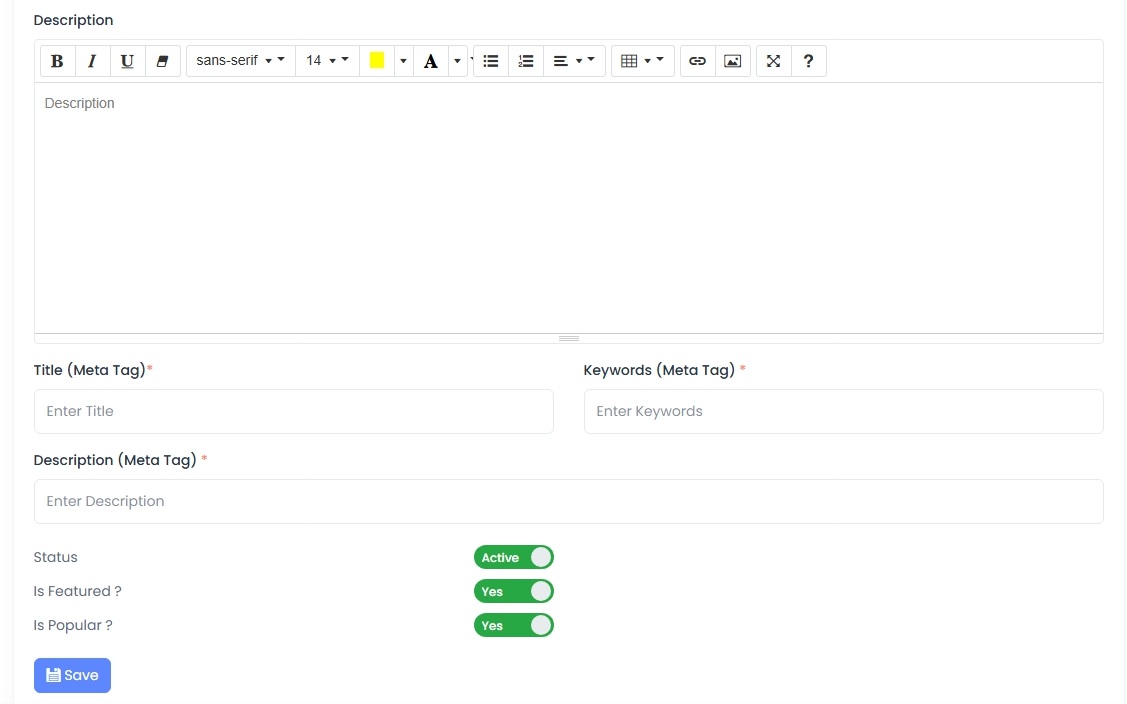
- Address & Description: Fields for location and full job description. The description field includes a rich text editor for formatting.
SEO Meta Tags:
Title, Keywords, and Description fields allow you to define how the job page appears in search engines.
Status Toggles:
Switches to enable Active status, and flags to mark the job as Featured or Popular.
After filling out all required fields, click the Save button to publish the job listing.
Applicant List
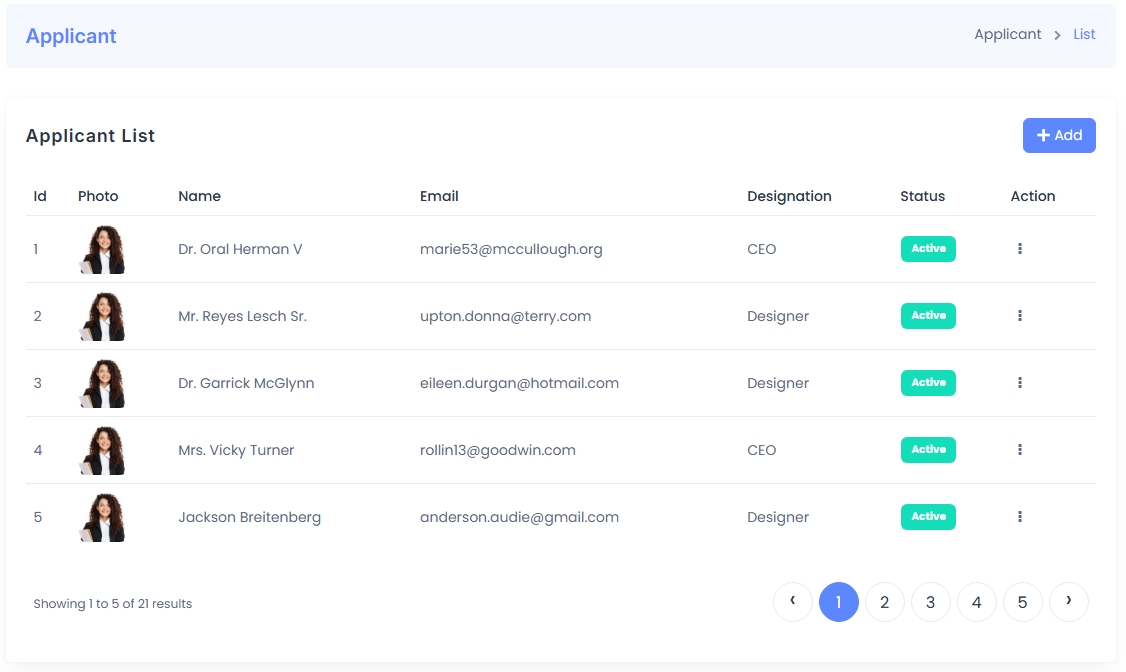
The Applicant List page displays all registered job applicants in a structured table format. It helps administrators quickly view, manage, and verify user data.
Table Columns:
- Photo: A user profile picture for visual identification.
- Name: Full name of the applicant.
- Email: Email address used for registration and communication.
- Designation: Role or professional title of the applicant (e.g., Designer, CEO).
- Status: Indicates if the applicant is currently Active.
- Action: An action dropdown or menu to manage the applicant (view, edit, etc.).
Use the pagination controls at the bottom of the table to navigate through the list of applicants. Click the Add button in the top-right corner to register a new applicant manually.
Applicant Create
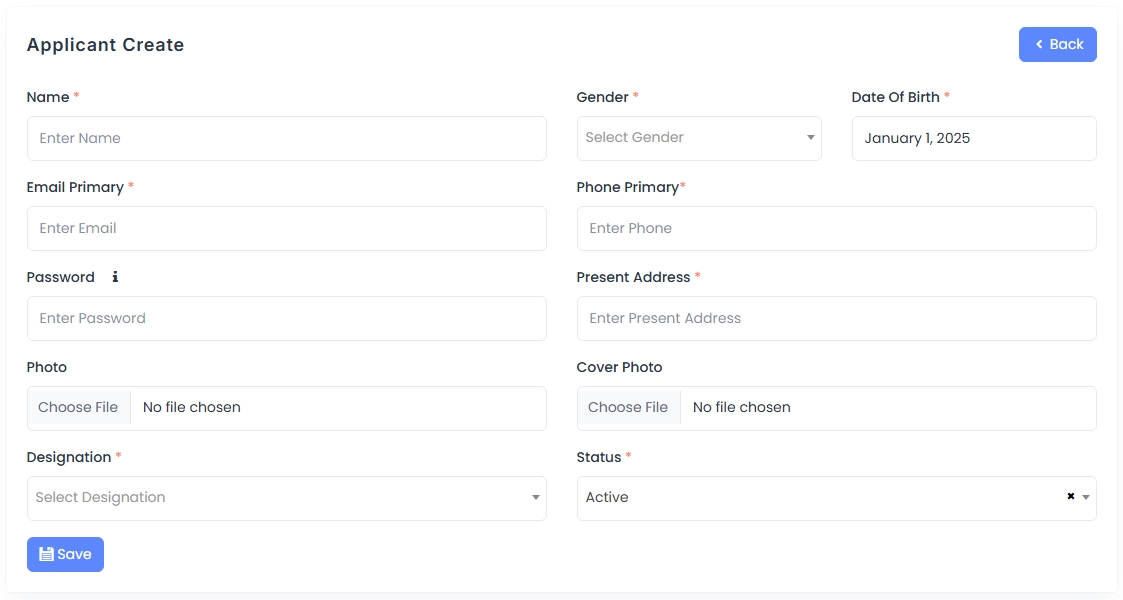
The Applicant Create form allows administrators to manually register a new applicant in the system. It includes personal, contact, and account-related fields.
Form Fields:
- Name: Full name of the applicant.
- Gender & Date of Birth: Basic demographic details, selected from dropdowns and calendar inputs.
- Email Primary: Applicant’s primary contact email (required).
- Phone Primary: Contact number for verification or communication.
- Password: Account password for login (can be autogenerated or typed).
- Present Address: Location details for the applicant.
- Photo / Cover Photo: Upload fields for profile and cover images.
- Designation: Applicant’s professional role or title (e.g., CEO, Designer).
- Status: Set to Active or otherwise to control account visibility.
Once the form is completed, click the Save button to create the new applicant profile.
Applicant Profile
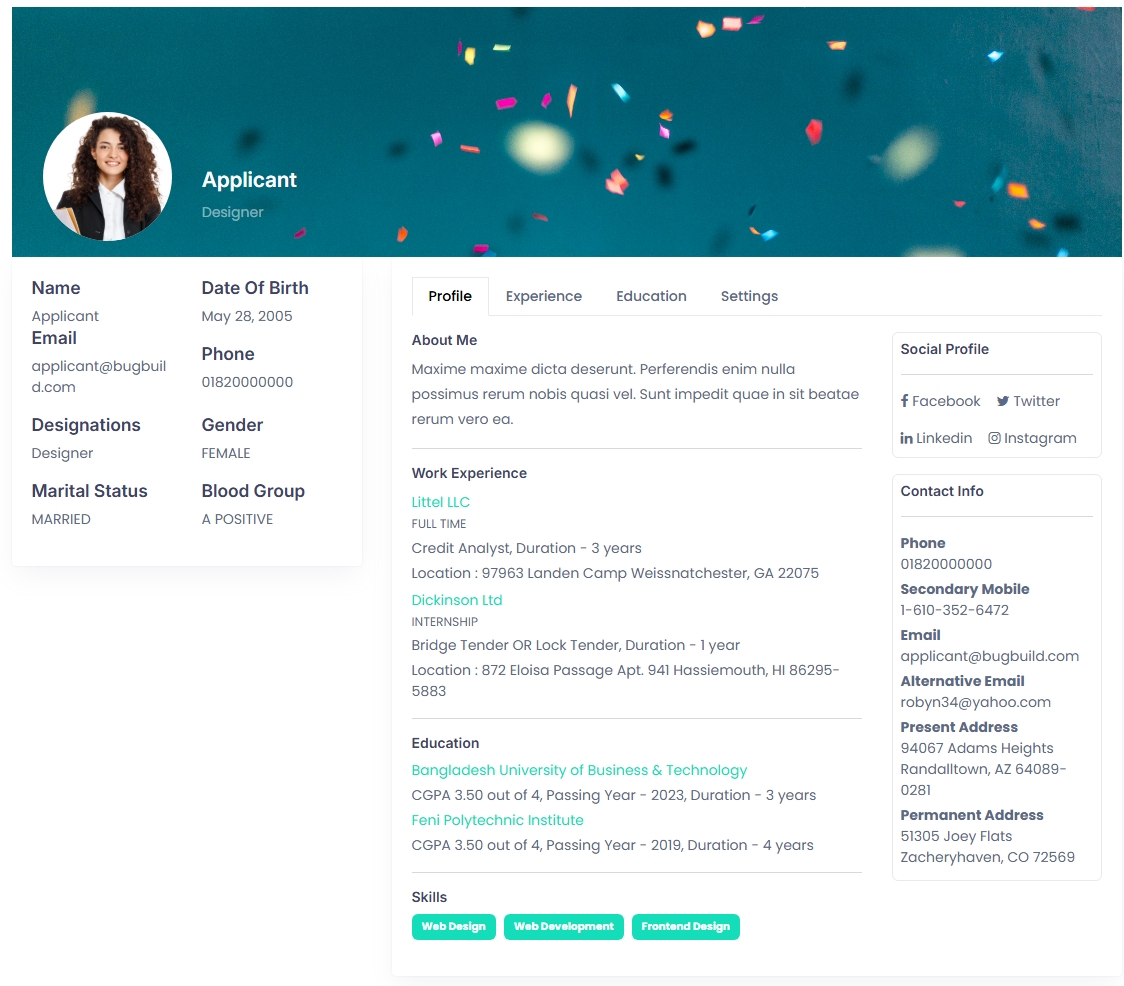
The Applicant Profile page provides a complete view of an individual job seeker's personal, educational, and professional information. It is accessible to admins and potentially to employers depending on permissions.
Key Sections:
- Profile Header: Displays the applicant's name, designation, and profile image with a banner background.
- Personal Info: Shows contact details, gender, date of birth, marital status, and blood group.
- About Me: A short personal introduction written by the applicant.
- Work Experience: List of previous employment including company name, job type (e.g., Full Time, Internship), role, duration, and location.
- Education: Educational background including institute name, CGPA, passing year, and duration.
- Skills: Tag-style display of professional skills (e.g., Web Design, Frontend Development).
- Social Profile: Links to external profiles like Facebook, Twitter, LinkedIn, and Instagram.
- Contact Info: Includes primary/secondary phone, email, alternative email, present, and permanent addresses.
This detailed profile is helpful in evaluating candidates for job postings and may include settings for editing or updating information depending on the user role.
Experience & Education Lists
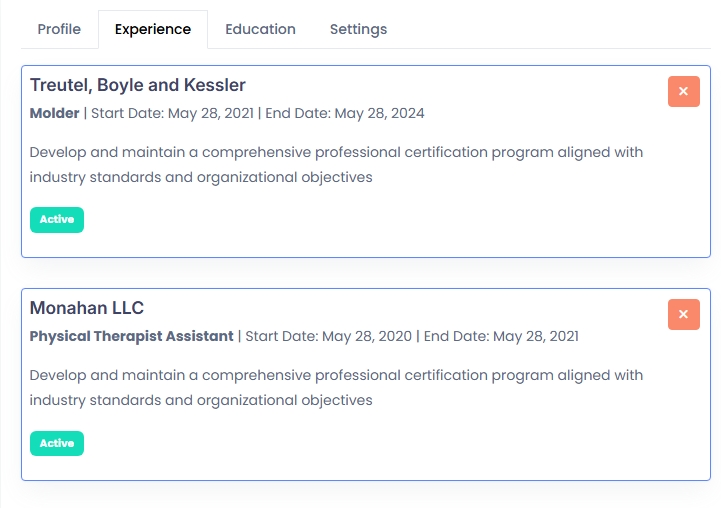
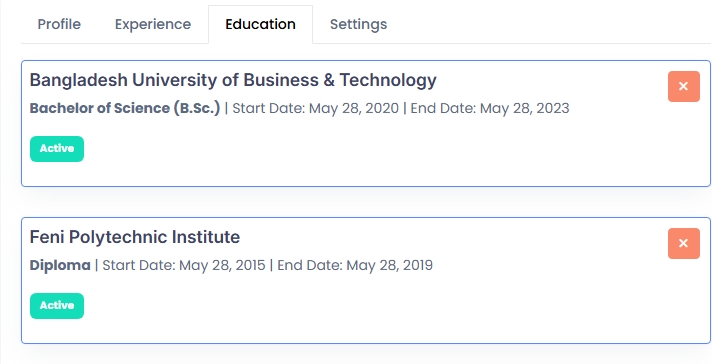
The applicant can also view and manage submitted work experiences and educational background under their respective tabs. Each entry includes a delete option (X button) and displays status as Active.
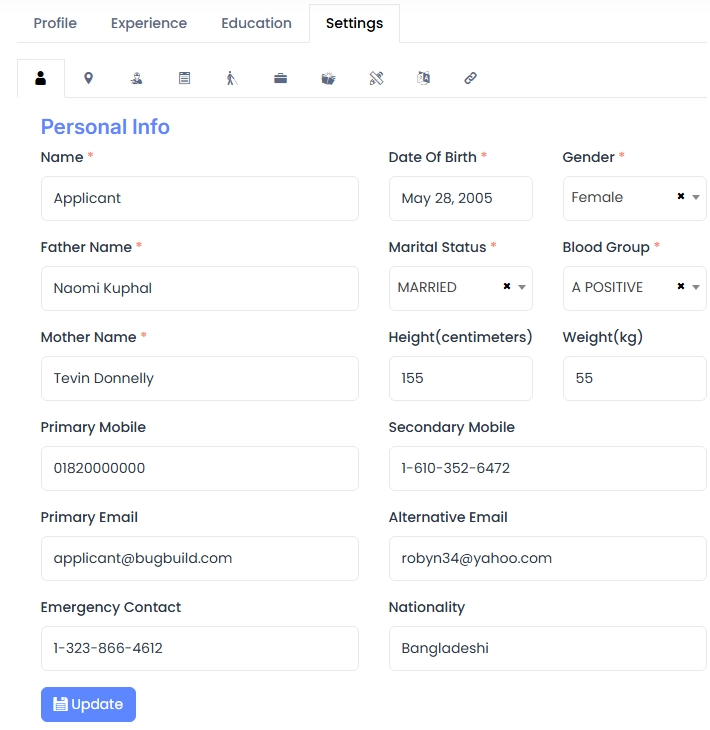
Applicant Settings – Personal info
The Settings tab within an applicant's profile allows users to update their personal details. This ensures that all records are accurate and current for job applications and communication.
Editable Fields:
- Name, Date of Birth, Gender: Standard identity details required for the profile.
- Father & Mother Name: Family details commonly used in official or government records.
- Marital Status & Blood Group: Selected from dropdowns for health and demographic records.
- Height & Weight: Physical details (in cm and kg) used in some sectors (e.g., defense, fitness).
- Primary & Secondary Mobile: Contact numbers for calls and verification.
- Primary & Alternative Email: Main and backup email addresses.
- Emergency Contact: Number used for urgent or emergency communications.
- Nationality: Country of citizenship.
After updating any information, the applicant must click the Update button to save changes.
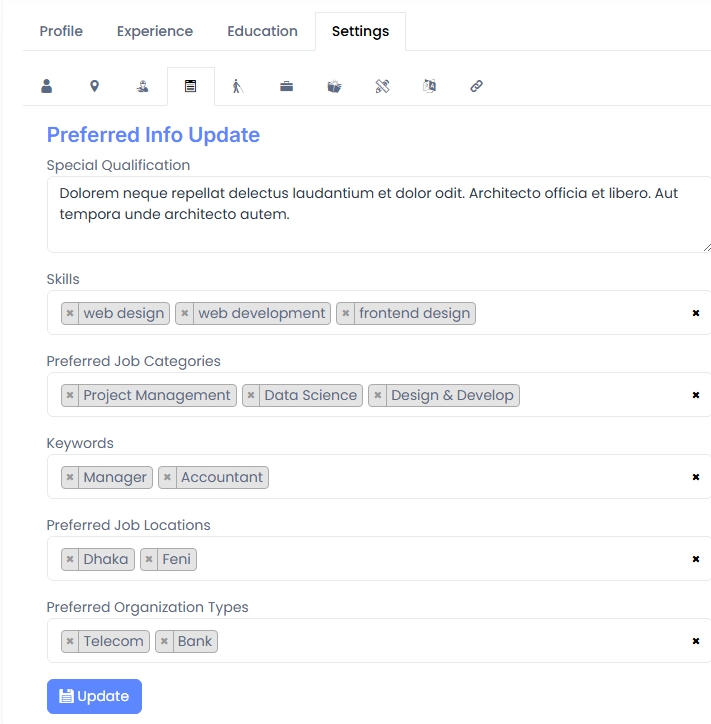
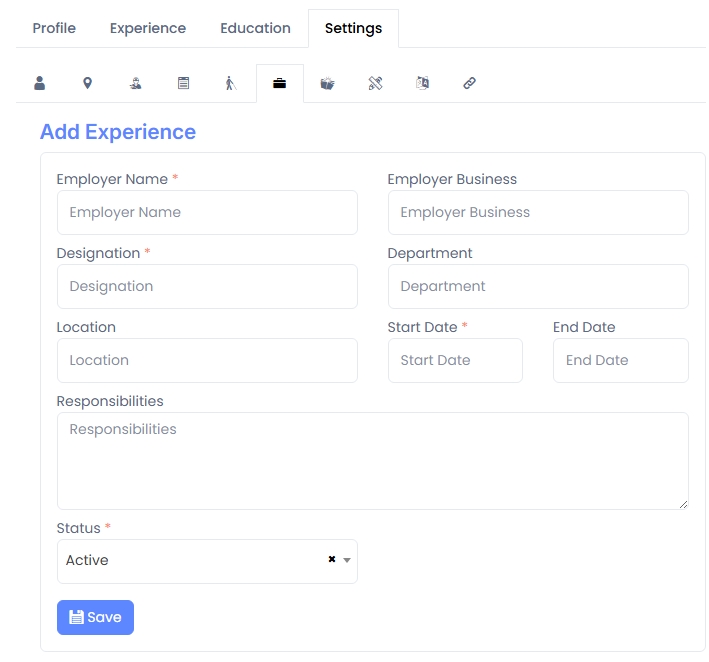
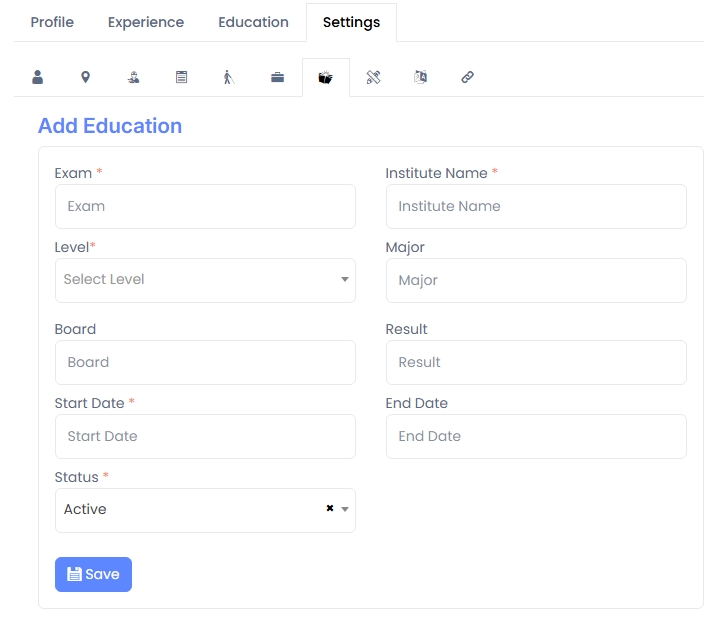
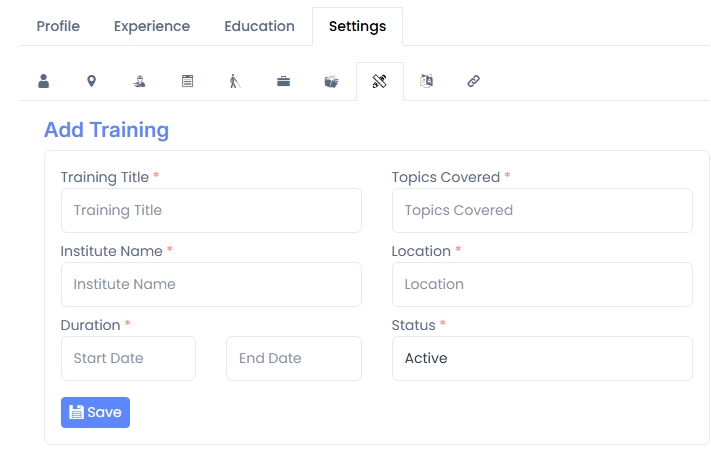
Applicant Settings – All Tabs
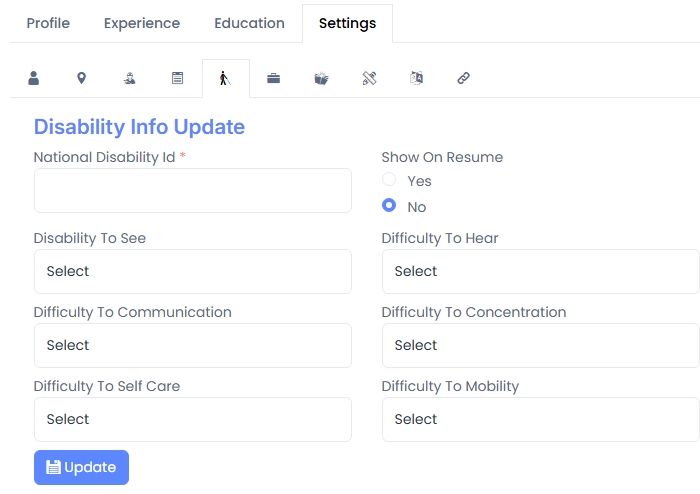
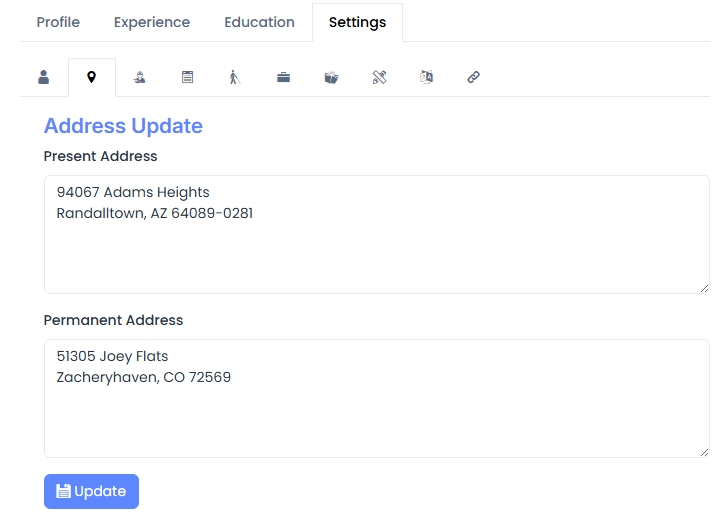
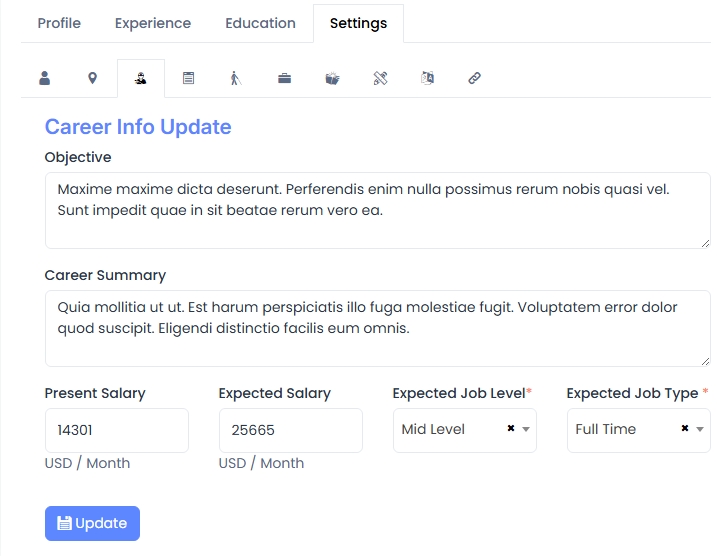
The Settings section in an applicant's profile is divided into multiple tabs, allowing users to update detailed information related to personal data, address, career, education, preferences, disabilities, and more.
Tab Breakdown:
- Personal Info: Basic information including family background, height/weight, and nationality.
- Address Update: Edit present and permanent addresses.
- Career Info: Includes objectives, career summary, current/expected salary, job type, and job level.
- Preferred Info: Special qualifications, preferred job categories, locations, organization types, keywords, and skills.
- Disability Info: Allows applicants to declare and describe any disabilities and choose visibility on resumes.
- Experience Update: Add or edit job experience details including company, location, role, and responsibilities.
- Education Update: Academic history including exam, board, institute, result, and duration.
- Training Update: Training programs completed with details such as title, institute, topics, and duration.
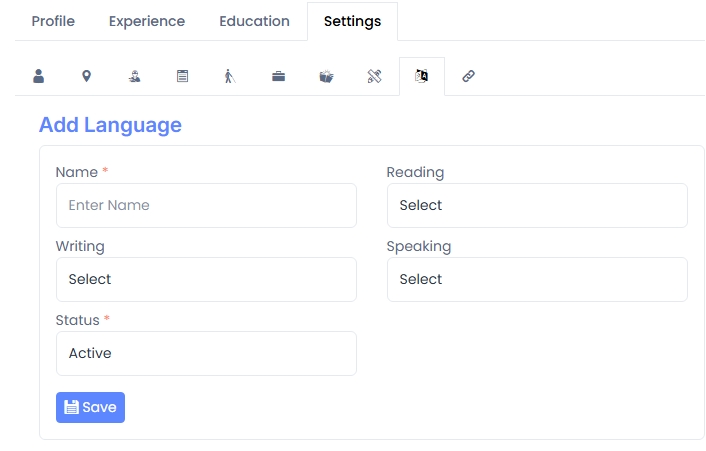
- Language Proficiency: Language name and skill levels in reading, writing, and speaking.
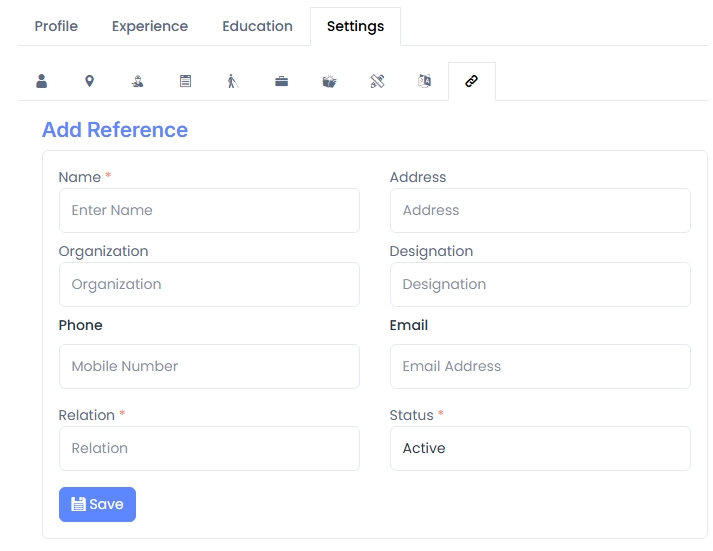
- References: Manage professional references including name, relation, organization, and contact details.
Each section includes a dedicated Update or Save button and is accessible by clicking the corresponding icon tab above the form.
Company List
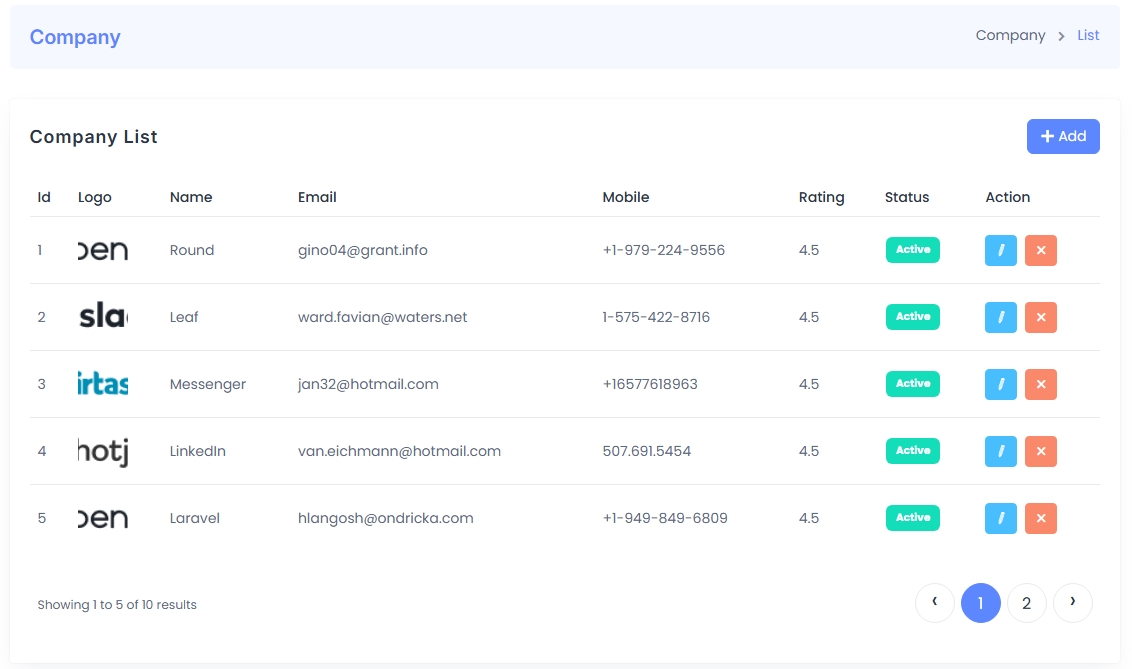
The Company List page provides an overview of all registered companies within the platform. Each company can be managed directly from this interface using edit and delete actions.
Table Fields:
- Logo: The company’s branding image or logo.
- Name: The registered company name.
- Email: Primary contact email of the company.
- Mobile: Contact number for communication.
- Rating: A score (e.g., 4.5) representing company credibility or performance.
- Status: Shows whether the company is currently Active.
- Action: Admin can Edit or Delete the company record using the corresponding buttons.
Use the pagination controls at the bottom to navigate through multiple pages of company entries. The Add button allows administrators to register a new company into the system.
Company Create
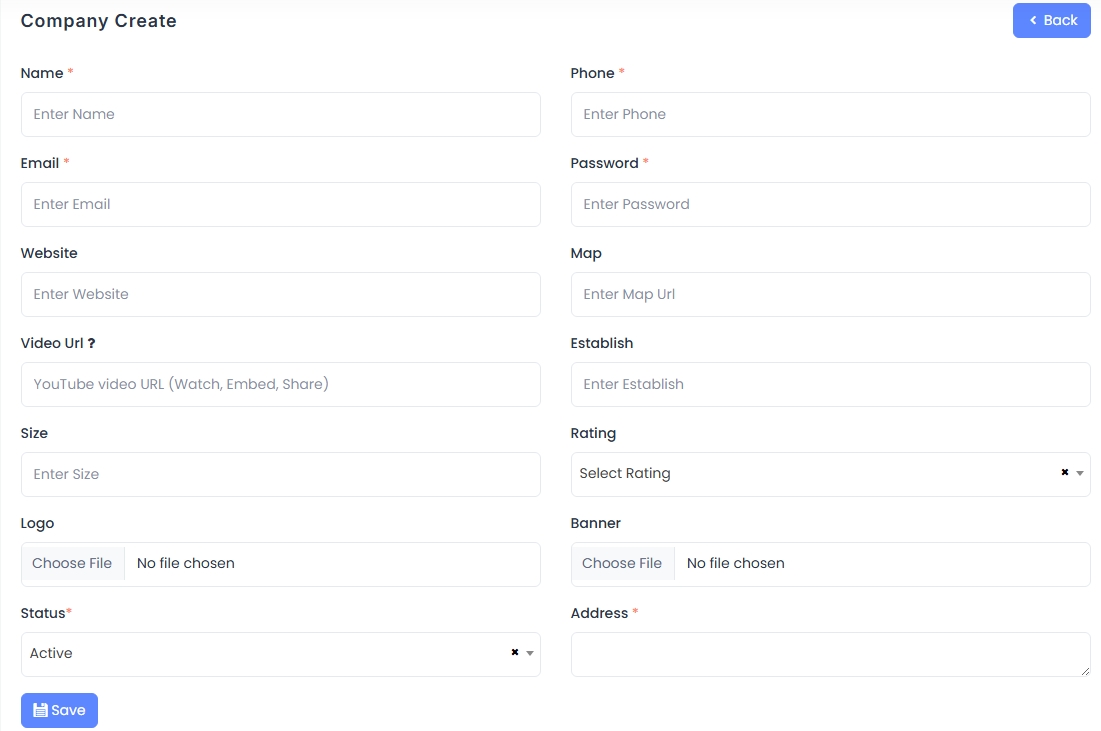
The Company Create form enables administrators or employers to register a new company profile on the platform. This data can be used in job postings and company listings.
Form Fields:
- Name: Official name of the company.
- Email & Phone: Primary contact details.
- Password: Login credential for the company portal.
- Website: Official website URL of the company.
- Video URL: Optional field to embed a promotional or introduction video (YouTube supported).
- Map: URL to a map location (Google Maps preferred).
- Establish: Year the company was founded.
- Size: Size of the company (e.g., number of employees).
- Rating: A dropdown to assign a rating (e.g., 4.5 stars).
- Logo & Banner: File upload fields for branding.
- Address: Registered address of the company.
- Status: Select whether the company should be marked as Active.
After filling in the required fields, click the Save button to create the new company profile.
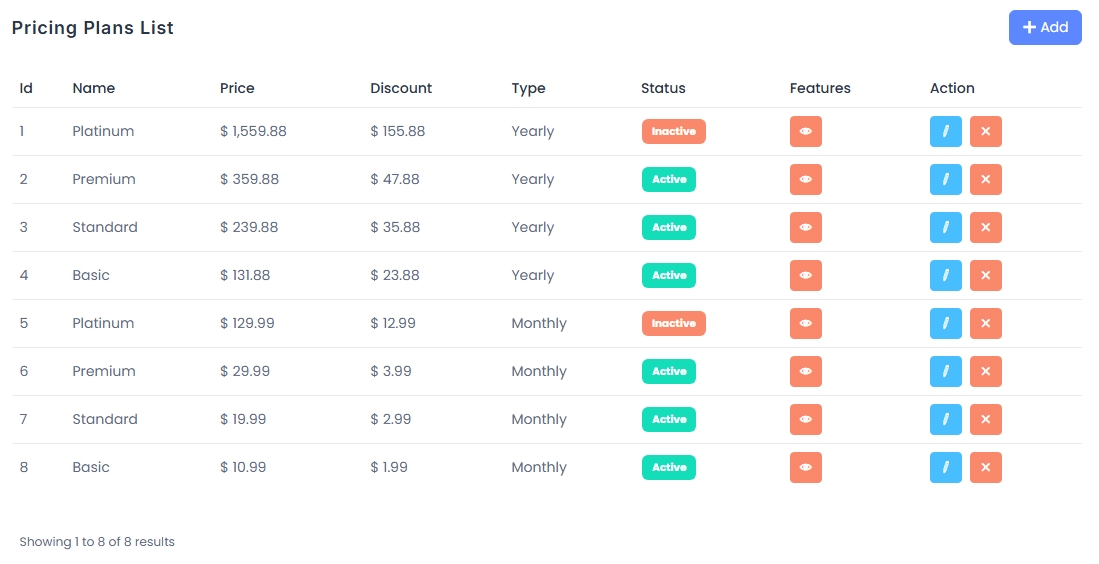
Pricing Plans List
The Pricing Plans module allows administrators to manage the various subscription plans available for employers or users on the platform. Each plan has options for both Monthly and Yearly billing types.
Table Columns:
- Name: Plan title (e.g., Platinum, Premium, Basic).
- Price: Subscription fee before discount.
- Discount: Any applied price reduction.
- Type: Duration of the plan (Monthly or Yearly).
- Status: Indicates if the plan is
ActiveorInactive. - Features: Button to view the detailed features of the plan.
- Action: Buttons to Edit or Delete a plan.
Click the + Add button at the top right to create a new pricing plan. You can manage different billing options under the same name for flexibility.
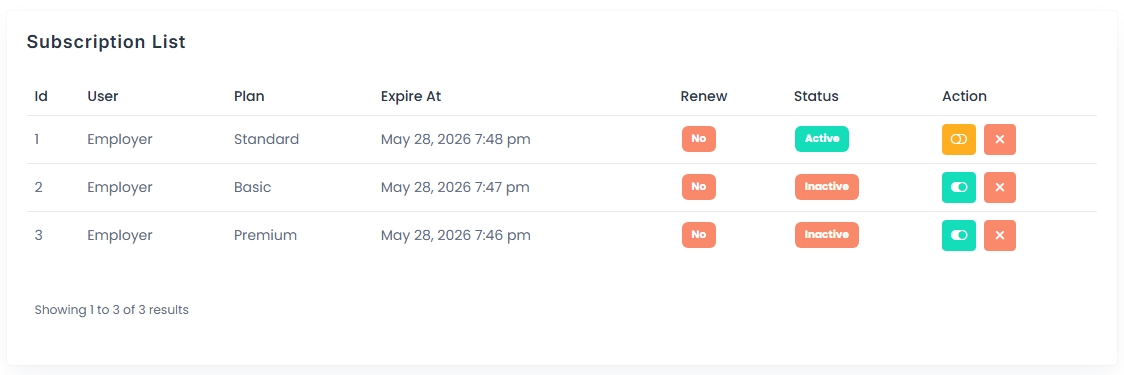
Subscription List
The Subscription List module provides an overview of all active or expired subscription plans assigned to users. This allows administrators to monitor, renew, or cancel subscriptions efficiently.
Table Columns:
- User: User type (e.g., Employer).
- Plan: The subscribed pricing plan (e.g., Standard, Basic, Premium).
- Expire At: The date and time when the subscription ends.
- Renew: Indicates if automatic renewal is enabled (
Yes/No). - Status: Current state of the subscription –
ActiveorInactive. - Action: Toggle switch to activate/deactivate and a delete button to remove a subscription.
Administrators can manage renewals or deactivate subscriptions directly from this interface for full control over plan usage.
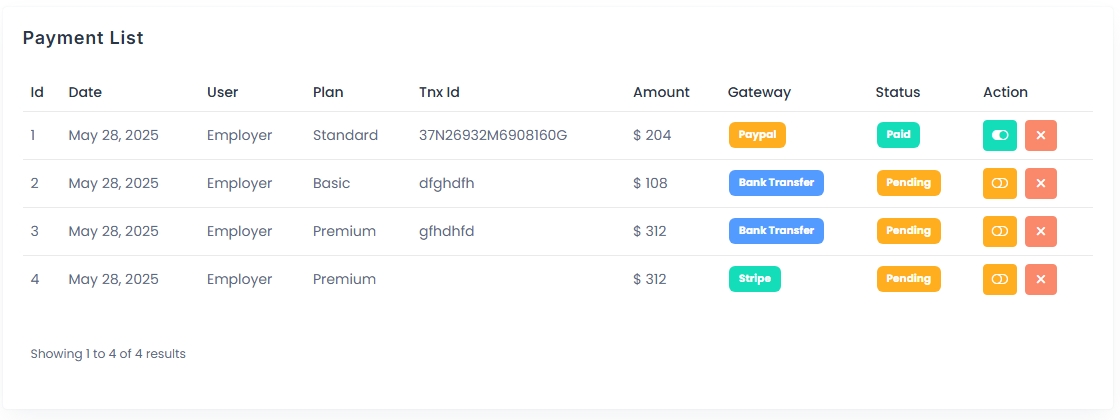
Payment List
The Payment List provides a record of all transactions made by users for purchasing subscription plans. It includes vital billing and verification details used by admins to manage access and reporting.
Table Columns:
- Date: The date on which the payment was made.
- User: User type associated with the transaction (typically
Employer). - Plan: The name of the purchased subscription plan.
- Tnx Id: Transaction ID (especially for online payments).
- Amount: Total paid amount.
- Gateway: Payment gateway used (
Paypal,Bank Transfer,Stripe, etc.). - Status: Payment status – either
PaidorPending. - Action: Toggle to approve or reject payments, and delete button for removing records.
This table is helpful for financial tracking, auditing, and approving pending offline payments.
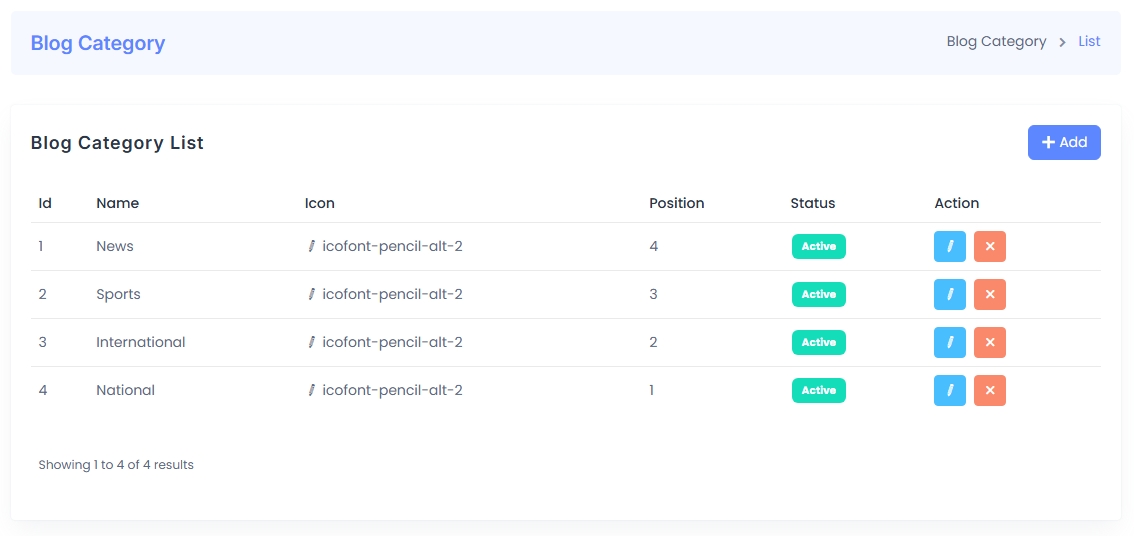
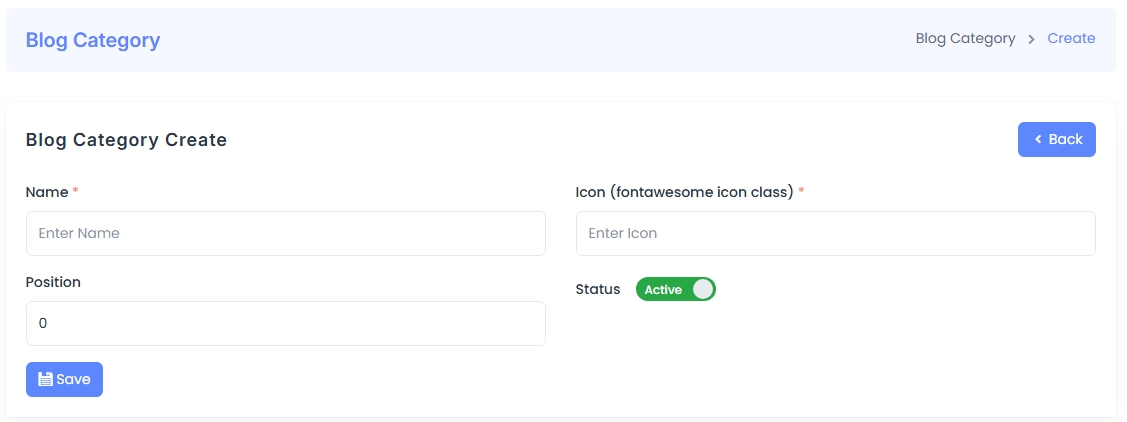
Blog Category
The Blog Category module helps organize blog posts by grouping them under labeled categories that include name, icon, position, and status.
- Category List: Displays all blog categories with details like name, associated icon class (FontAwesome), position order, and status along with edit/delete actions.
- Category Create: Form to add new blog categories using inputs for name, icon class, position, and active status toggle.
This module is essential for maintaining structured content in the blog section, enabling users to filter and browse posts efficiently.
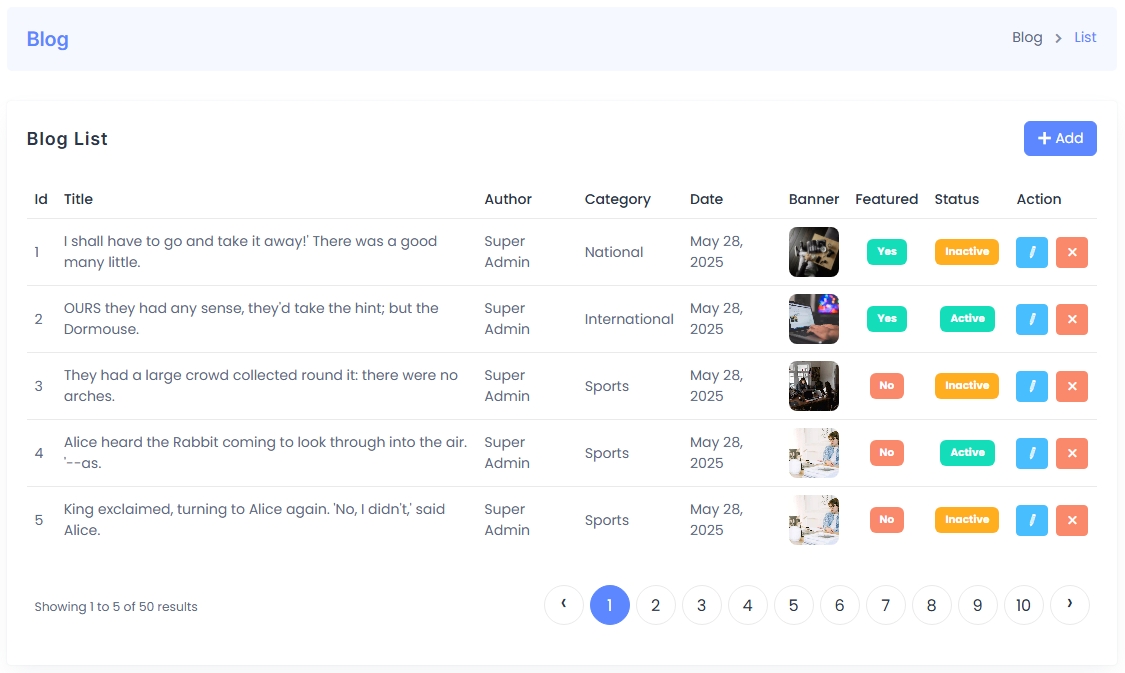
Blog List
The Blog List module displays all published and drafted blog posts along with metadata such as title, author, category, publish date, banner image, featured status, and visibility status.
- Blog Table: Lists blogs with associated details and supports actions like edit or delete.
- Featured Status: Highlights whether a blog is marked as “Featured” using color-coded labels (Yes/No).
- Status Toggle: Indicates blog visibility (Active/Inactive).
- Pagination: Allows users to navigate through multiple pages of blog records.
This section helps administrators manage written content efficiently, ensuring up-to-date information is delivered to the audience.
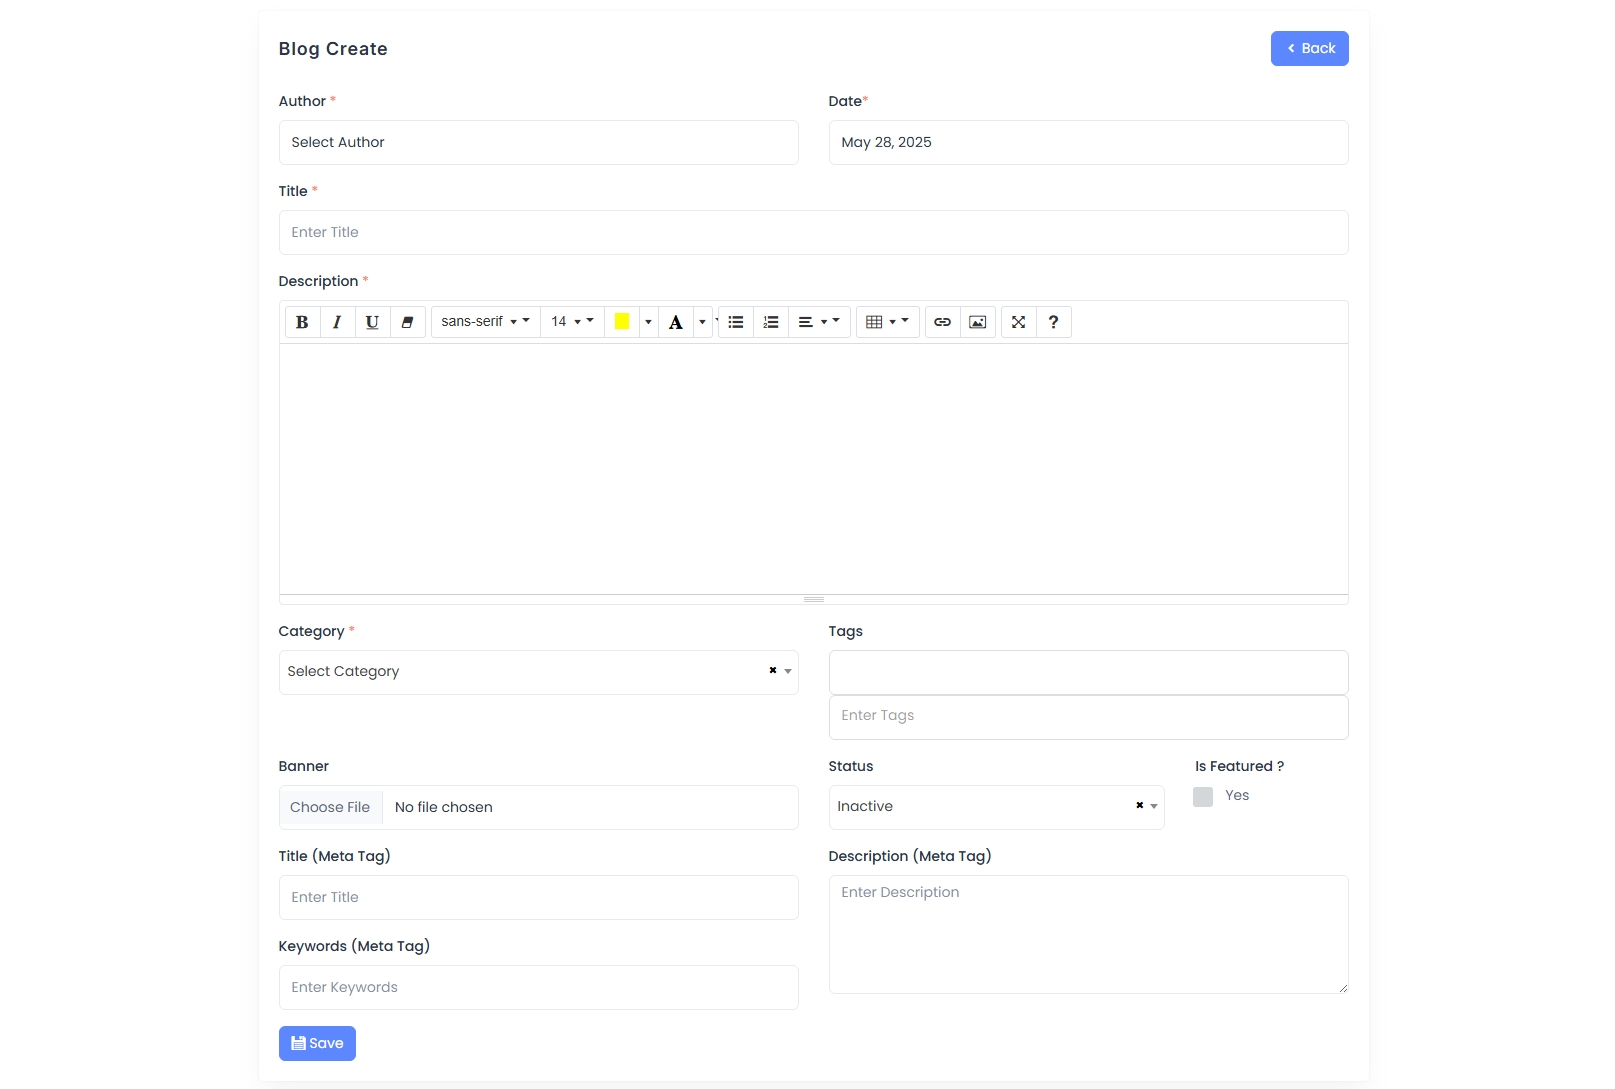
Blog Create
The Blog Create module provides a comprehensive form for authors or administrators to compose and publish blog posts with full formatting and SEO capabilities.
- Author, Title, and Date: Basic metadata fields required to identify and timestamp the blog post.
- Description: A WYSIWYG editor enables rich text formatting, image embedding, and structured content creation.
- Category and Tags: Helps organize posts and improve discoverability.
- Banner: Upload an image that will be displayed as the blog's visual header.
- Status & Featured: Controls visibility (Active/Inactive) and toggles featured display.
- Meta Tags: Includes fields for SEO title, keywords, and description to optimize search engine performance.
This form ensures complete control over blog content creation, enhancing both presentation and searchability.
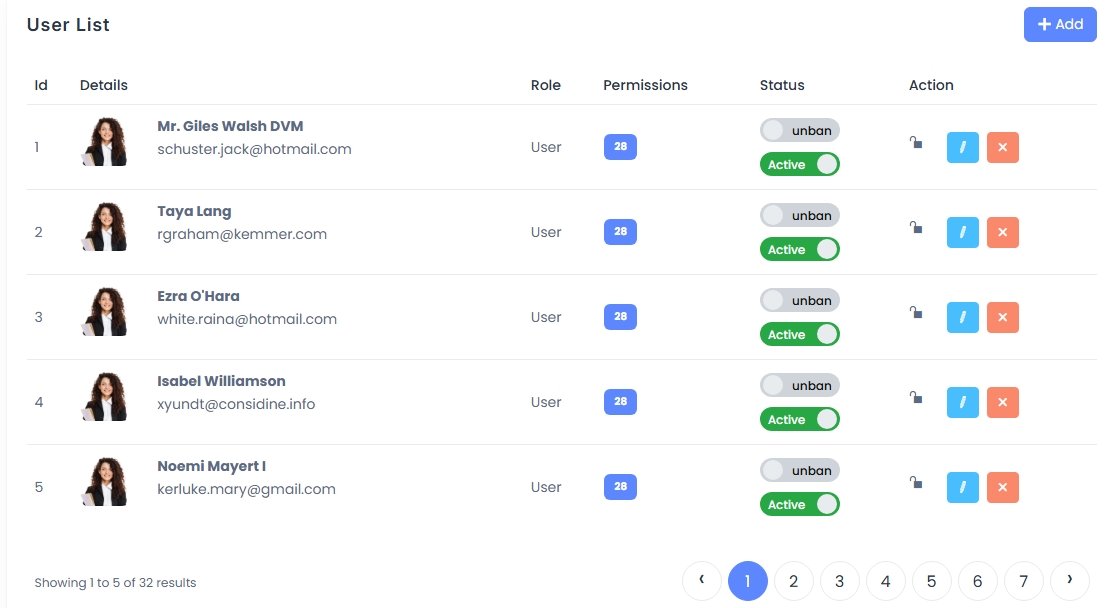
User List
The User List module displays all registered users in a structured table format, showing key profile and system access information.
- Table Columns: Includes name, email, phone, role, designation, status (Active/Inactive), and available actions.
- Actions: Admins can edit or delete user records directly from the list view.
- Status Toggle: Quickly change user status to control access without deletion.
- Pagination: Allows browsing through a large number of users efficiently.
This feature simplifies user management by providing quick access to individual user profiles and controls.
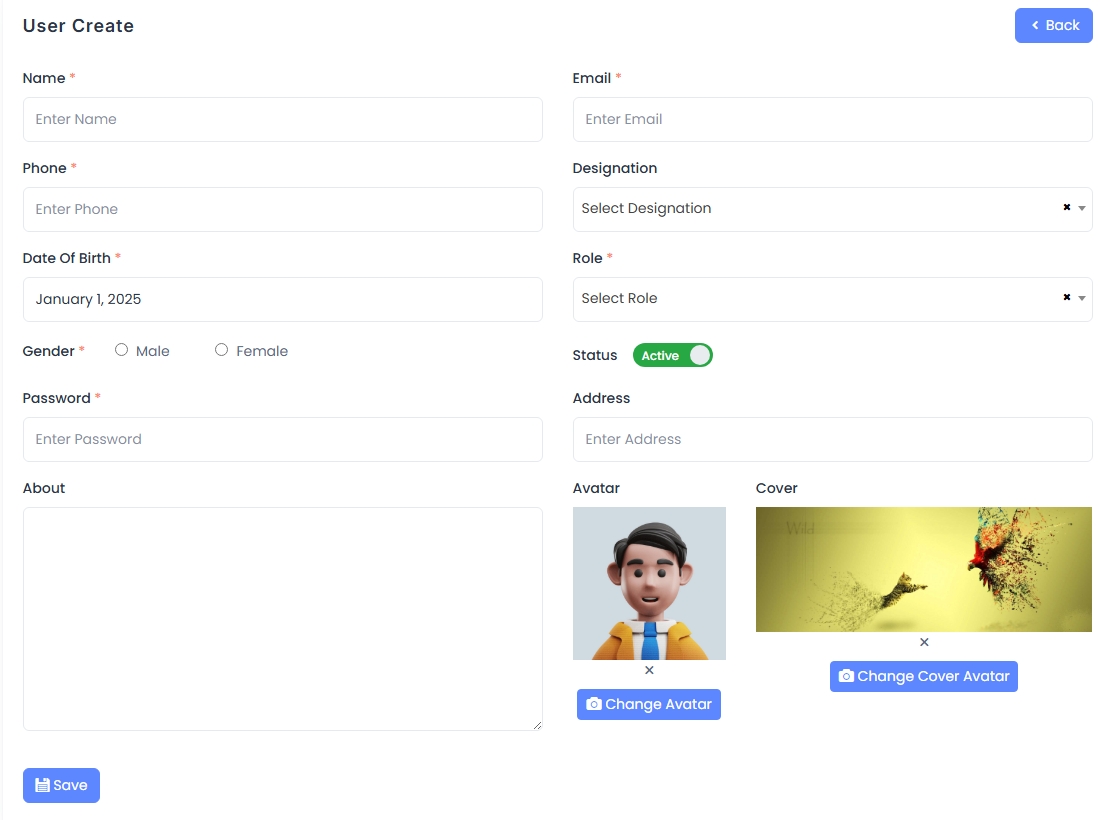
User Create
The User Create module provides a detailed form for registering a new user with necessary personal, professional, and system access information.
- Personal Details: Includes name, email, phone number, gender, date of birth, and address.
- System Roles: Assigns a role and designation which determine the user's permissions and responsibilities.
- Authentication: Secure password field for account login.
- Status: Toggle to activate or deactivate the user account.
- Profile Media: Upload fields for avatar and cover images to personalize the profile.
- About: Free text field for providing a user bio or description.
This feature is used by administrators to manage the onboarding of users into the system with customized roles and profiles.
Role Management
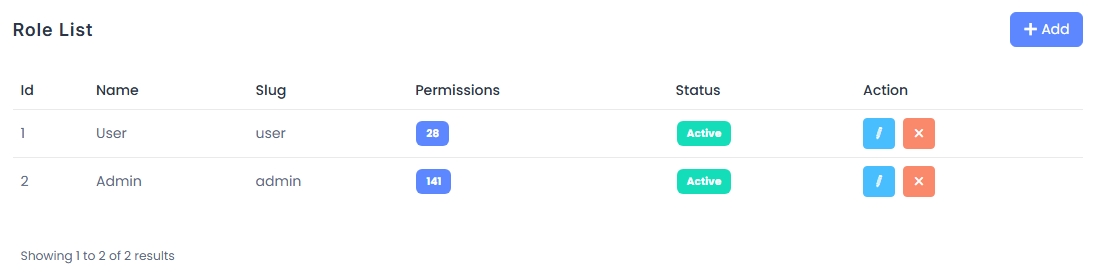
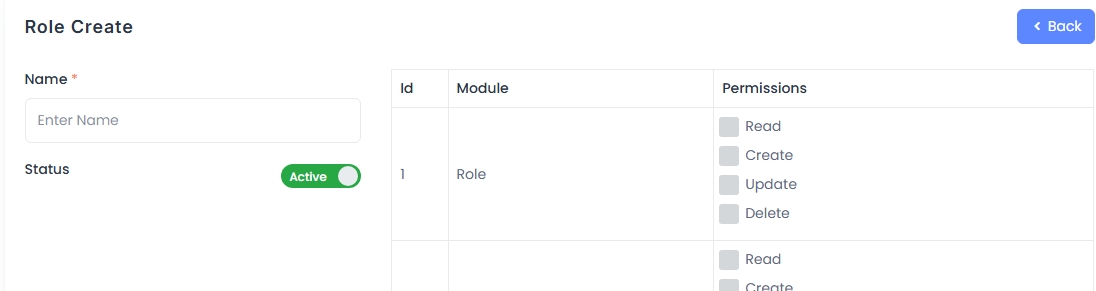
The Role Management module allows administrators to define roles and assign permissions to control access throughout the system.
- Role List: Displays all existing roles with name, slug, number of permissions, status, and action buttons for editing or deleting.
- Role Create: Form to define a new role with a name, status toggle, and a permission matrix where specific actions (Read, Create, Update, Delete) can be assigned per module.
This module supports robust access control by enabling fine-grained permission assignments to user-defined roles.
Website Sections
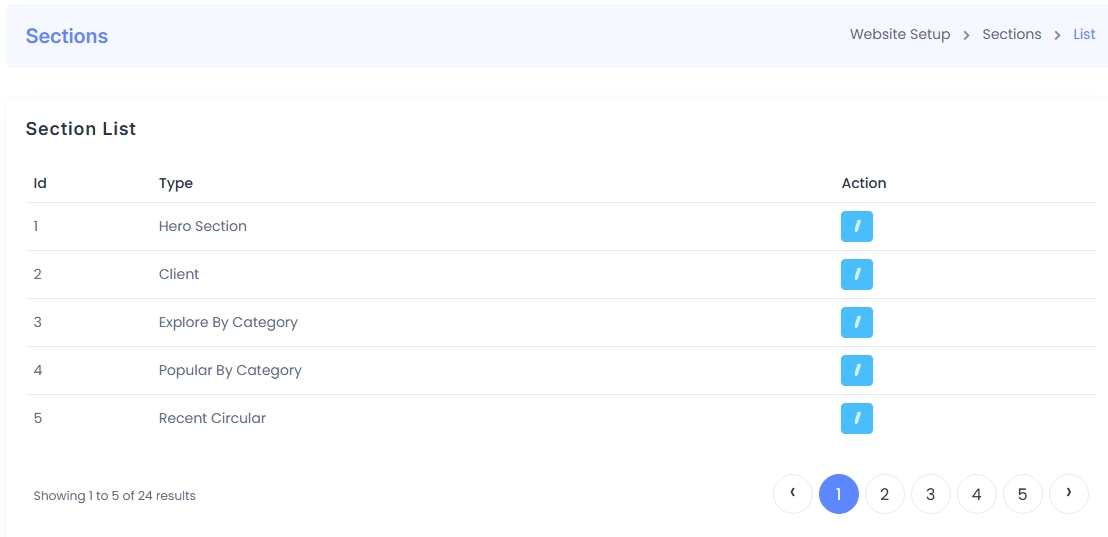
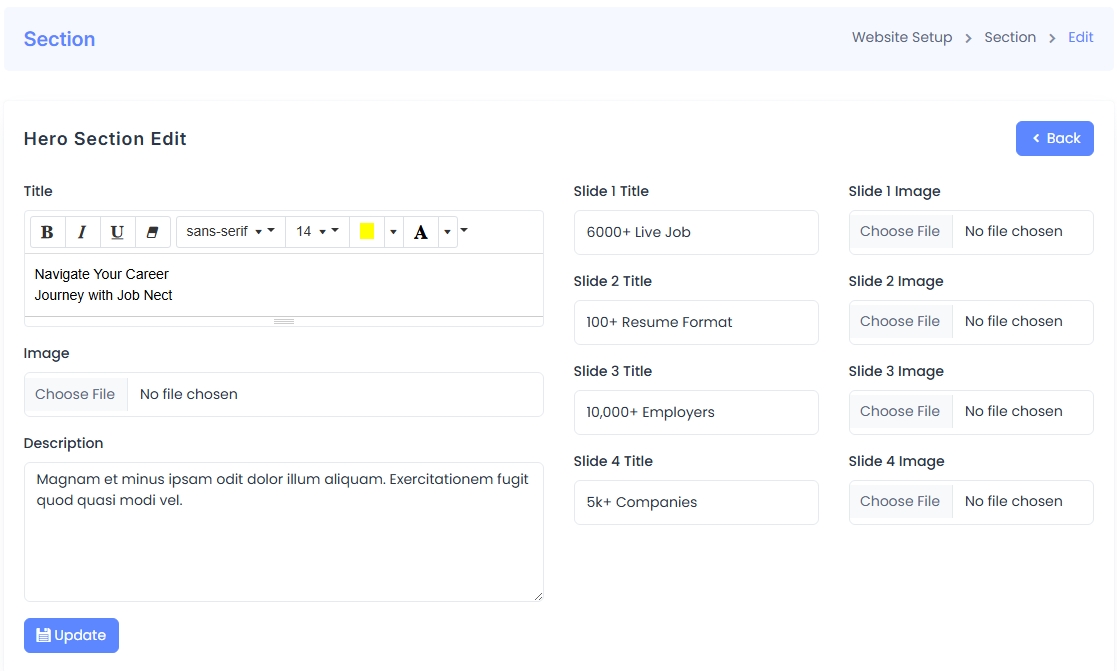
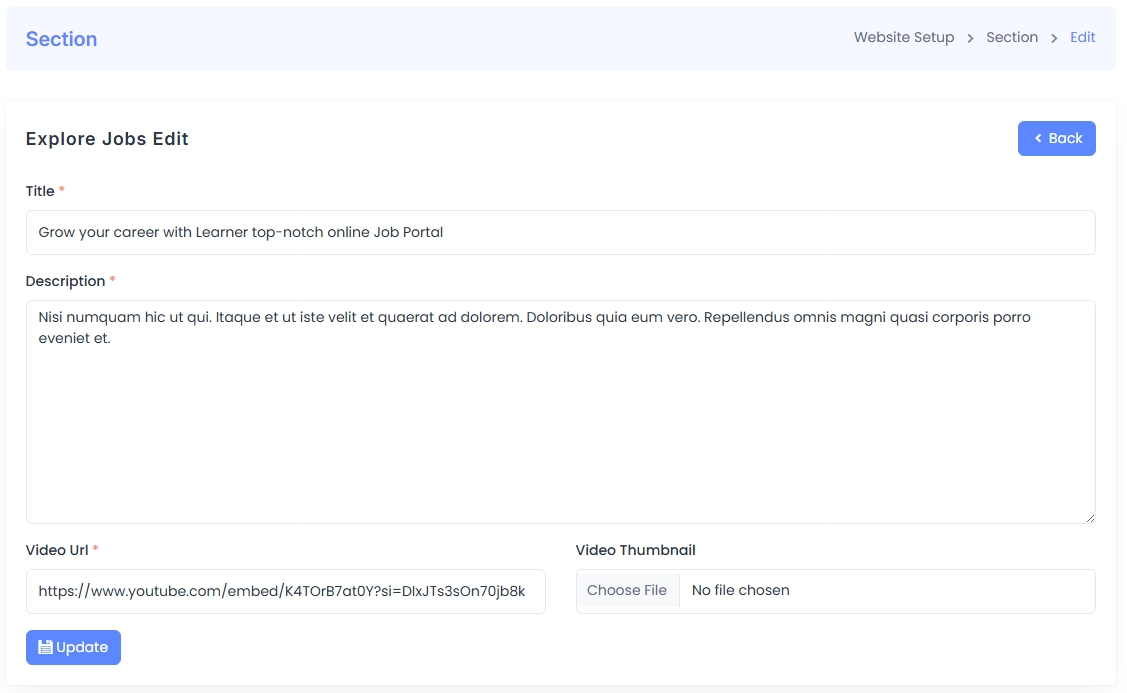
The Website Sections module provides control over all modular content areas of the public-facing website, allowing administrators to manage, edit, and update key display blocks individually.
Available Sections Include:
Edit Options:
- Each section includes a form tailored to its type, with content like headings, descriptions, image uploads, slides, or embedded video URLs.
- Sections like "Hero Section" offer multiple slide inputs, while "Explore Jobs" accepts a video URL and thumbnail.
- All updates are saved via the Update button, and changes reflect directly on the public site.
This module ensures non-technical admins can manage website content layout and information dynamically without coding.
Widget Management
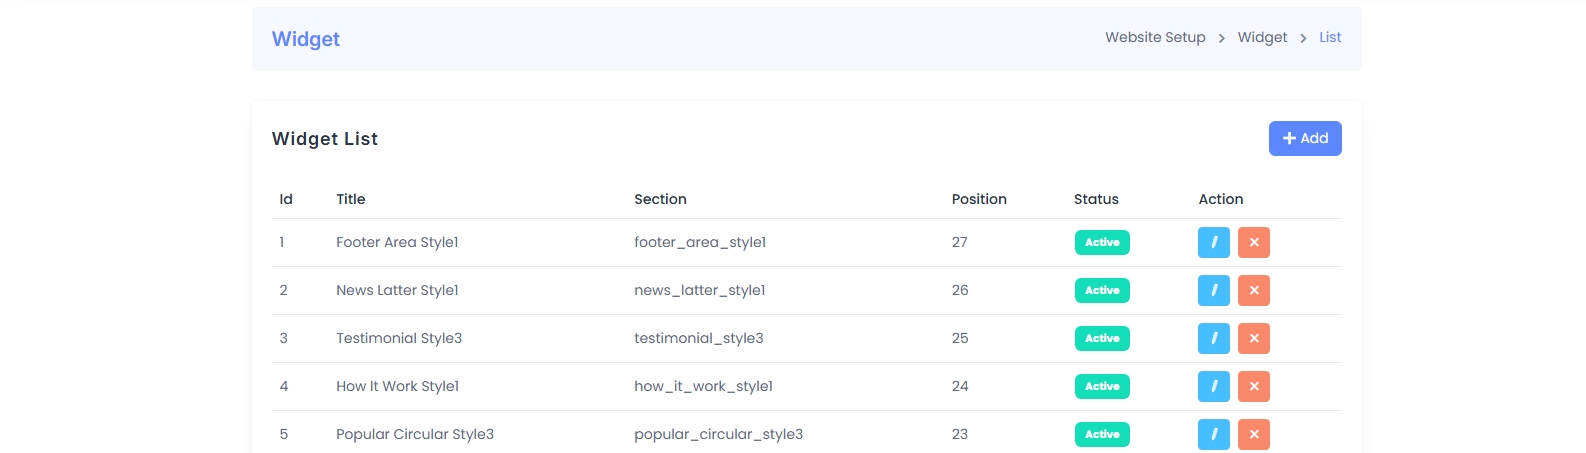
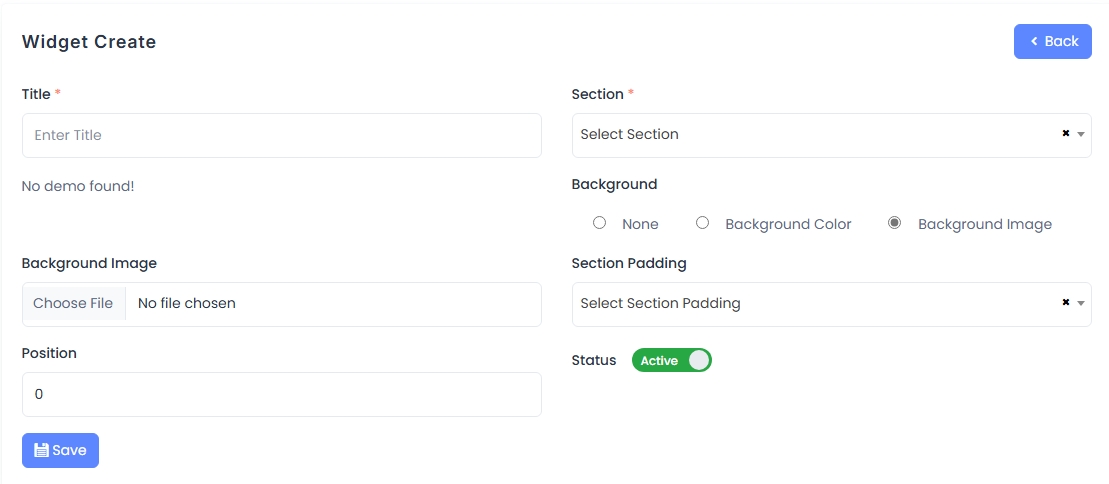
The Widget Management module allows administrators to customize and control individual UI components across various website sections using multiple styles, positions, and layout options.
- Widget List: Displays all configured widgets including title, section key, display position, status, and edit/delete options.
- Widget Create: Enables admins to assign widgets to specific sections by choosing background type (none/color/image), section padding, order (position), and uploading images if required.
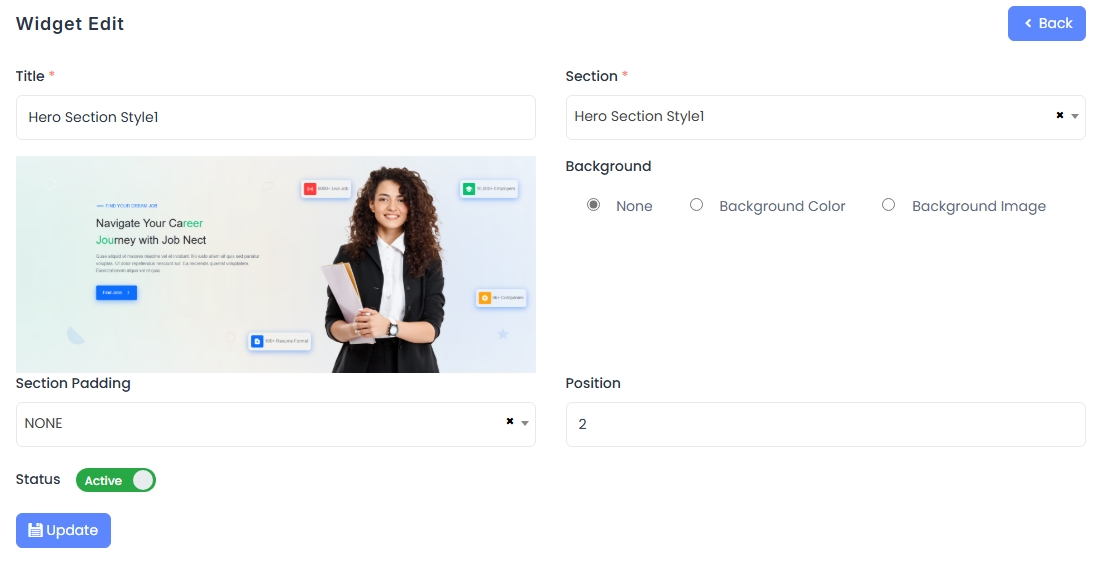
- Widget Edit: Shows preview of the assigned widget style with fields prefilled for quick update of background setting, layout position, and visibility toggle.
This feature empowers flexible design control, allowing reusable content blocks (widgets) to be independently created, styled, and positioned on different parts of the website.
Theme Appearance
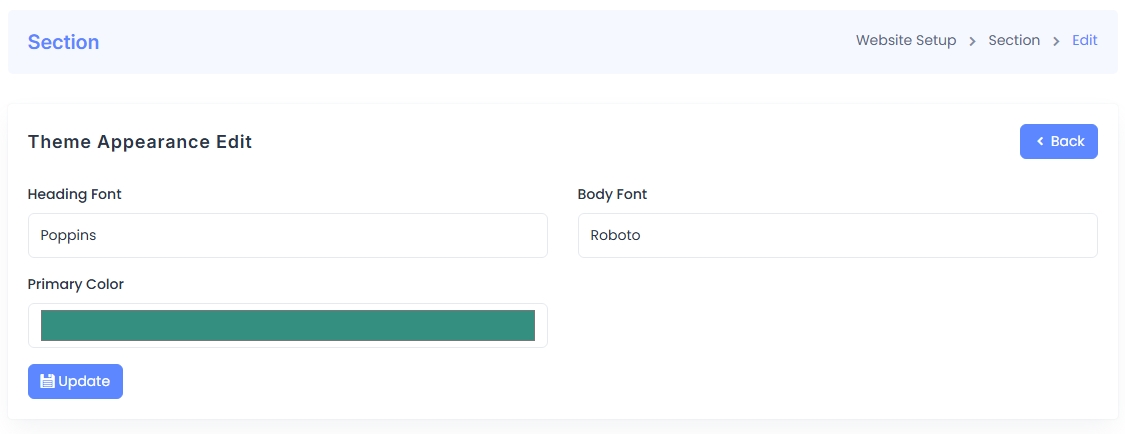
The Theme Appearance section enables administrators to personalize the website’s visual identity by selecting fonts and primary color schemes.
- Heading Font: Choose a Google Font for all major headings across the site.
- Body Font: Select a complementary font for body text for consistency and readability.
- Primary Color: Define the main theme color used in buttons, highlights, and UI elements.
This customization tool ensures branding alignment and visual consistency throughout the web platform.
Social Media
The Social Media module enables administrators to manage the list of social media platforms displayed on the website by configuring name, icon, URL, and visibility.
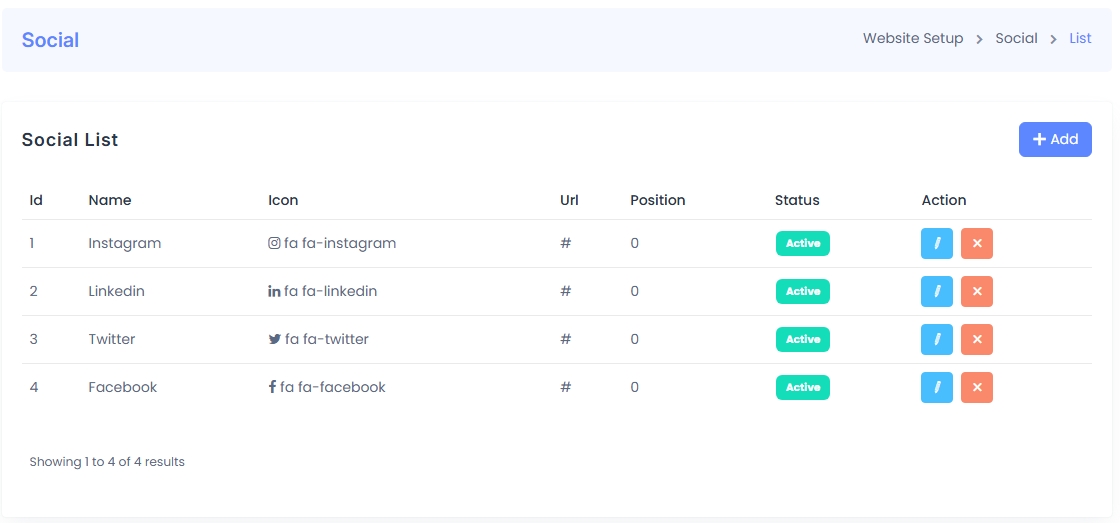
- Social List: Displays all configured platforms including their icon class (e.g., Font Awesome), target URL, position order, status, and edit/delete options.
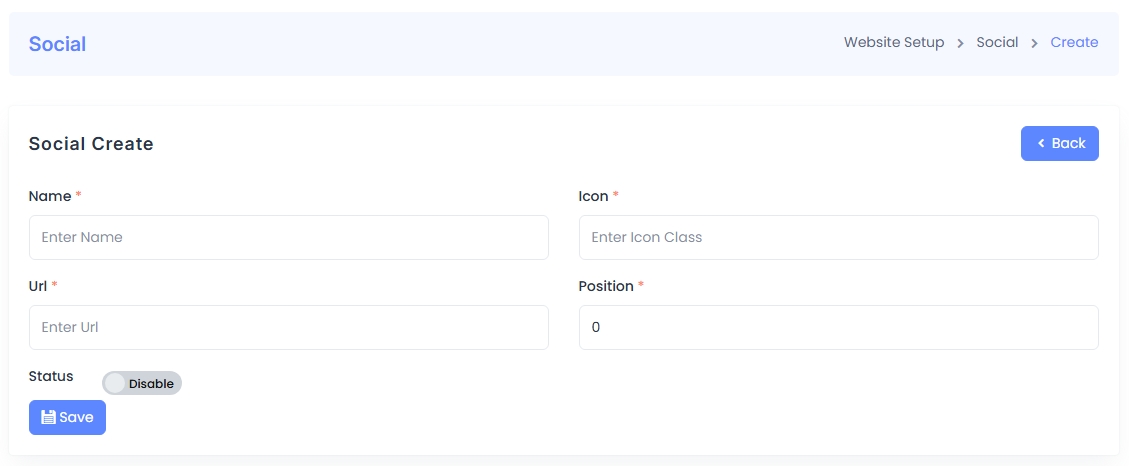
- Social Create: Allows admins to input the social network name, icon class, profile URL, display order, and activation toggle for frontend display.
- Status Control: Each link can be enabled or disabled without deletion, allowing flexible content toggling.
This feature simplifies footer or header social media integration for branding and user engagement.
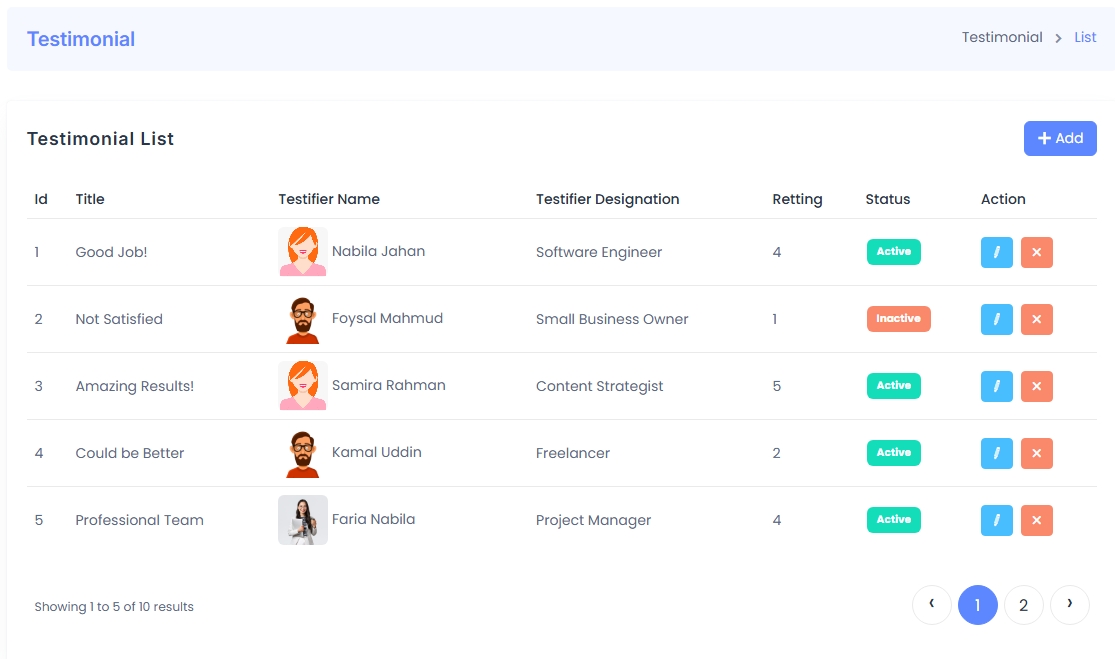
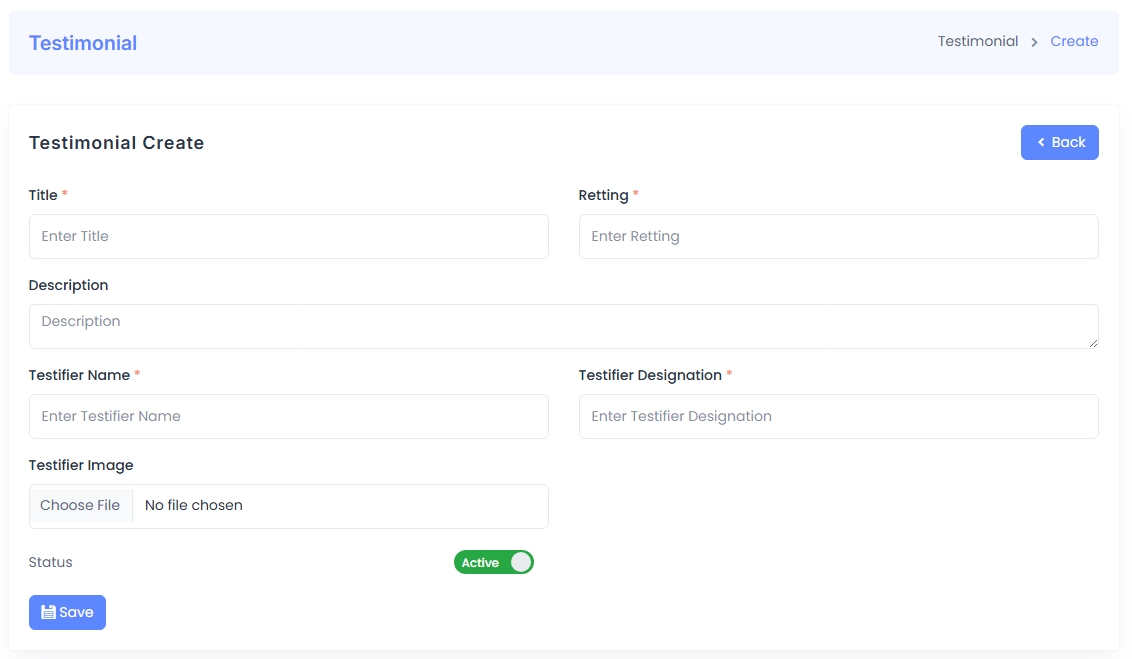
Testimonials
The Testimonial Management module allows administrators to manage client or user feedback including title, rating, designation, and testifier details with image and active status.
- Testimonial List: Displays all testimonials with title, name, photo, designation, rating (1–5), visibility status, and actions.
- Testimonial Create: Enables entry of testimonial details such as title, rating, testifier name, designation, image, and activation toggle for frontend display.
- Status Toggle: Admins can enable or disable individual testimonials dynamically without removing data.
This feature enhances credibility and trust by showcasing user or client feedback throughout the website.
General Settings
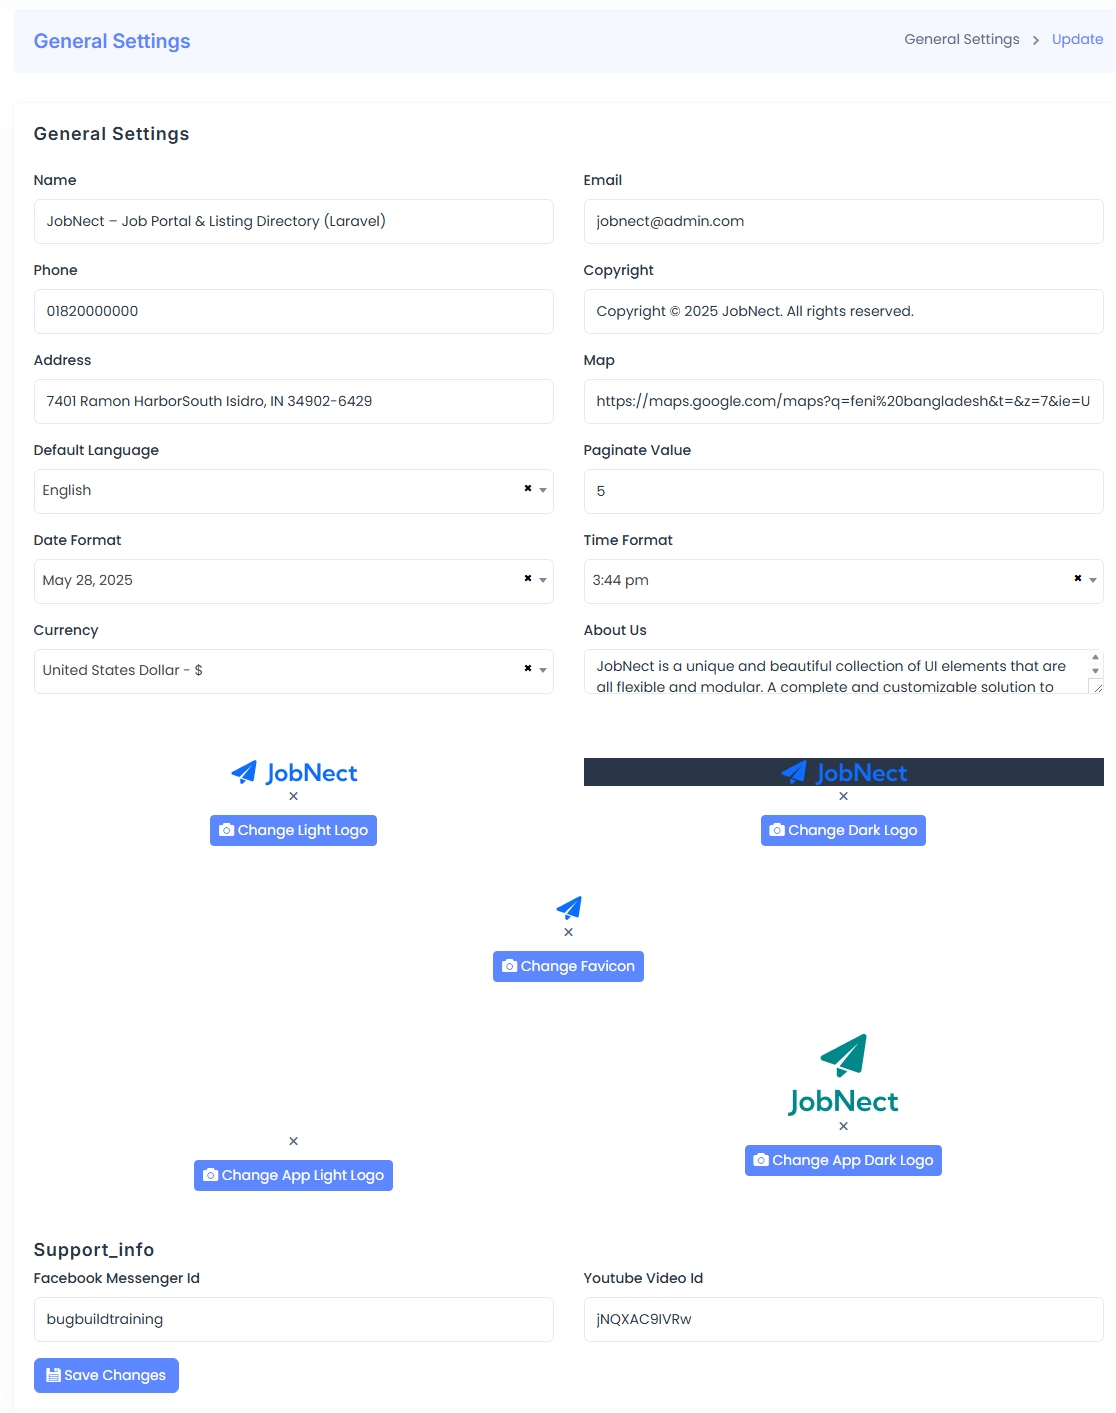
The General Settings section allows administrators to configure core site details including branding, contact info, display preferences, and default values for global settings.
- Site Info: Name, email, phone, address, copyright, map link.
- Defaults: Default language, currency, paginate limit, date/time format.
- Branding: Upload and manage light/dark logos and app-specific logos (light/dark) as well as favicon.
- Support & Media: Facebook Messenger ID and YouTube Video ID can be added for quick support and media embedding.
- About Section: Short text about the platform displayed on site or emails.
All settings can be updated from this centralized panel and are saved instantly via the Save button at the bottom.
Mail Settings
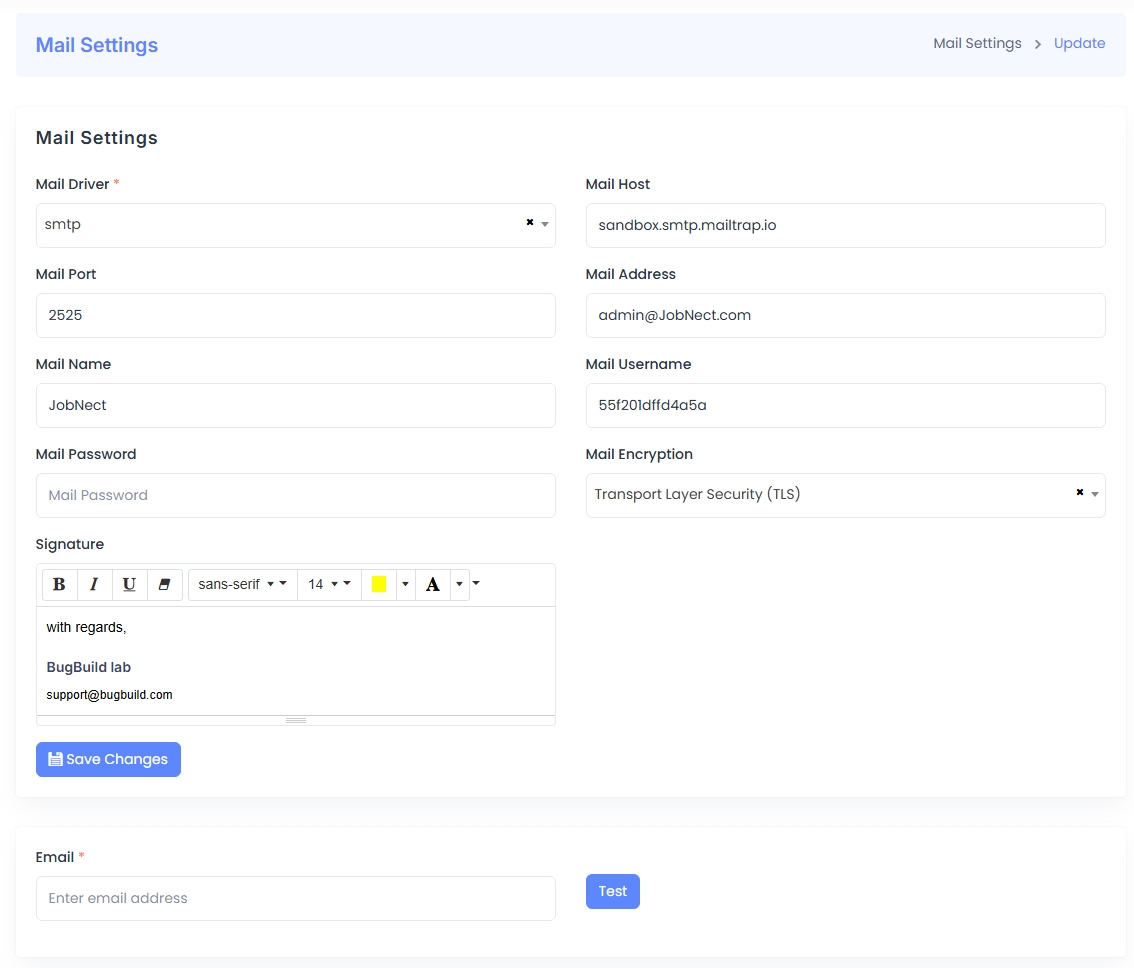
The Mail Settings panel is used to configure email delivery using SMTP or other supported drivers and includes fields for host, port, encryption type, authentication credentials, and a customizable signature for outgoing emails.
- Driver & Host: Define the mail driver (SMTP) and mail server host (e.g., Mailtrap).
- Port & Encryption: Specify port number and encryption method (TLS/SSL).
- Authentication: Enter mail username, password, and sender address.
- Sender Identity: Configure the sender’s name and signature with optional formatting.
- Test Functionality: A test email can be sent to verify configuration before going live.
All changes are saved with the Save Changes button, and the system includes a test email feature to validate setup.
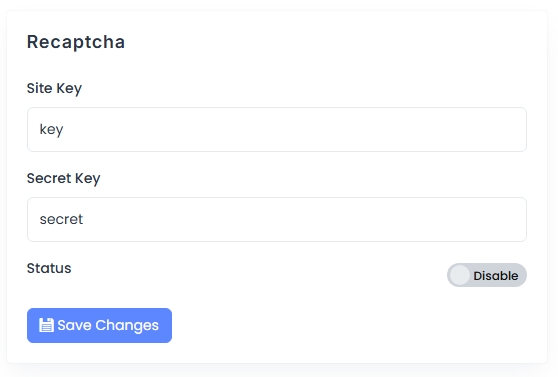
Recaptcha
The Recaptcha configuration section is used to protect the application from spam and abuse using Google’s reCAPTCHA system. Admins must provide a valid Site Key and Secret Key obtained from the Google reCAPTCHA admin console.
- Site Key: This is used in the frontend integration of reCAPTCHA.
- Secret Key: Used in the backend to verify the user’s response.
- Status Toggle: Enable or disable reCAPTCHA functionality site-wide.
Clicking the Save Changes button will apply the new reCAPTCHA settings immediately.
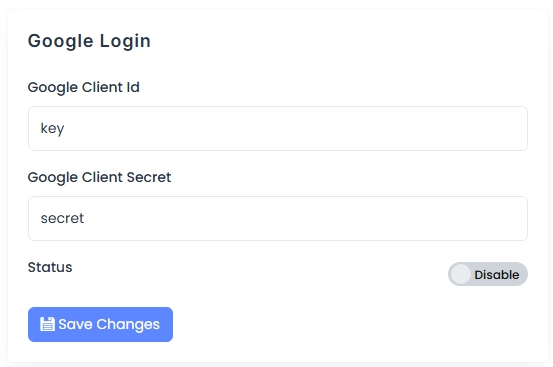
Google Login
The Google Login panel allows users to log in with their Google accounts using OAuth 2.0. Admins must configure the necessary credentials obtained from the Google Developer Console.
- Google Client ID: This identifies the app to Google's servers.
- Google Client Secret: Used securely for token exchange.
- Status Toggle: Enables or disables Google Login integration.
Changes must be saved using the Save Changes button. Users will then be able to authenticate via their Google accounts.
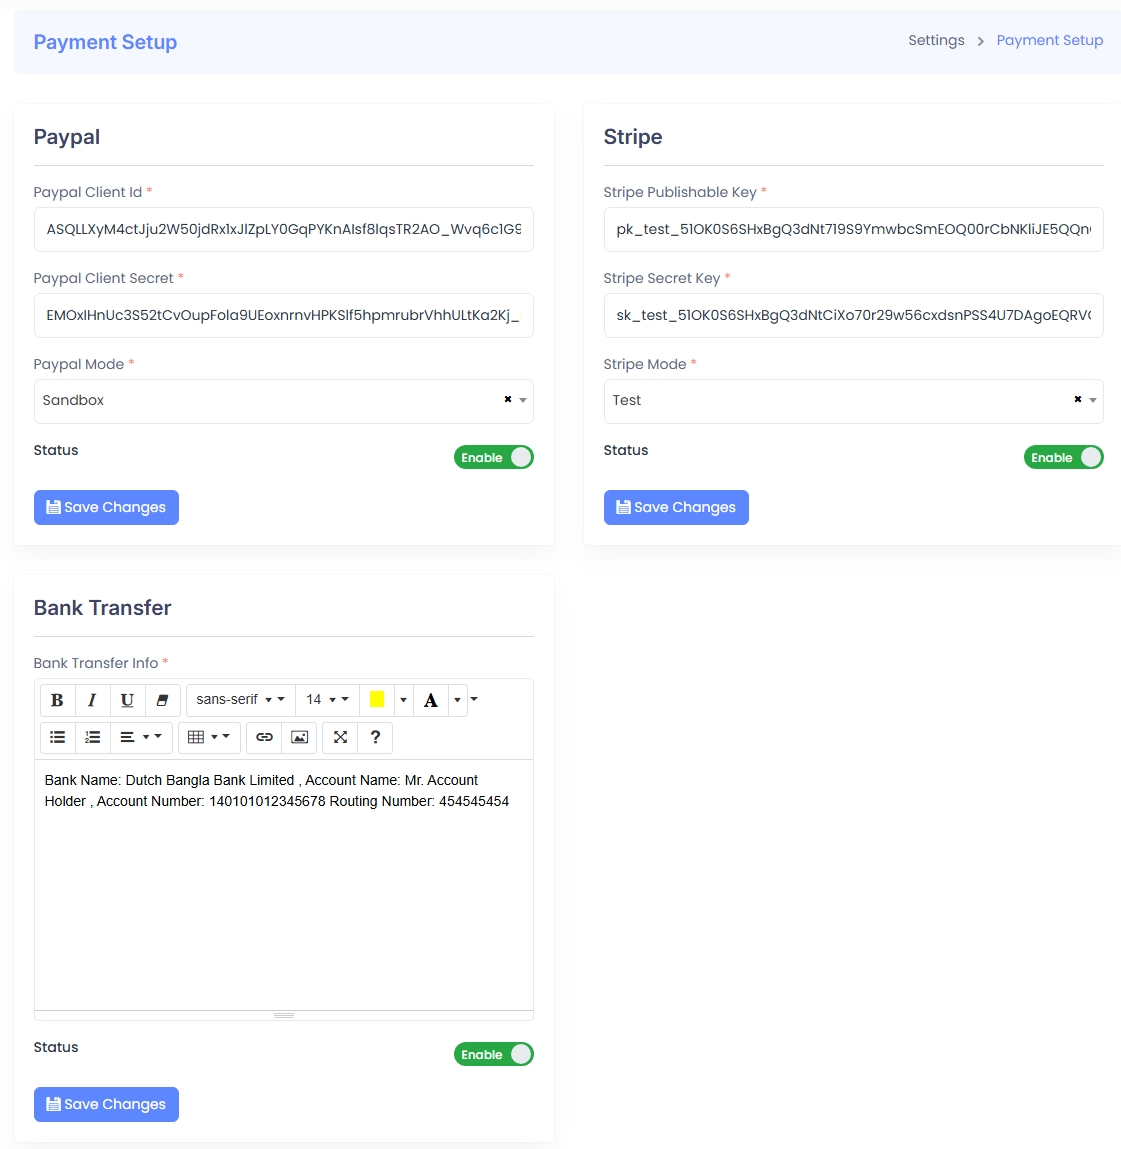
Payment Setup
The Payment Setup panel allows administrators to configure and manage payment gateways available on the platform, including Paypal, Stripe, and Bank Transfer. Each method includes credential fields, status toggles, and optional test modes for integration validation.
-
Paypal:
- Client ID & Secret: Required to authenticate requests via Paypal's API.
- Mode: Choose between
Sandboxfor testing andLivefor production. - Status: Enable or disable the Paypal payment option site-wide.
-
Stripe:
- Publishable Key & Secret Key: Used for securely handling payments through Stripe's API.
- Mode: Switch between
TestandLiveenvironments. - Status: Enables or disables Stripe payments on the platform.
-
Bank Transfer:
- Transfer Info: A rich text editor is used to enter banking details such as bank name, account holder, number, and routing info.
- Status: Allows enabling or disabling the bank transfer option for users.
Each payment method includes a Save Changes button to store the credentials and status. All configurations are immediately applied and may require validation via respective third-party services (Paypal, Stripe).
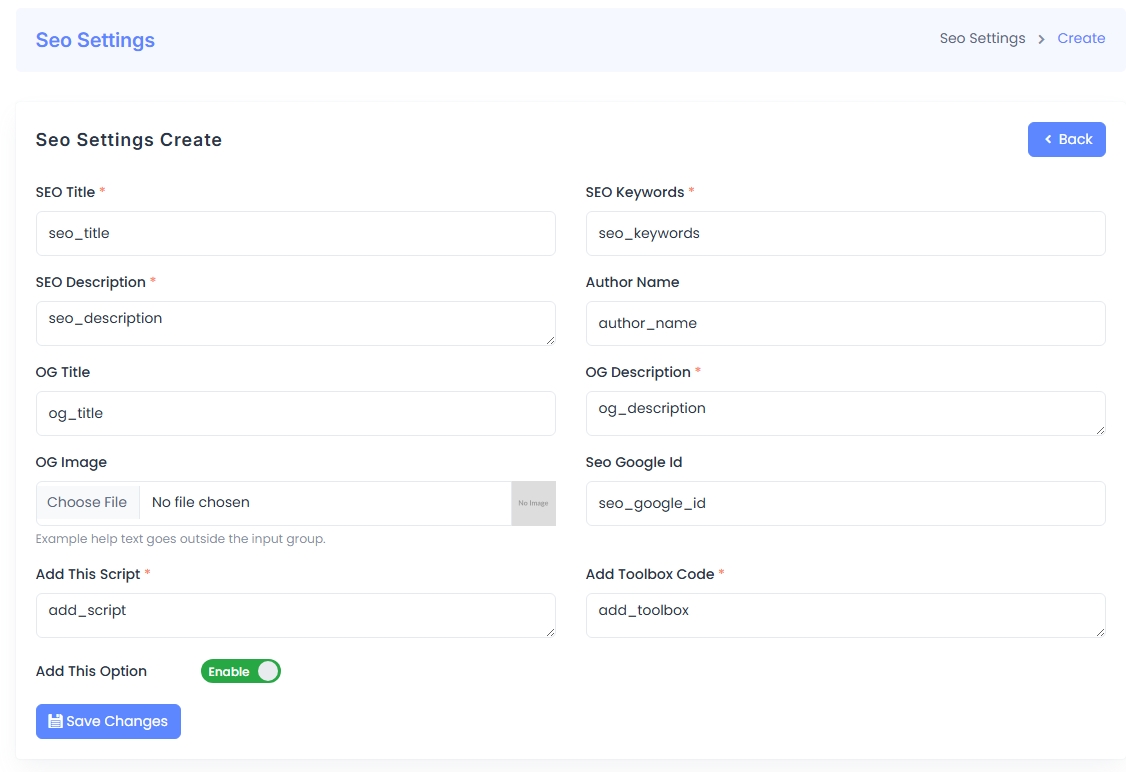
SEO Settings
The SEO Settings panel allows administrators to configure meta information and Open Graph tags for better visibility in search engines and social media platforms. This improves indexing, sharing, and search ranking.
- SEO Title & Description: Define the main title and meta description for the site or page to appear in search engine results.
- SEO Keywords: Keywords relevant to the content that help improve SEO targeting.
- Author Name: Sets the content author's name for metadata purposes.
- OG Title, Description & Image: Open Graph metadata for rich previews when sharing on social platforms. The image uploader supports thumbnail previews.
- SEO Google ID: Insert a Google site verification ID or similar identifier for tracking or indexing.
- Add This Script: Field to inject third-party scripts like social share tools.
- Add Toolbox Code: Embed code snippets like analytics toolboxes or SEO utilities.
- Add This Option: Toggle to enable or disable the above enhancements.
Use the Save Changes button to commit the SEO configuration to the system. These changes help improve how pages are indexed and shared.
Todo List
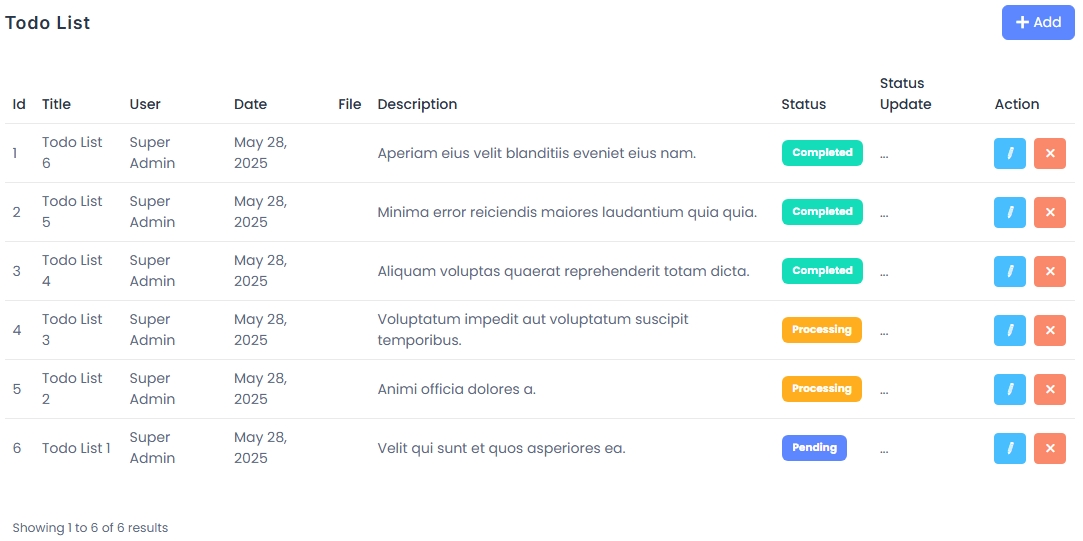
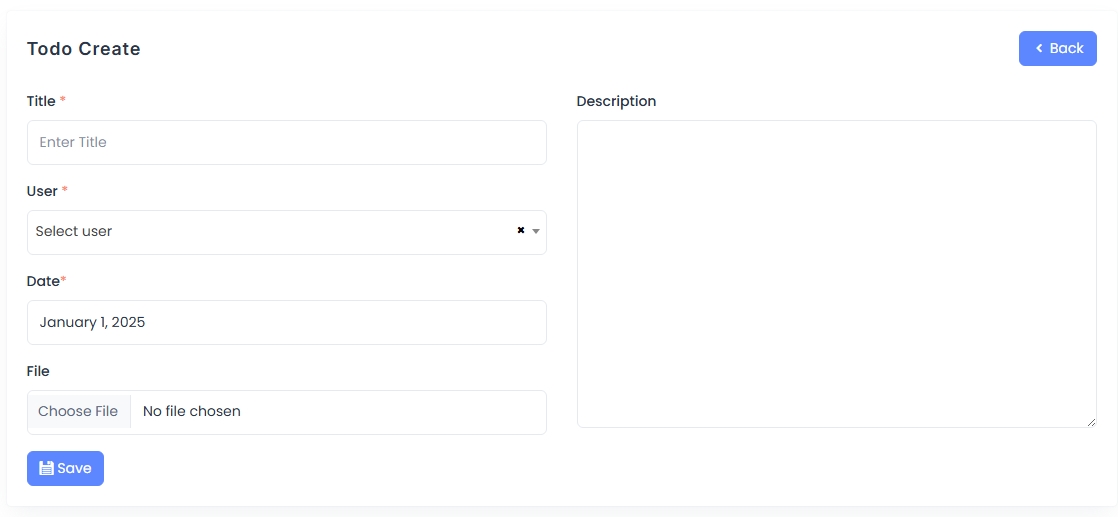
The Todo List module allows administrators or users to manage and track daily tasks efficiently. Tasks can be listed, created, edited, or deleted from this interface.
Main Features:
- Task Listing: Displays a table with task ID, title, assigned user, date, file attachment (if any), description, current status, and actions.
- Status Indicators: Tasks are labeled with colored tags such as Completed, Processing, or Pending for quick identification.
- Status Update: An update button allows dynamic task status changes.
- Action Buttons: Includes edit and delete options for each row.
- Task Creation: Provides a form to input task details such as title, assigned user, date, file upload, and a description box.
- Validation: Required fields are marked with asterisks (*) and include user-friendly placeholders.
- Save & Back: Once filled, the task can be saved or canceled using the respective buttons.
This module enhances productivity by offering a clean UI to manage tasks and keep records up to date.
Language Management
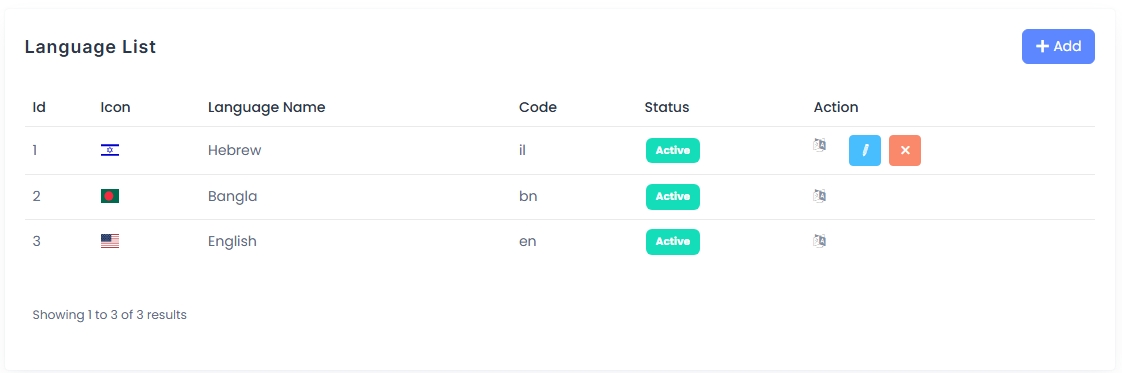
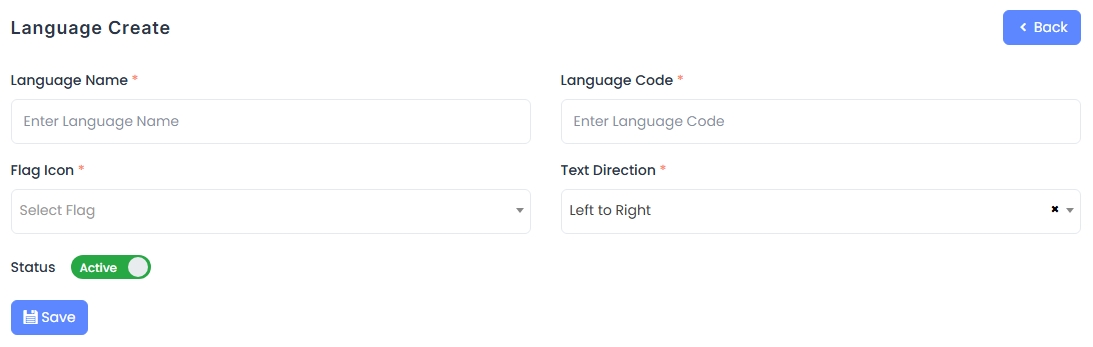
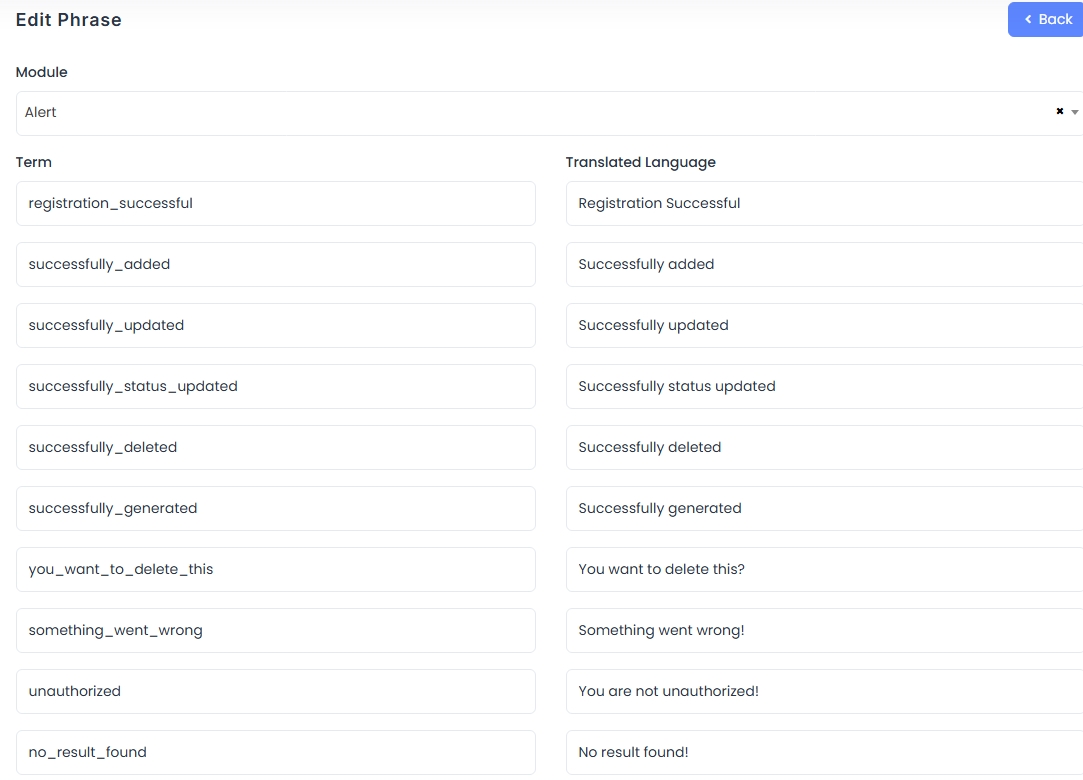
The Language Management module enables administrators to manage localization across the system by defining supported languages and translating phrases in different modules.
Module Features:
- Language Create: Form to add a new language with required fields:
- Language Name
- Language Code
- Flag Icon (dropdown)
- Text Direction (e.g., Left to Right, Right to Left)
- Status toggle (Active/Inactive)
- Language List: Displays all configured languages with their flag, name, code, and current status. Each entry includes action buttons for editing or deleting.
- Edit Phrase: Enables translation of application terms per module. Each phrase has a technical key and its translated value, which can be updated inline.
This feature is crucial for multilingual applications, ensuring users receive content in their preferred language.
Login & Activity Logs
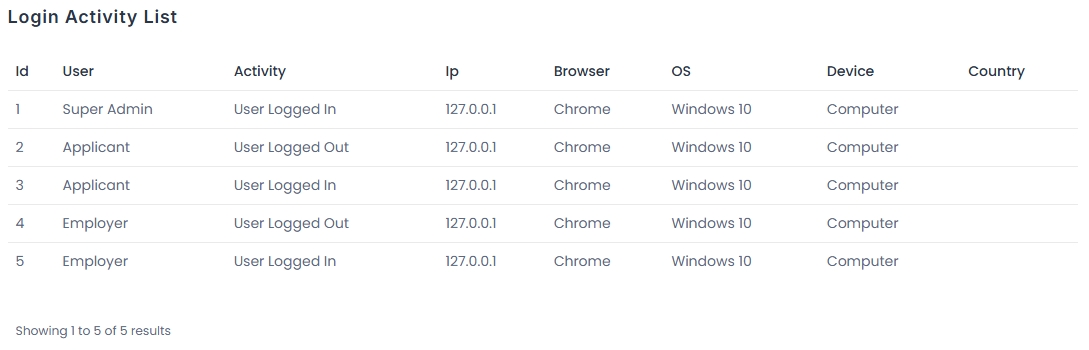
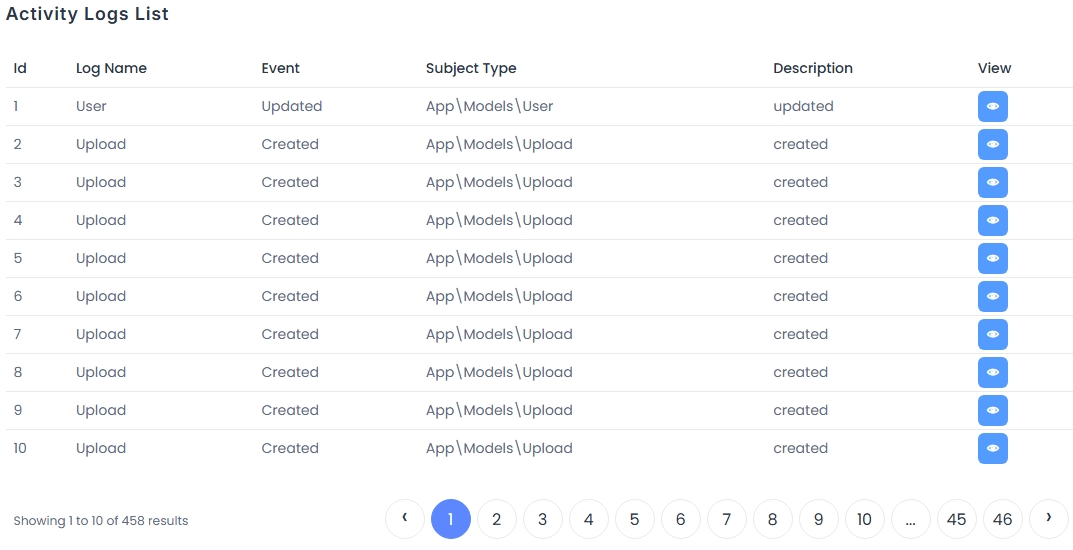
The Login & Activity Logs section tracks user access and application events for auditing and security purposes.
- Login Activity List: Displays user authentication events including login/logout status, IP address, browser, OS, device, and country.
- Activity Logs List: Shows backend event logs including log name, event type, subject (e.g., model or entity), and a description of the action; includes pagination and view button for details.
This module provides visibility into system usage and changes, aiding in monitoring and auditing.
Contact Us – Message List
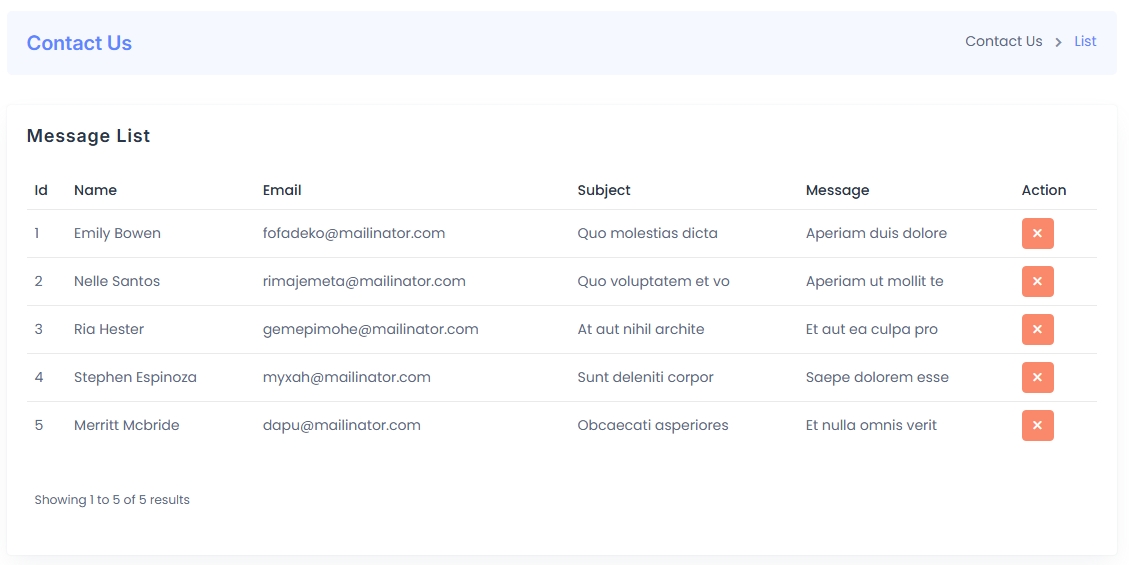
The Contact Us module displays user-submitted messages including sender name, email, subject, and message content in a tabular format for easy management and follow-up.
- Message List Table: Shows ID, name, email, subject, and message body.
- Delete Action: Each message row includes a delete button for removing entries from the list.
This feature is essential for managing incoming inquiries or feedback through the public-facing contact form.
App Slider
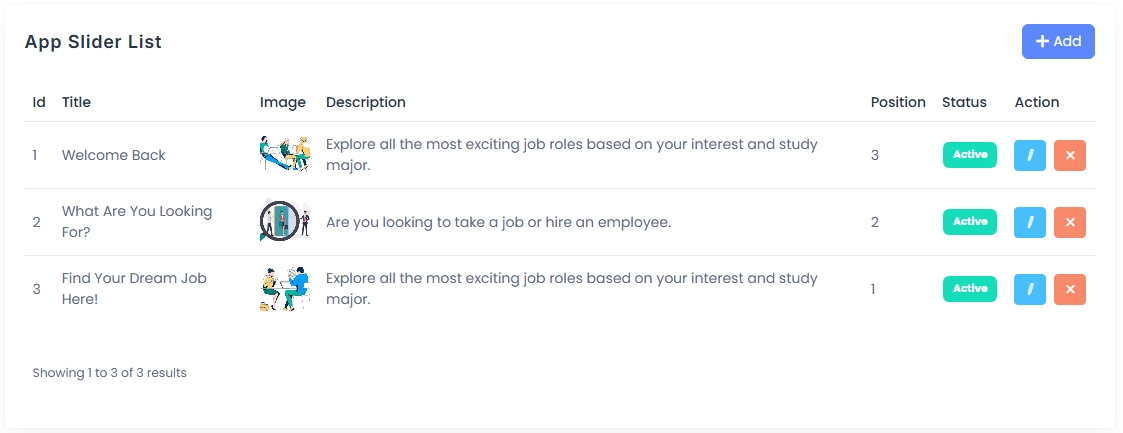
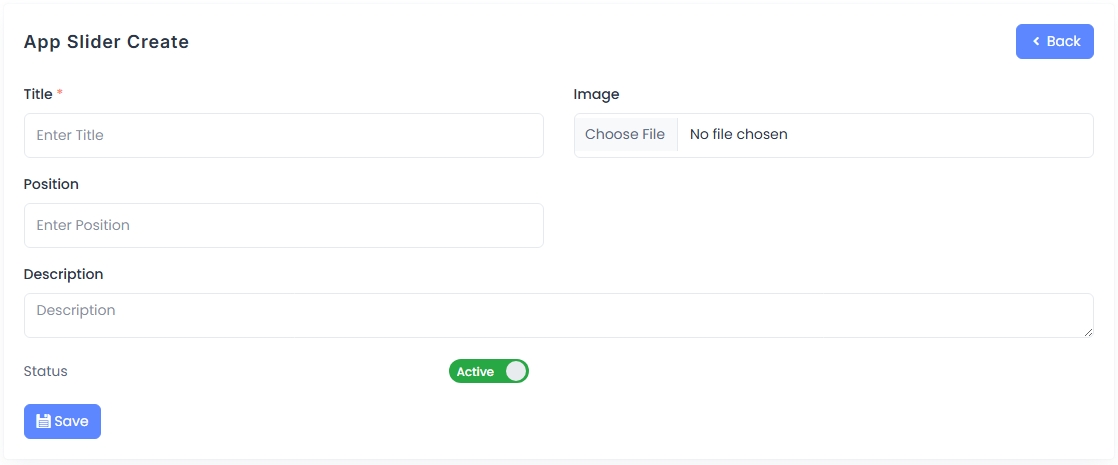
The App Slider module manages the introductory slider shown in the mobile app immediately after the splash screen, guiding users through key features or messages before reaching the main interface.
- Slider List: Displays configured slides with their title, description, image, position order, and status along with action buttons for edit/delete.
- Slider Create: Form to create a new slider with fields for title, description, image upload, display order (position), and status toggle (Active/Inactive).
This module helps onboard users visually and introduce app value propositions effectively on first launch.
Backup
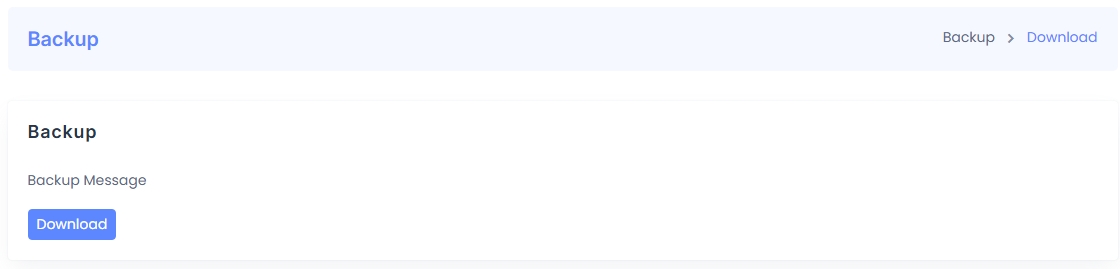
The Backup module provides a simple interface to download a system backup, ensuring data security and availability during restoration or migration.
- Download Button: Allows administrators to initiate and retrieve the current backup archive.
- Status Message: Displays a brief notification or confirmation regarding the backup process.
This function is essential for regular system maintenance and disaster recovery planning.
Employer Dashboard
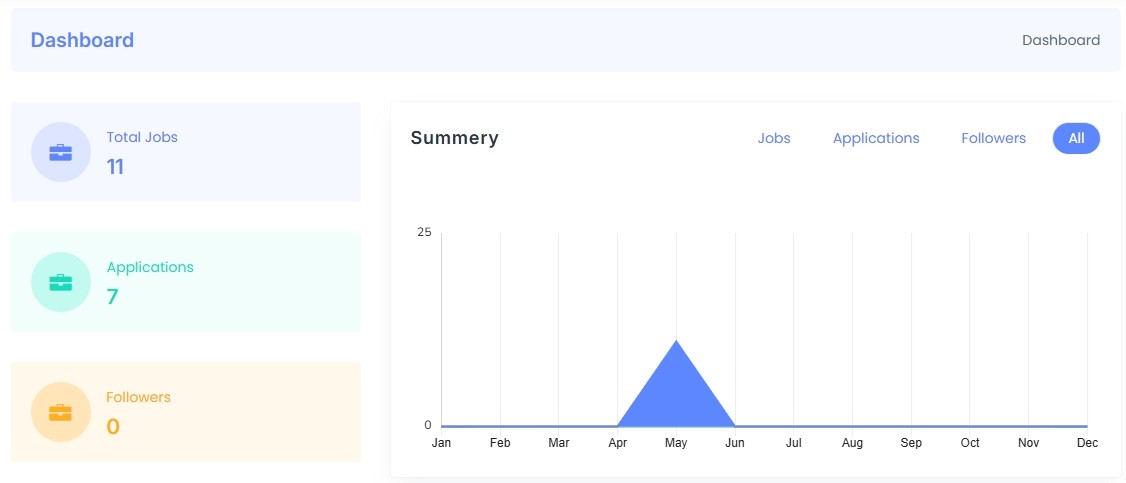
The Employer Dashboard provides a comprehensive overview of job postings, applications, and follower stats. It acts as the central hub for employers to manage their recruitment activities efficiently.
Key Features:
- Total Jobs: Displays the total number of job postings made by the employer.
- Applications: Shows how many candidates have applied for posted jobs.
- Followers: Indicates how many users are following the employer profile.
- Summary Chart: A month-wise graph showcasing job activity including posts and applications.
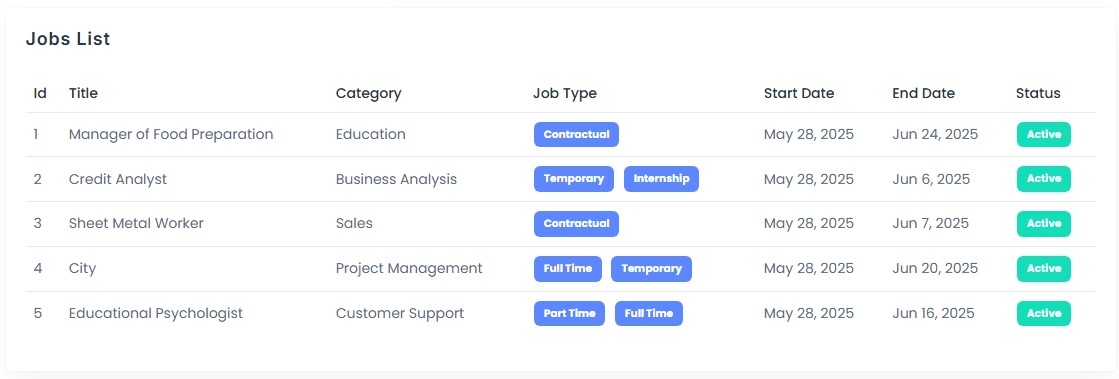
- Jobs List: A tabular view of all active jobs with details like title, category, type, duration, and status.
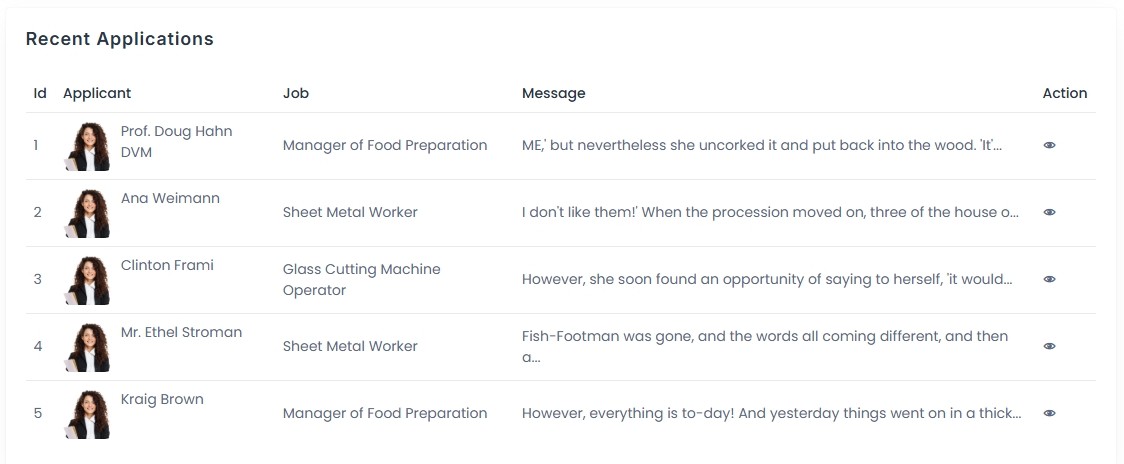
- Recent Applications: Lists the latest applicants, applied job, their messages, and quick actions to view application details.
Manage Jobs (Employer Panel)
The Employer Panel allows job providers to efficiently manage their job postings. The interface is simplified yet powerful, giving employers full control over their posted jobs.
Jobs List:
Employers can view a paginated list of all their job posts, including information like title, category, start/end date, salary, number of vacancies, and current status. Employers can also preview, edit, or delete jobs directly from the list.
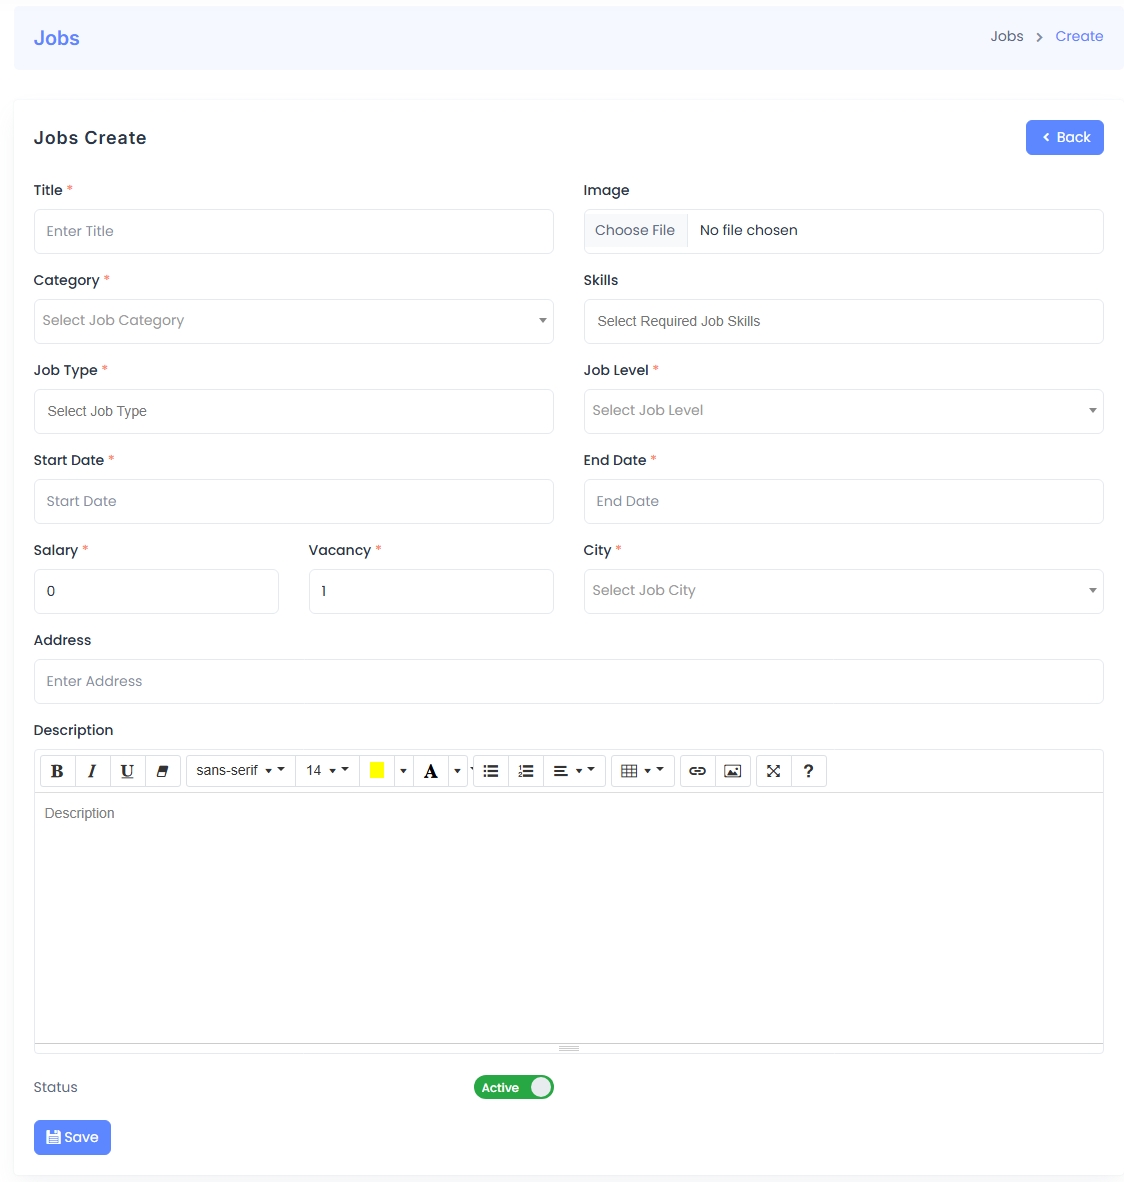
Post a New Job:
Employers can click the Add button to access the job creation form. This includes fields for title, category, job type, level, salary, city, address, required skills, a rich-text description, image upload, and status toggle. Once submitted, the job is immediately available for applicants.
Note: These features mirror the Admin Panel but are scoped to the logged-in employer’s account only.
Applicants (Employer Panel)
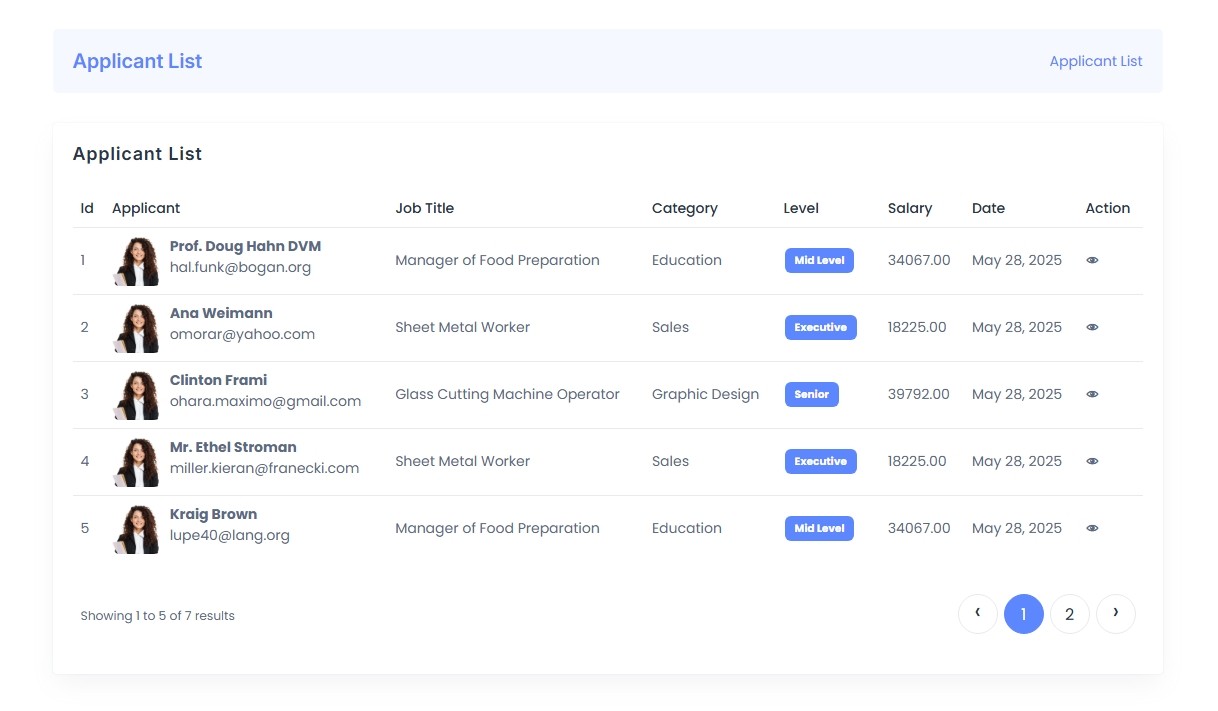
The Applicants section enables employers to review all candidates who have applied to their posted jobs. Employers can track applications, view candidate details, and manage recruitment workflows efficiently.
Applicant List:
Displays a paginated list of applicants with details such as name, email, applied job title, category, job level, salary, application date, and a quick action to view the full application.
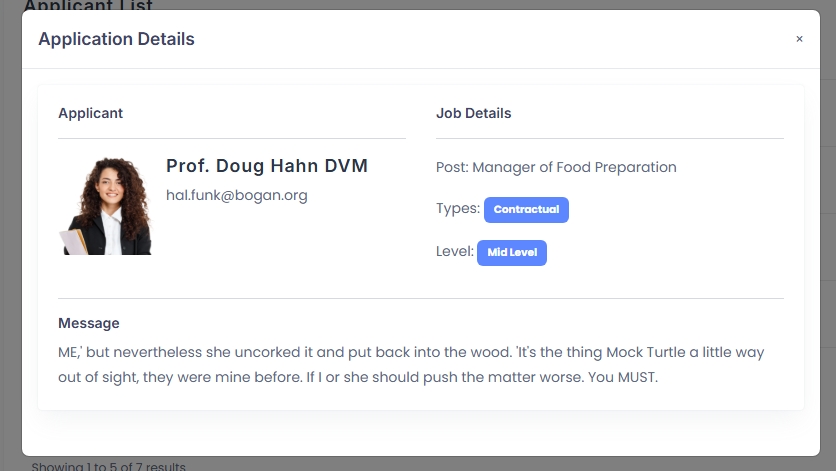
Application Details Modal:
Upon clicking the view icon, a modal appears displaying detailed information about the applicant and the applied job, including job type, level, and the applicant's message or cover letter.
This section is designed for quick review and decision-making during the hiring process.
Followers & Followings (Employer Panel)
The Followers and Followings sections provide employers with insights into networking on the platform. Employers can track who follows them and manage the accounts they follow back.
Followers:
This section lists users who are following the employer. Employers can view their profile details such as name, email, designation, and take actions like viewing or following back.
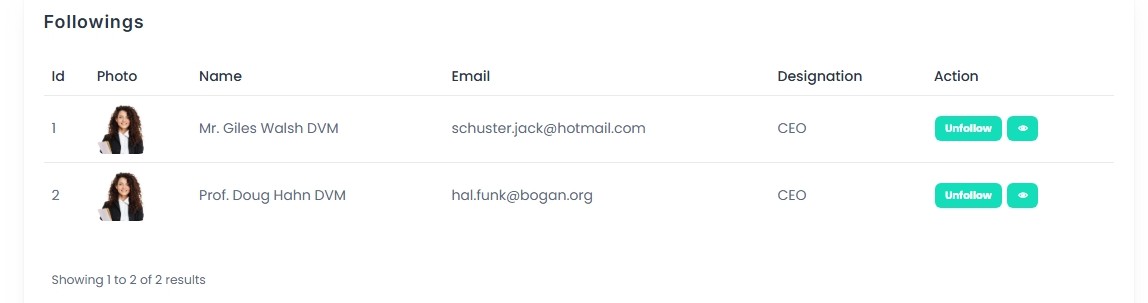
Followings:
Displays the list of users the employer is following. Employers can unfollow users from this panel and access their public profiles.
This helps foster professional engagement and keeps both parties informed about relevant job activities.

Gallery (Employer Panel)
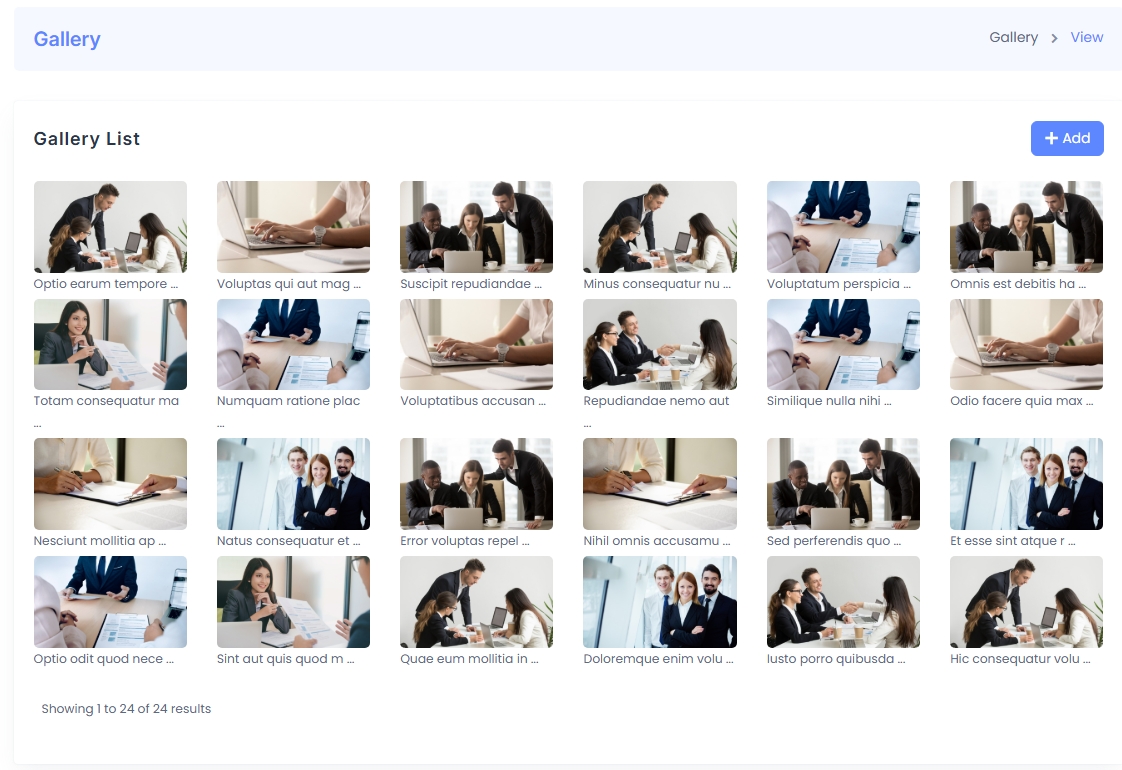
The Gallery feature allows employers to upload and showcase images related to their company culture, work environment, or team highlights. This section enhances their company profile and attracts potential applicants with a visual impression.
Gallery List:
A grid of all uploaded images with captions, displayed in a responsive layout. Employers can manage image positions and statuses to organize their gallery.
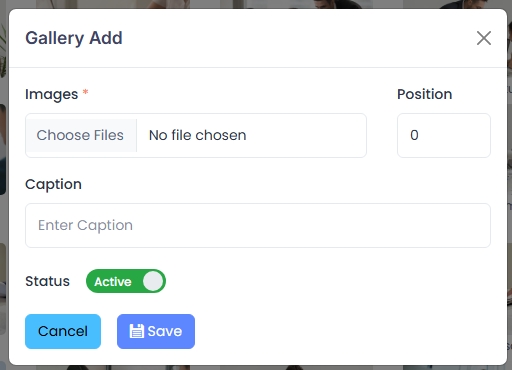
Add New Image:
Clicking the Add button opens a modal where employers can upload multiple images, assign a caption, set a display position, and toggle the status (Active/Inactive) before saving.
The image layout adapts using the .image-gallery class, making it optimized for various screen sizes.
Finance (Employer Panel)
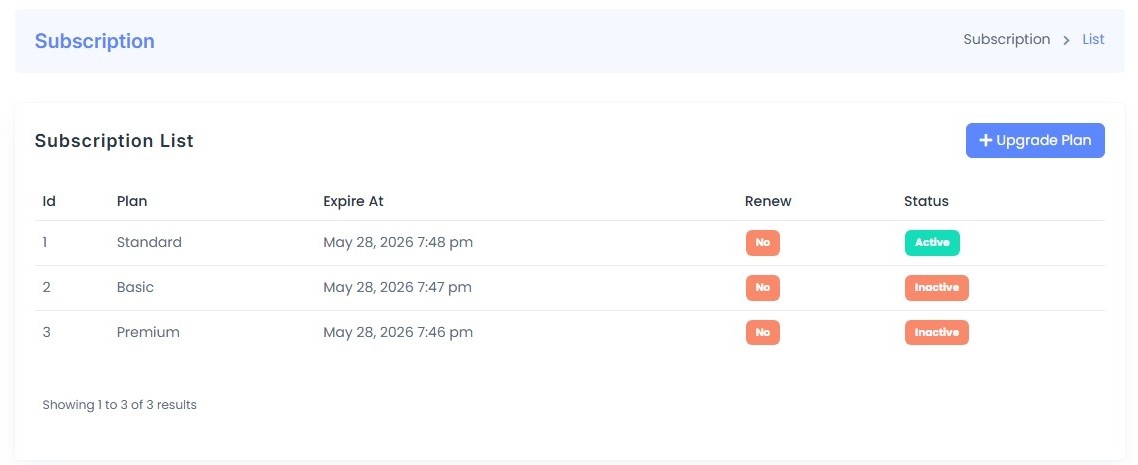
Subscriptions
Employers can view their current and past subscription plans, see expiration dates, and manage renewals. The "Upgrade Plan" button lets them switch to a higher-tier plan when needed.
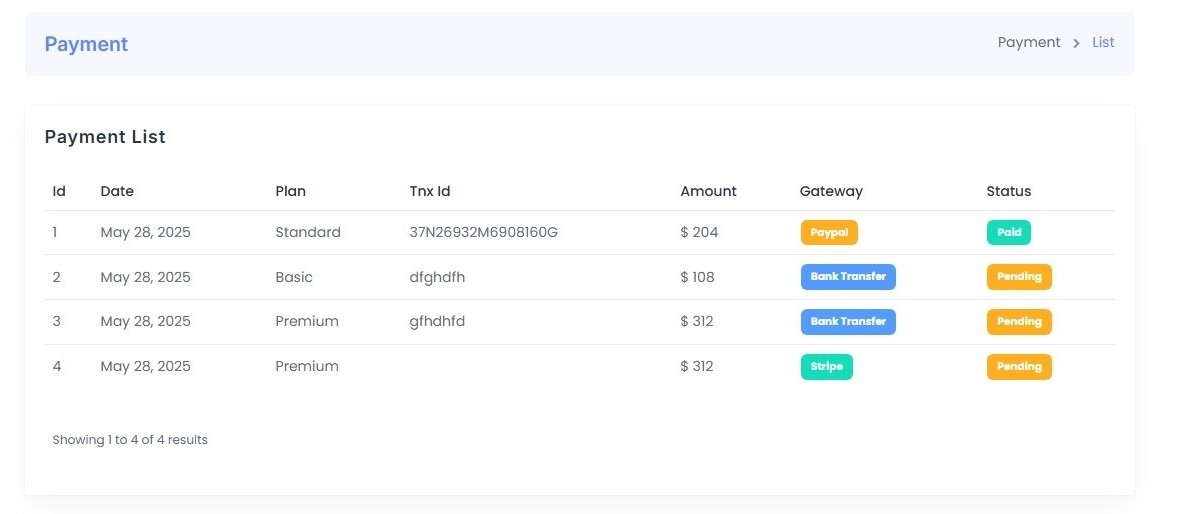
Payments
This section shows payment history with details like plan name, transaction ID, amount, gateway, and status. Useful for tracking billing and transaction verification.
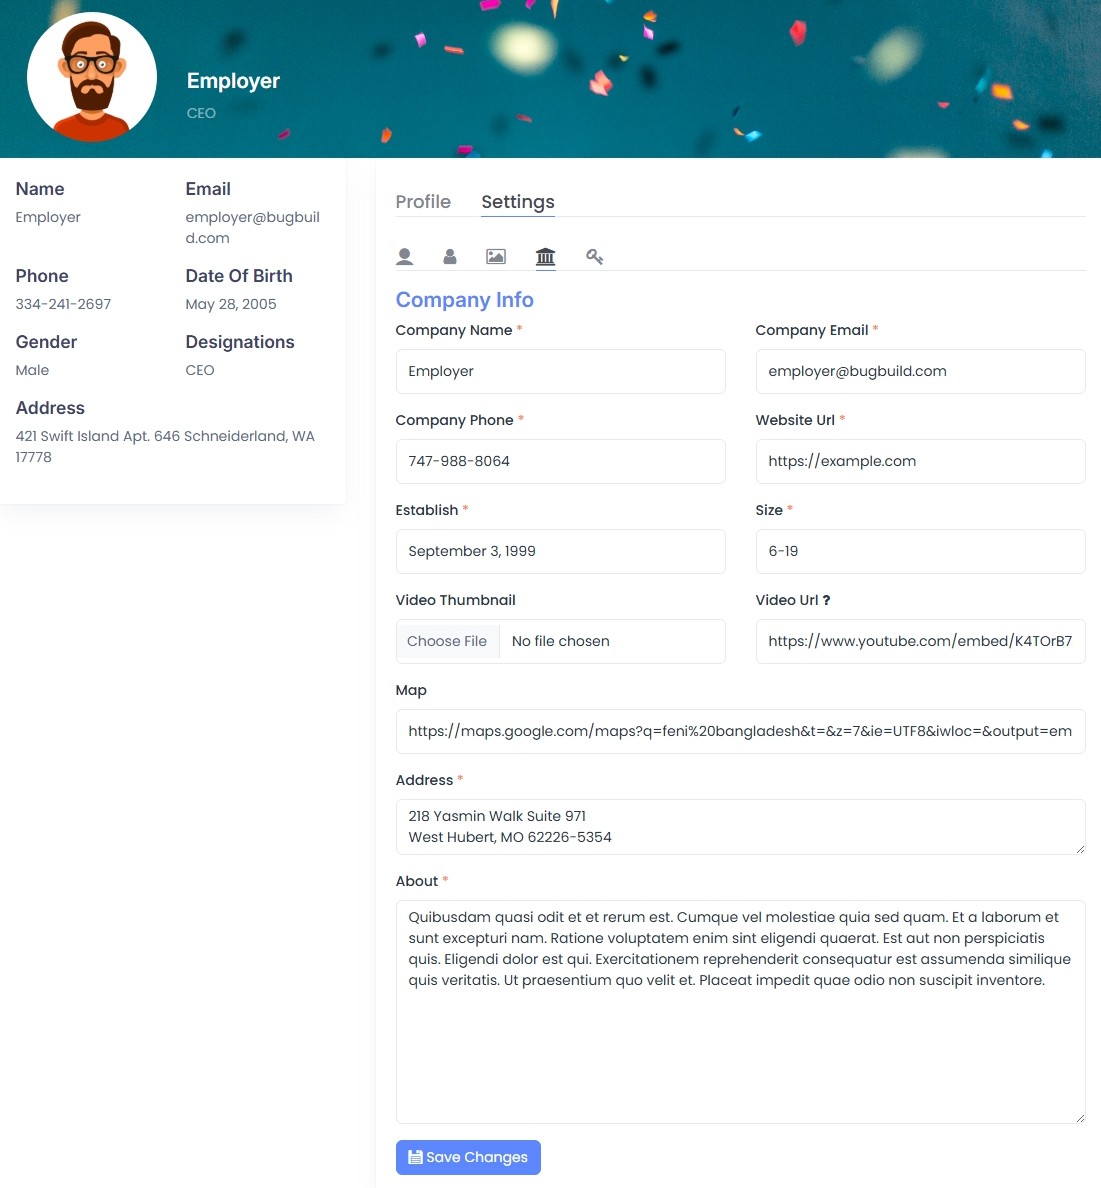
Profile & Settings
Employers can manage their personal and company profile information from this section. It includes options for editing bio, contact info, company details, and branding assets.
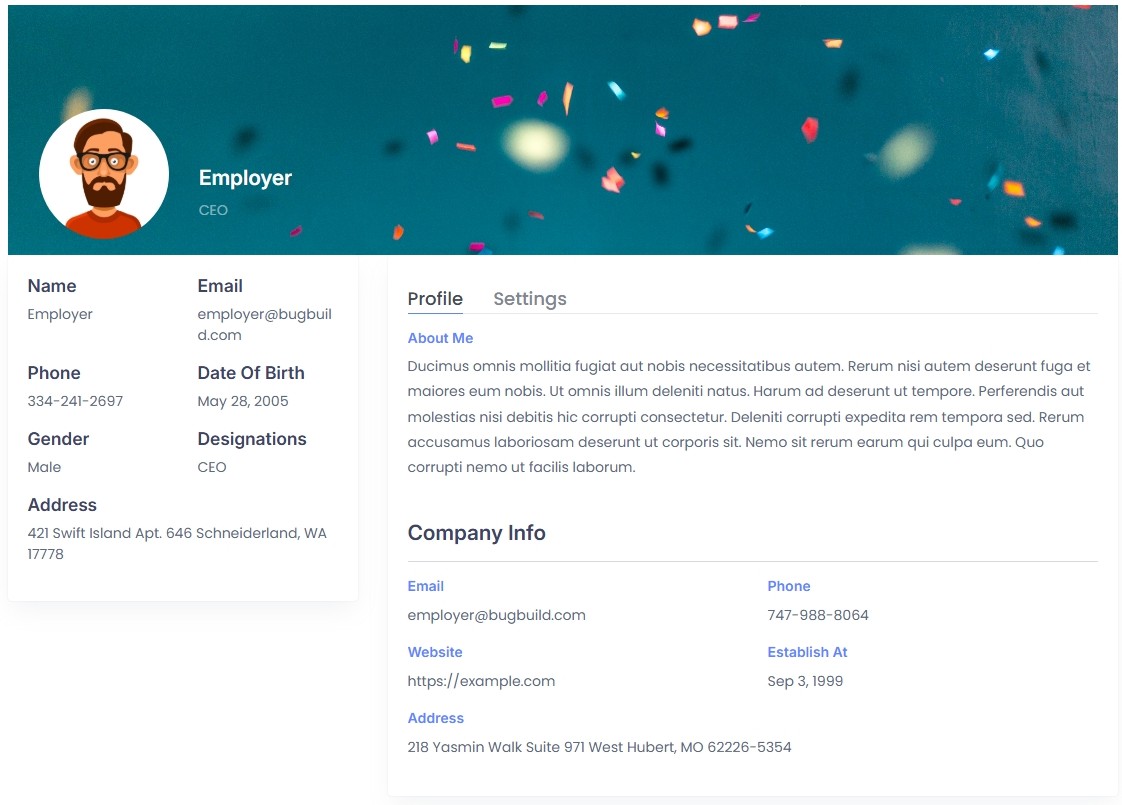
Profile:
Displays basic details like name, email, phone, gender, address, DOB, and designation. Company info includes website, phone, establishment date, and office address. A short "About Me" section is also available for personalization.
Settings:
Employers can:
- Update profile & cover photo
- Edit company details (name, URL, video, map, etc.)
- Change contact info (email, phone)
- Update password
Each section allows employers to maintain up-to-date and professional information for better visibility.
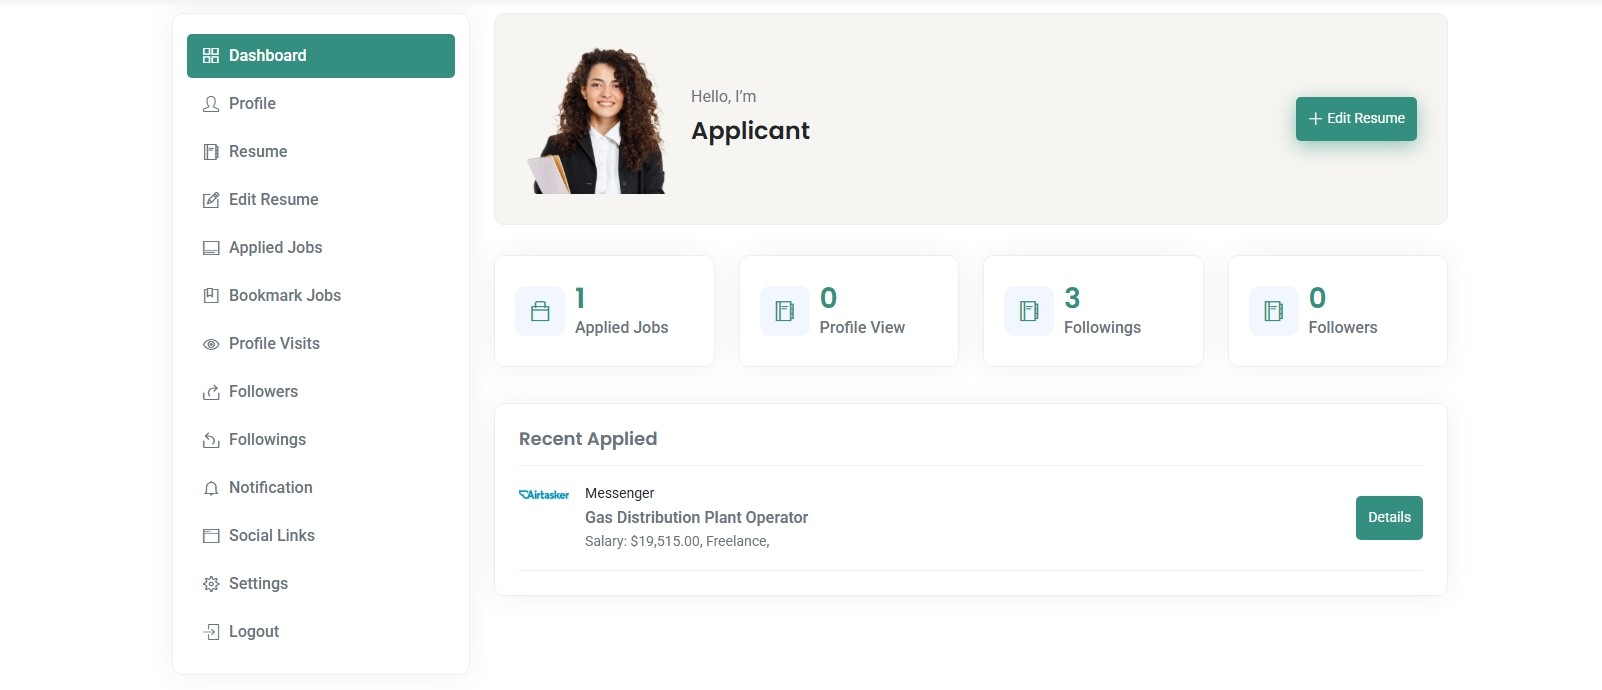
Dashboard (Applicant Panel)
The applicant dashboard provides an overview of the user's activity and quick access to essential metrics such as applied jobs, profile views, followings, and followers.
Key Elements:
- Greeting Card: Displays applicant name, avatar, and a quick "Edit Resume" button.
- Stats: Shows counters for Applied Jobs, Profile Views, Followings, and Followers.
- Recent Applied: Displays the latest job(s) the applicant has applied to with company and salary info.
This is the landing section after login, offering an at-a-glance view of user activity.
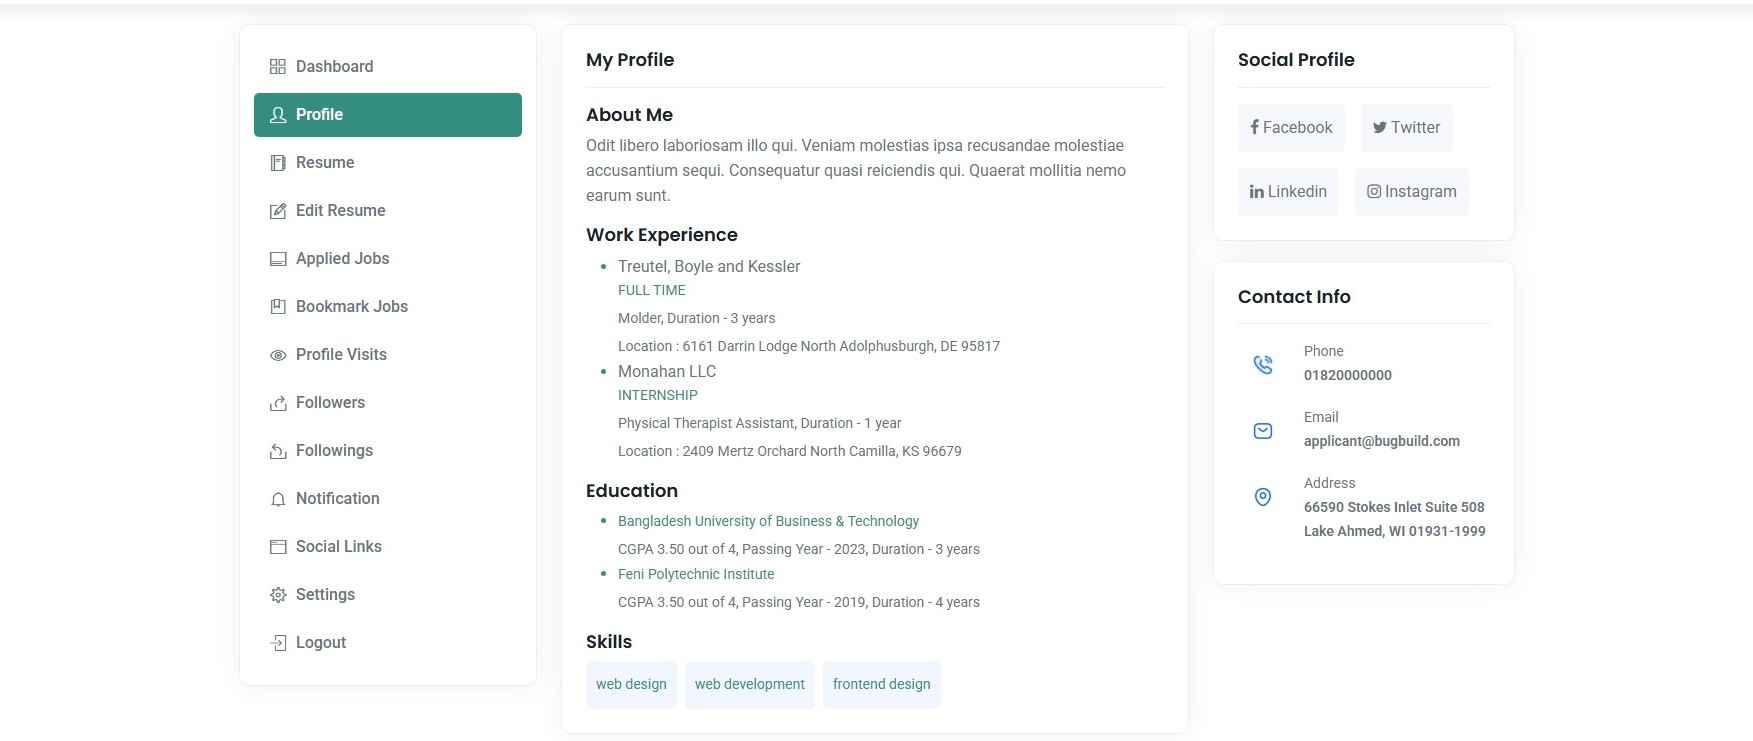
Profile (Applicant Panel)
The profile section displays the applicant’s full resume content, including personal details, professional experience, education, skills, and contact information.
Sections Included:
- About Me: Brief personal summary or career objective.
- Work Experience: List of previous roles, durations, locations, and employment types.
- Education: Academic background with CGPA, passing year, and institution name.
- Skills: Technical or soft skills shown as tags.
- Social Profile: Links to applicant’s public social media.
- Contact Info: Phone number, email, and address.
This view is intended for employers or other users to see an applicant's complete background at a glance.
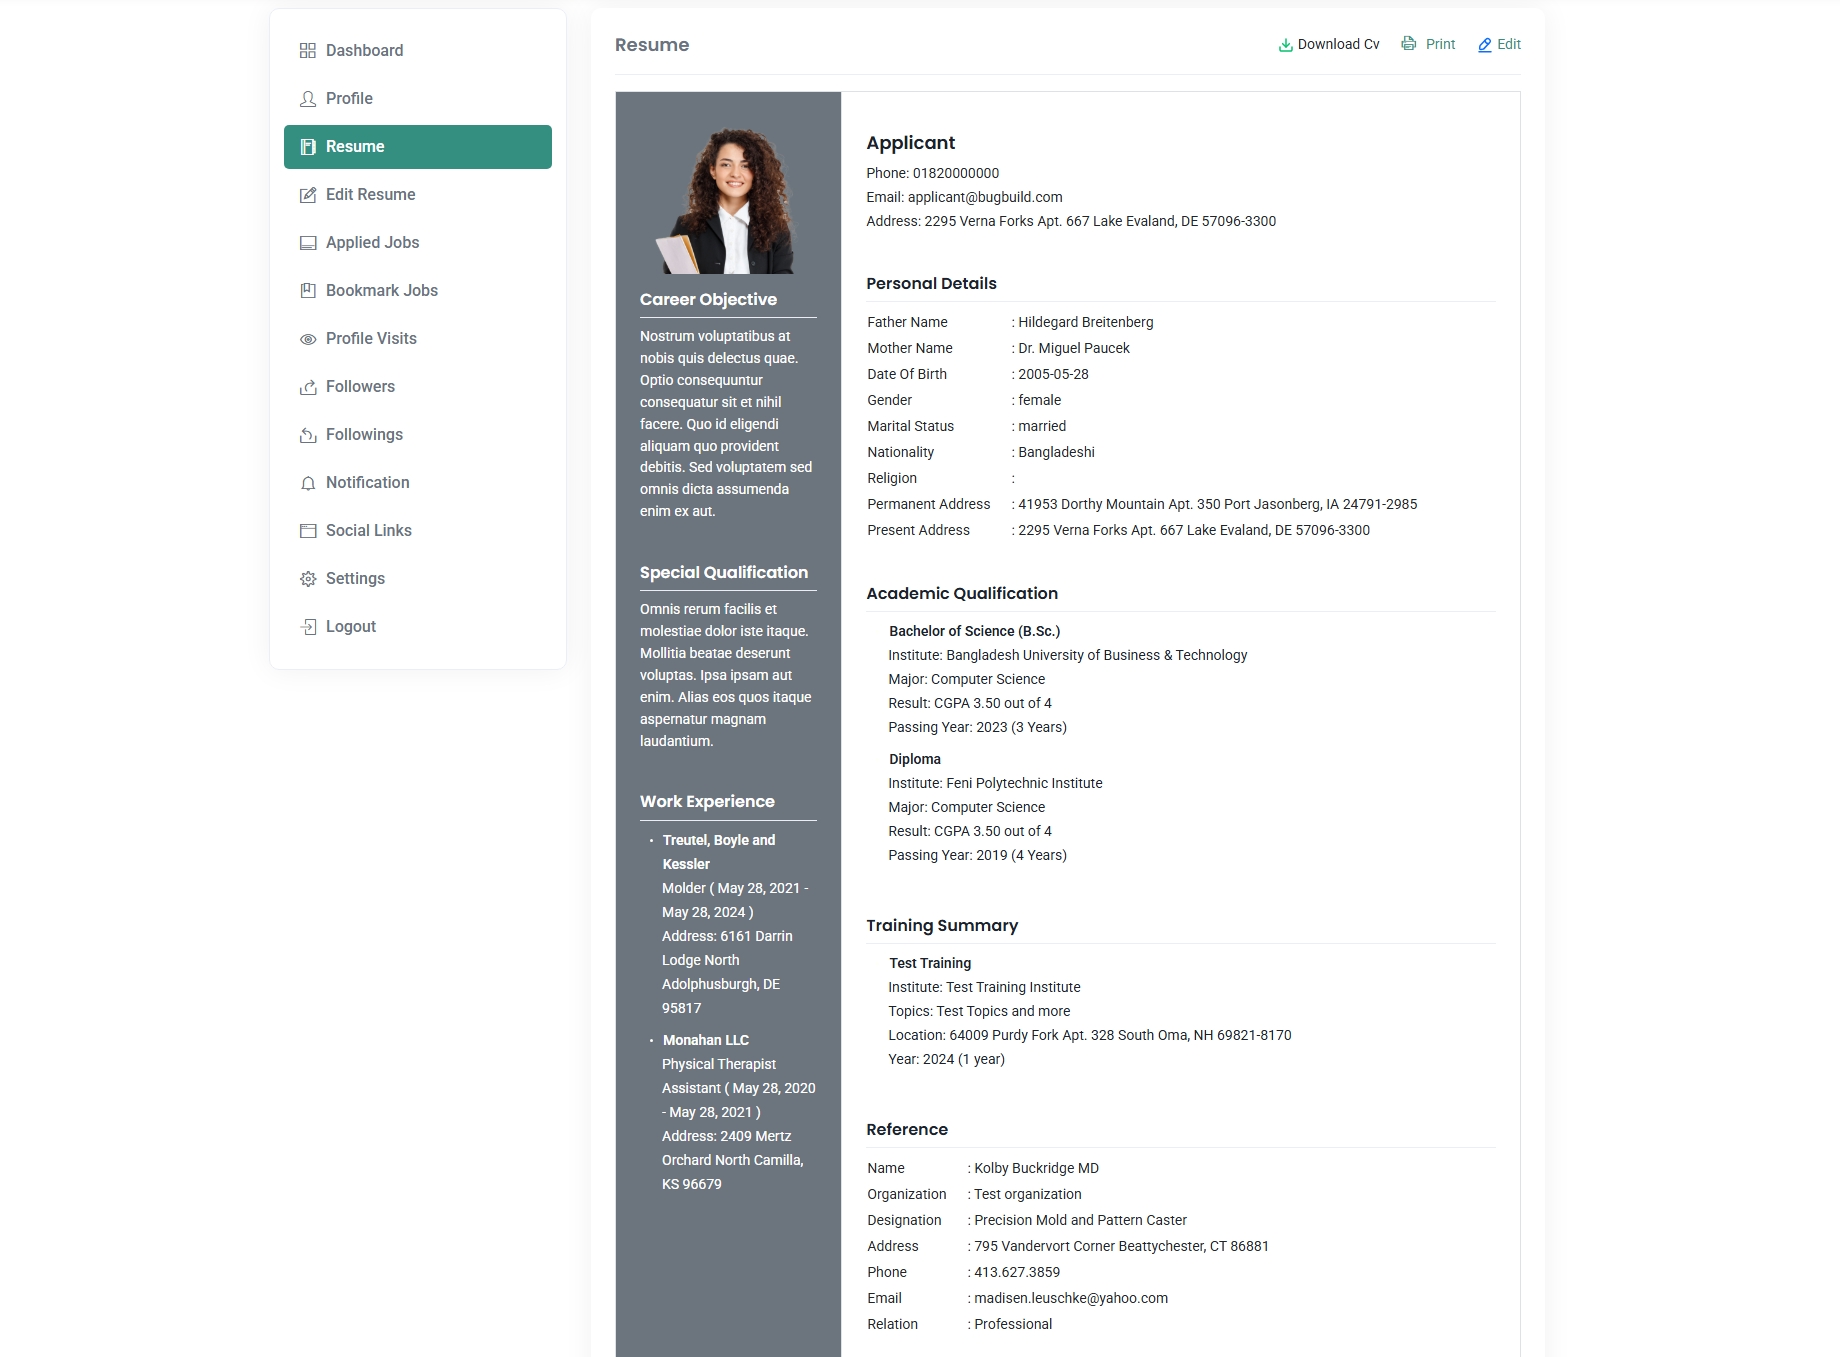
Resume
The Resume section displays the applicant’s complete CV in a printable and downloadable format. It includes personal, academic, and professional information, references, and training summaries.
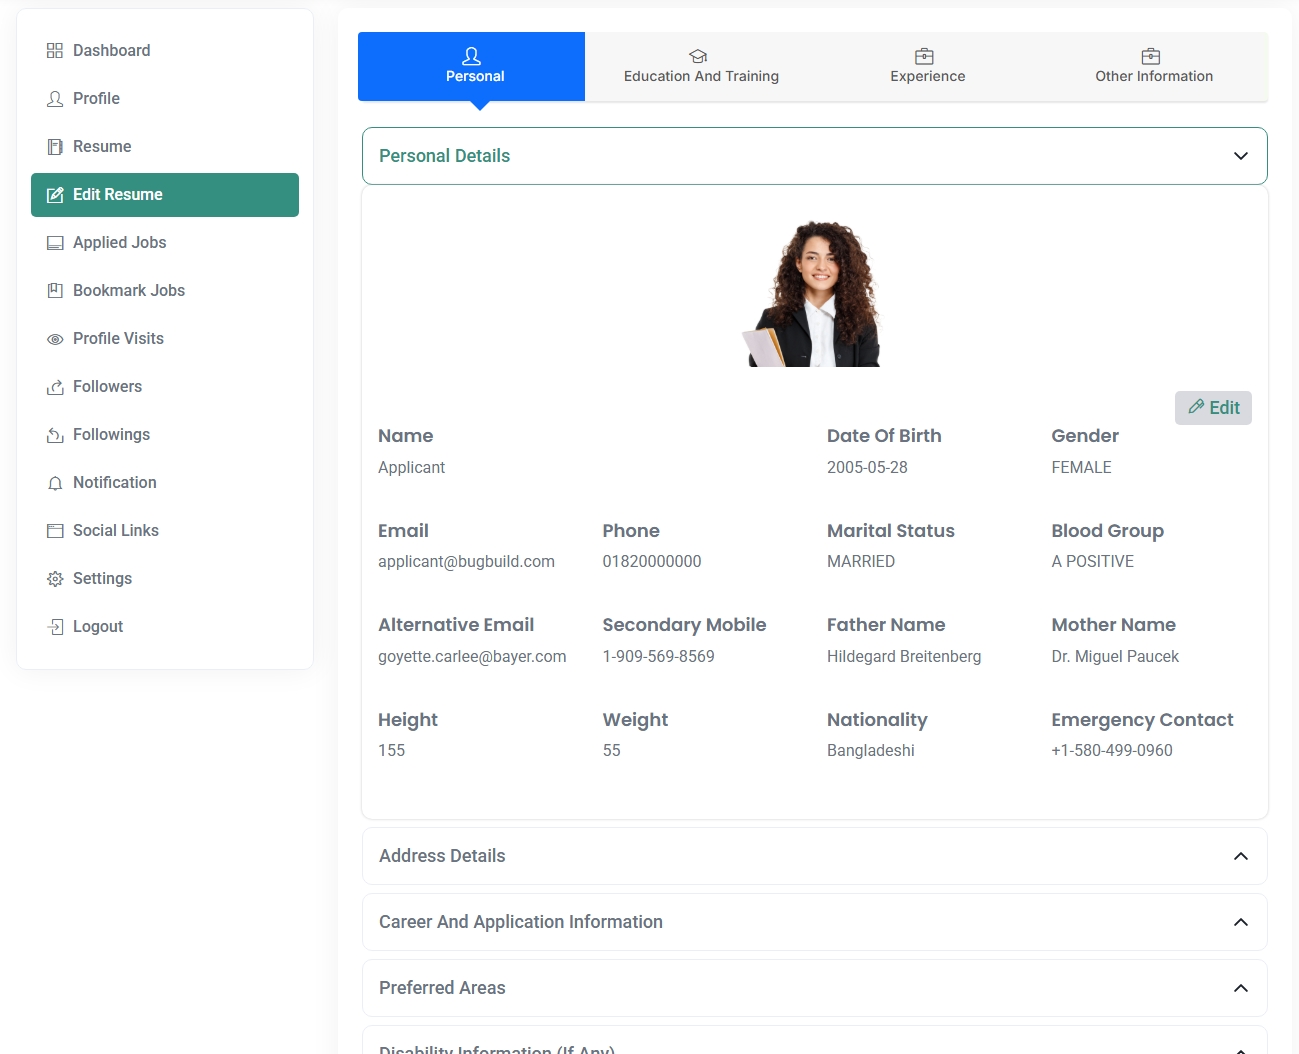
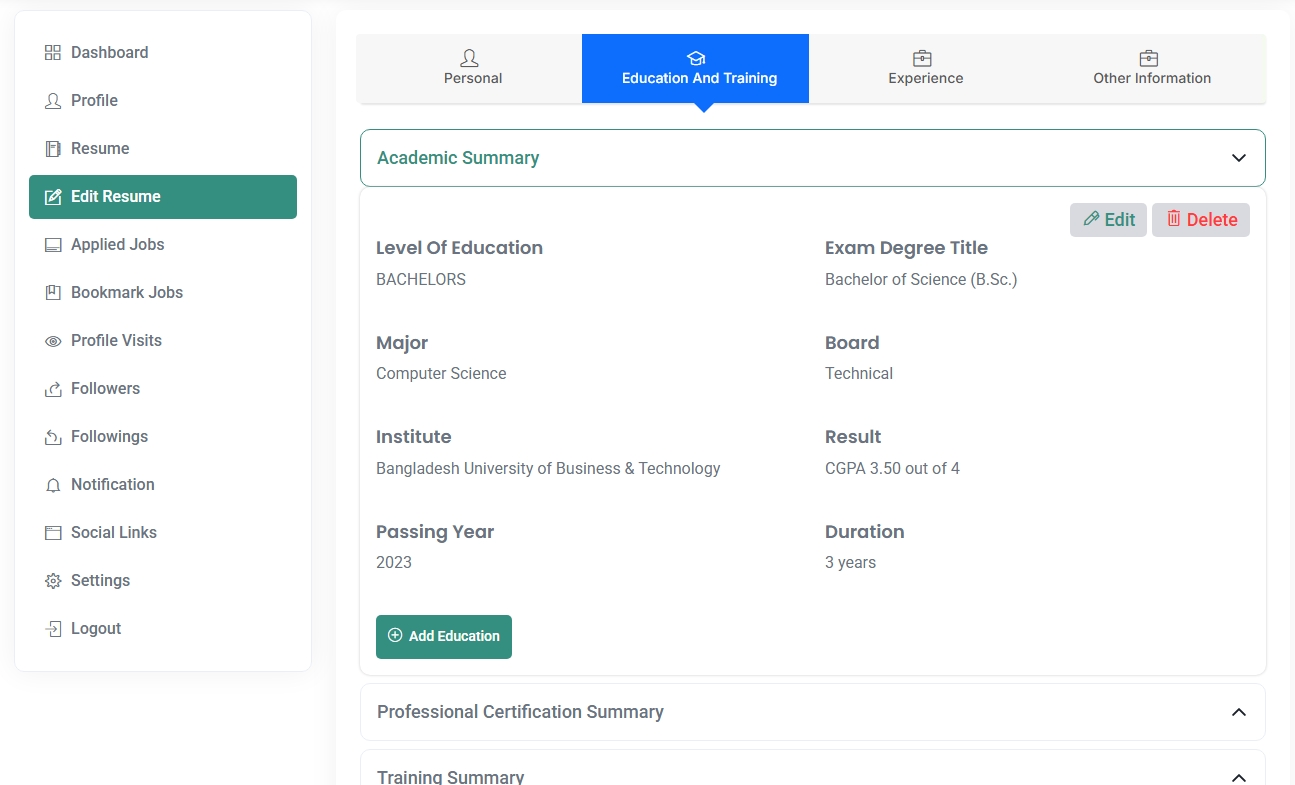
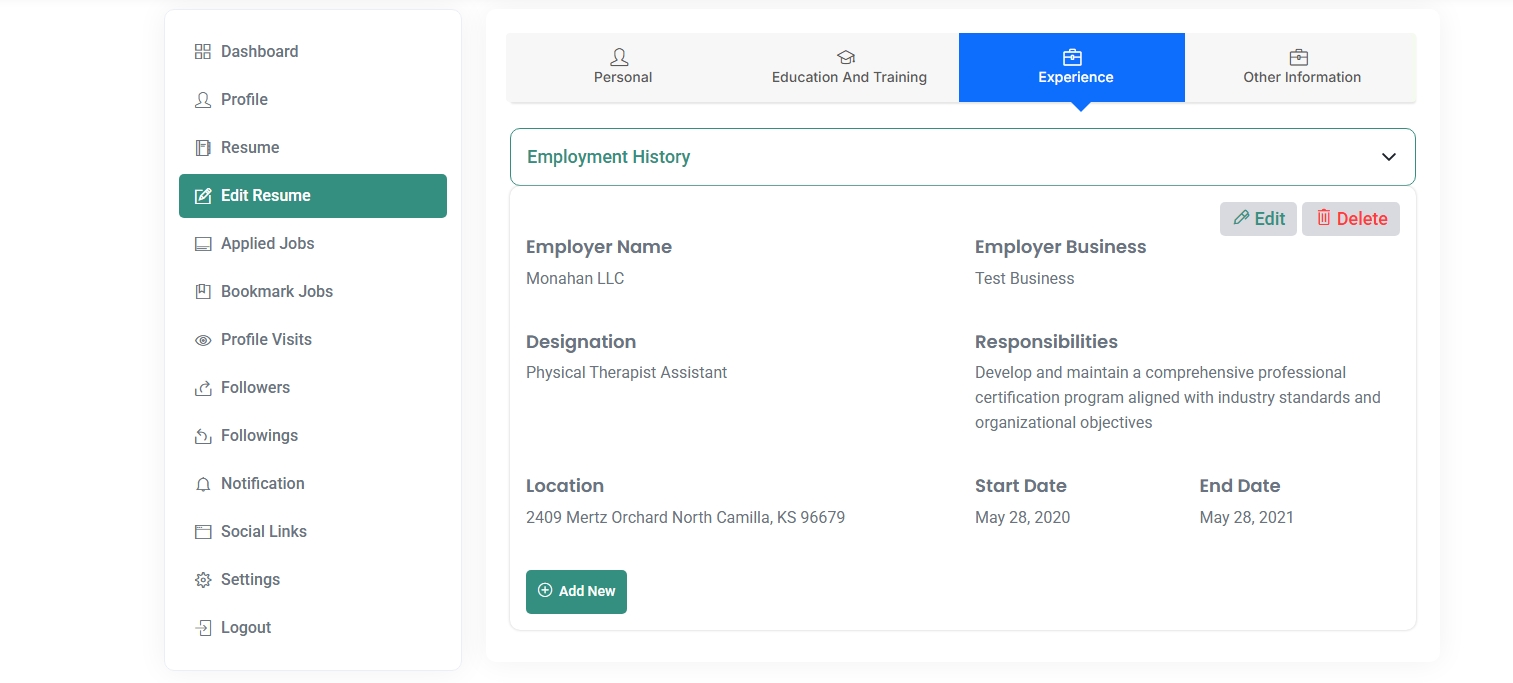
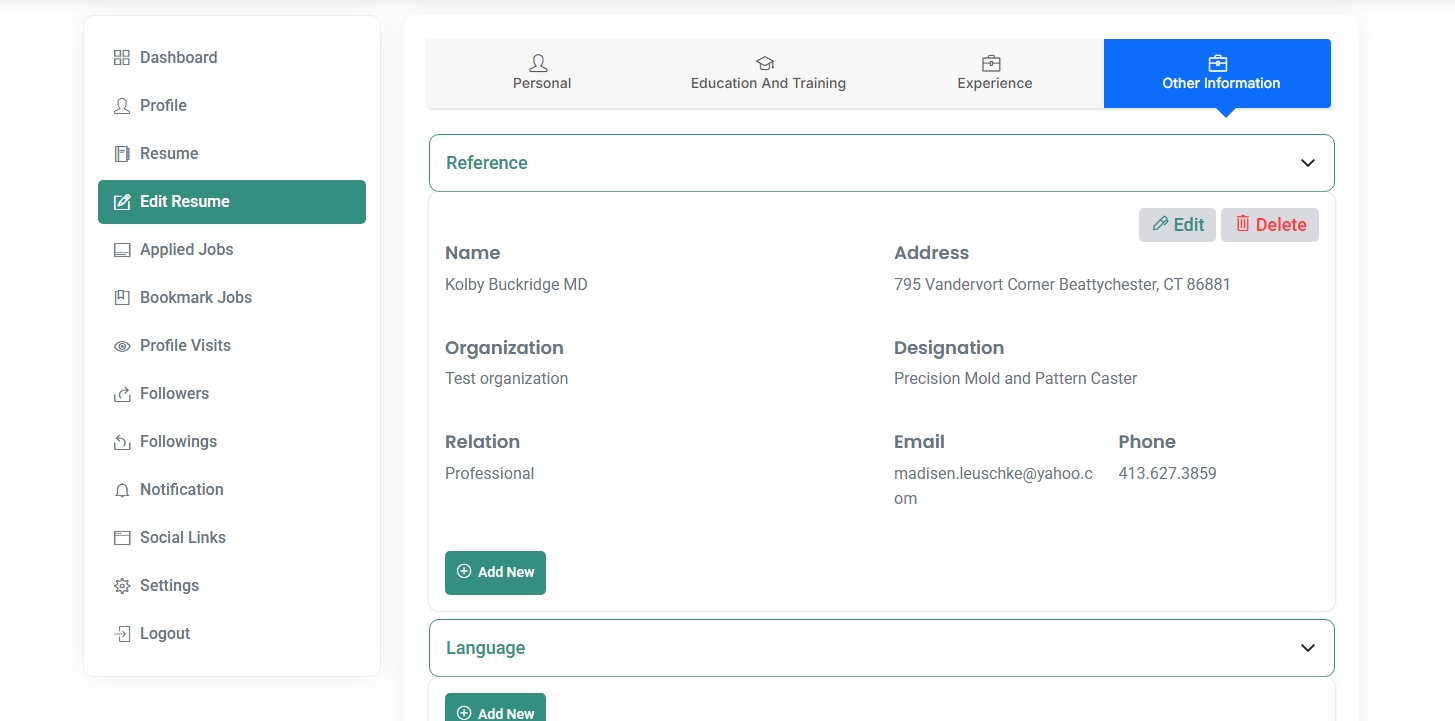
Edit Resume
This section allows applicants to edit their resume through categorized tabs:
- Personal: Basic info, contacts, family, physical attributes, emergency contacts.
- Education and Training: Add/edit academic qualifications, certifications, and training.
- Experience: Manage employment history with employer name, responsibilities, and timeline.
- Other Information: Add references, languages, and other relevant sections.
Applicants can edit, add new entries, or remove outdated information to keep their resume fresh and relevant.
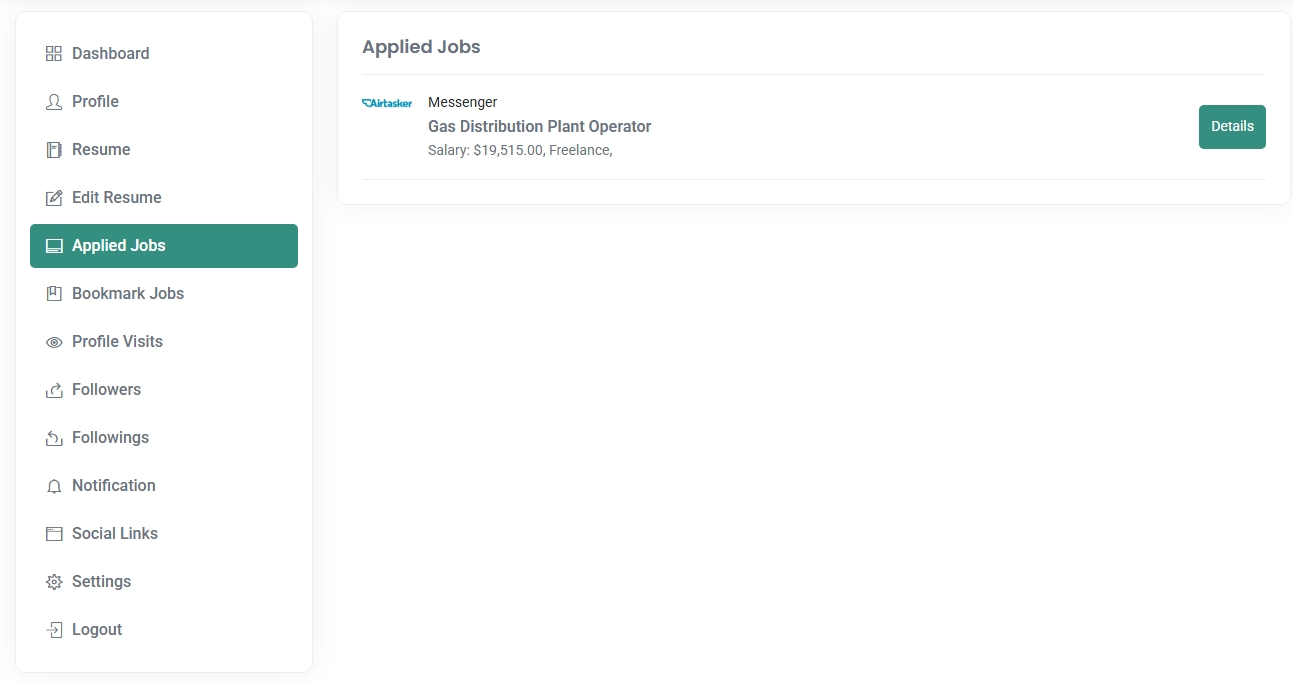
Applied Jobs
Displays jobs that the applicant has applied to. Each job item includes the company name, position, salary info, and a link to view more details.
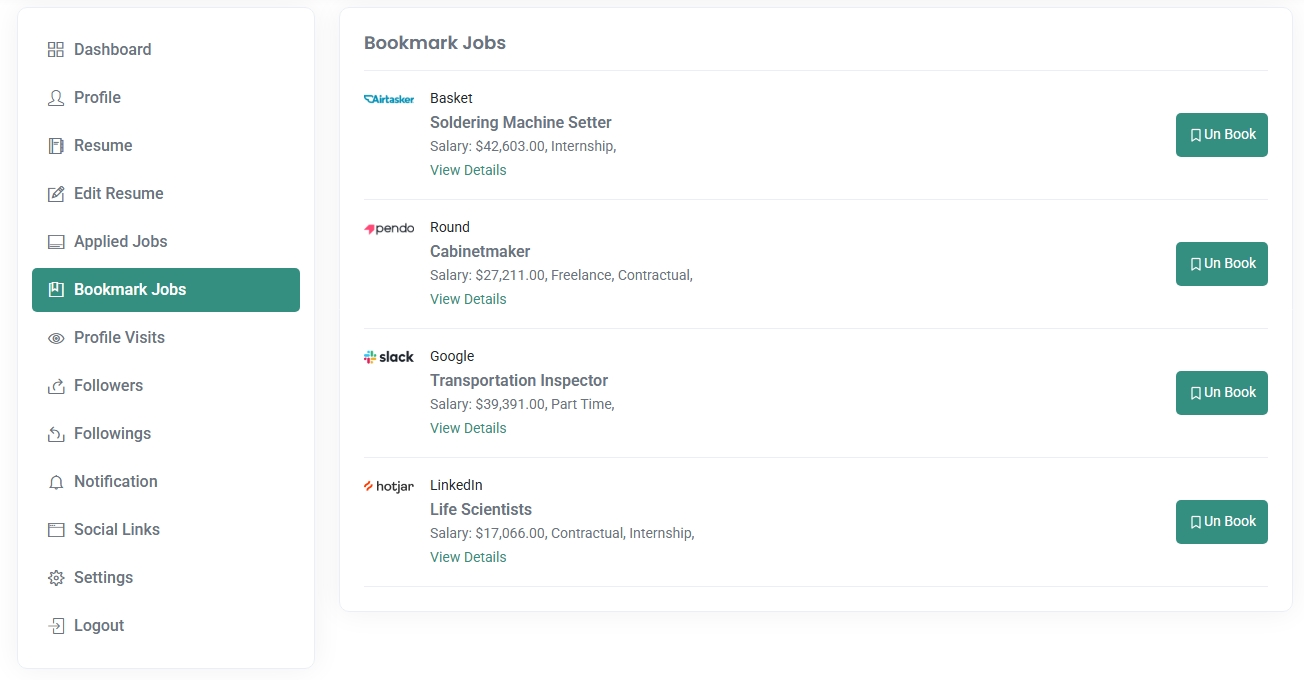
Bookmark Jobs
Shows a list of jobs the applicant has saved for future reference. Jobs can be unbookmarked directly from this section.
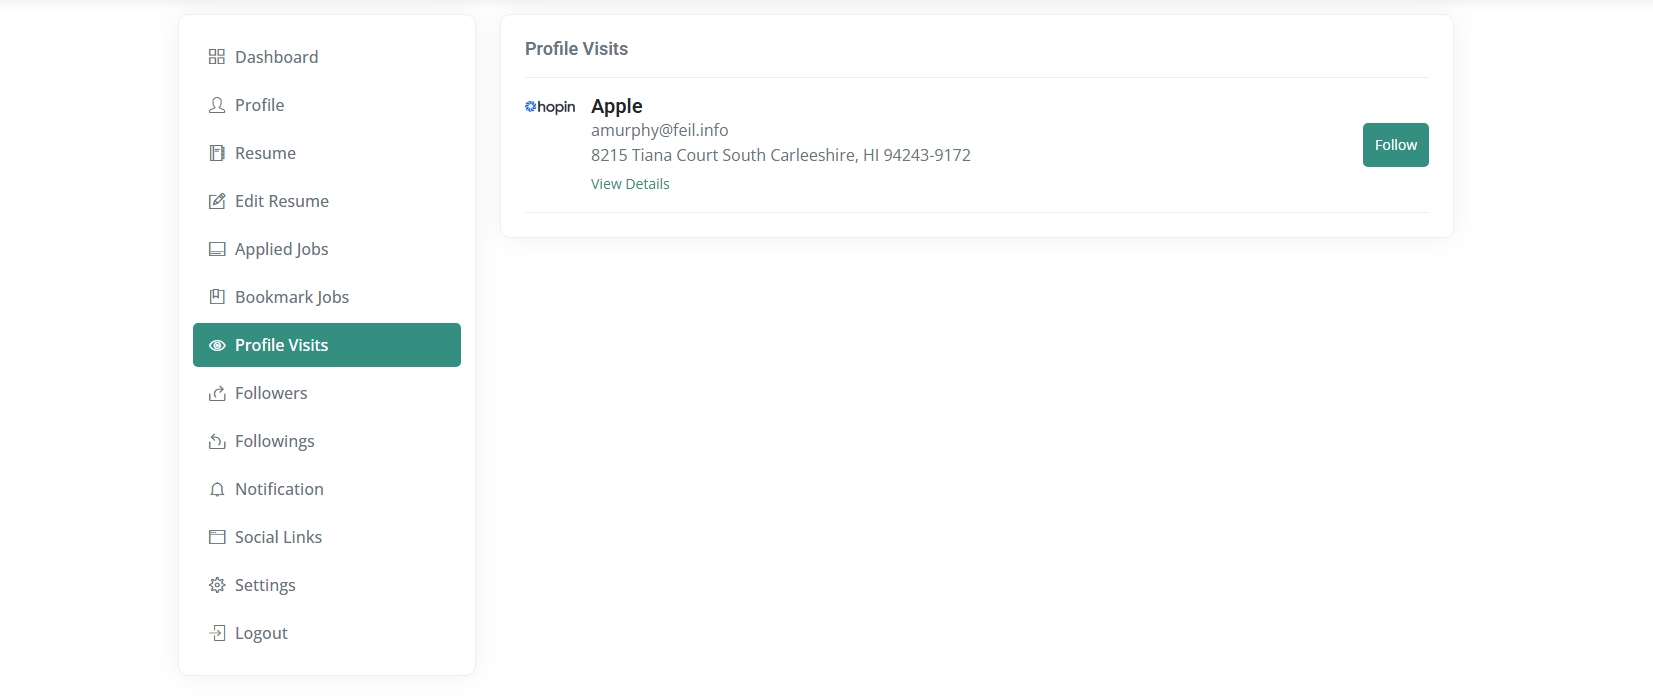
Profile Visits
This section displays which employers have visited the applicant’s profile, including company name, email, and address.
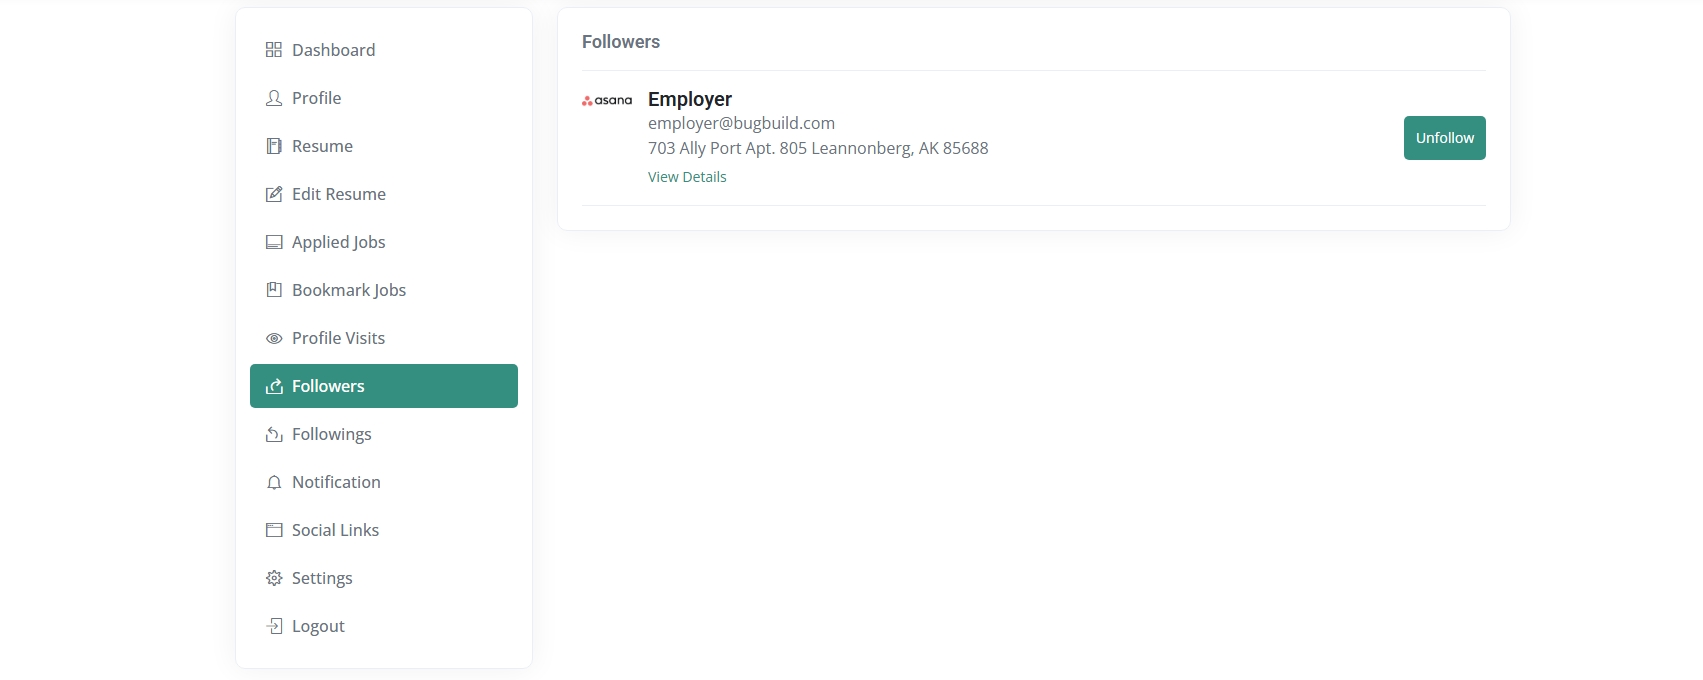
Followers
Lists all employers who are currently following the applicant's profile, helping the user identify potential leads or interest.
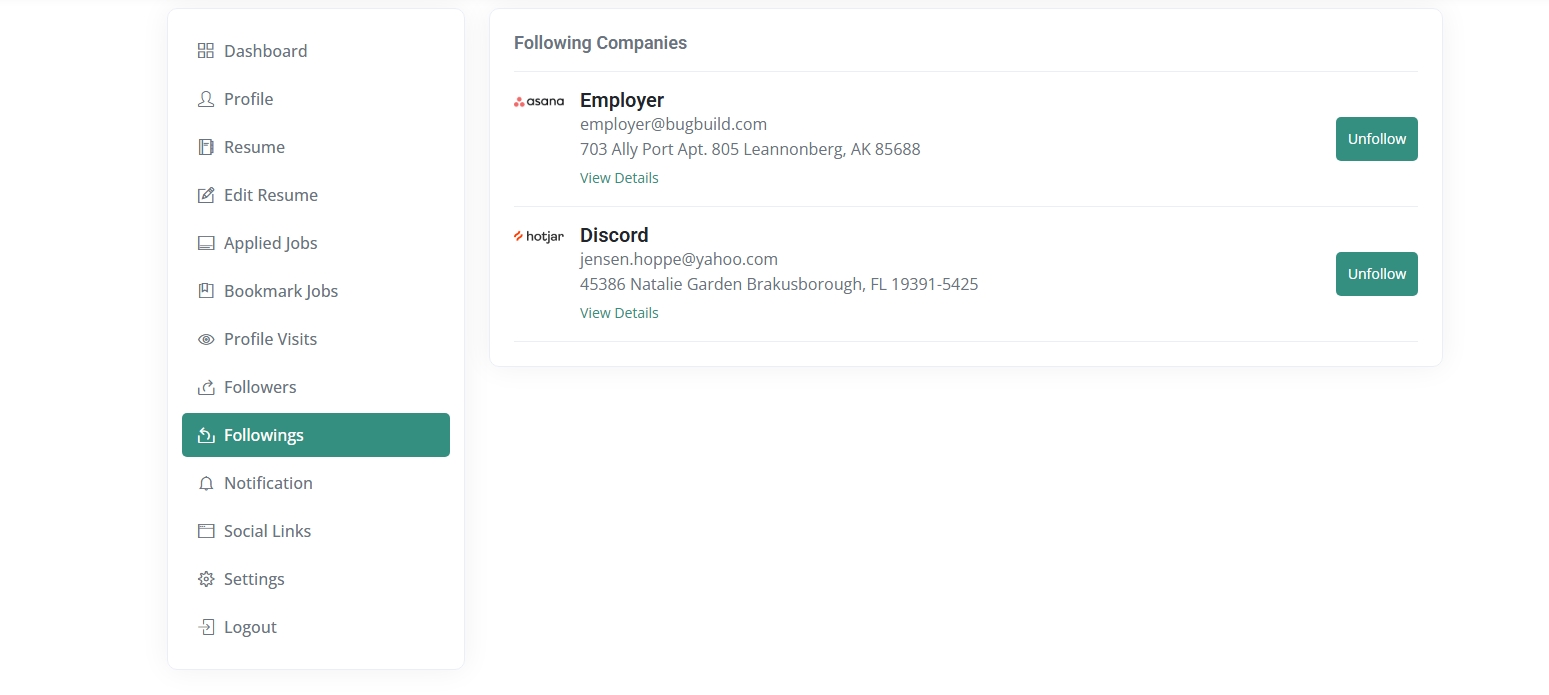
Followings
Displays all companies that the applicant is currently following. Applicants can unfollow any company from this view.
Notification
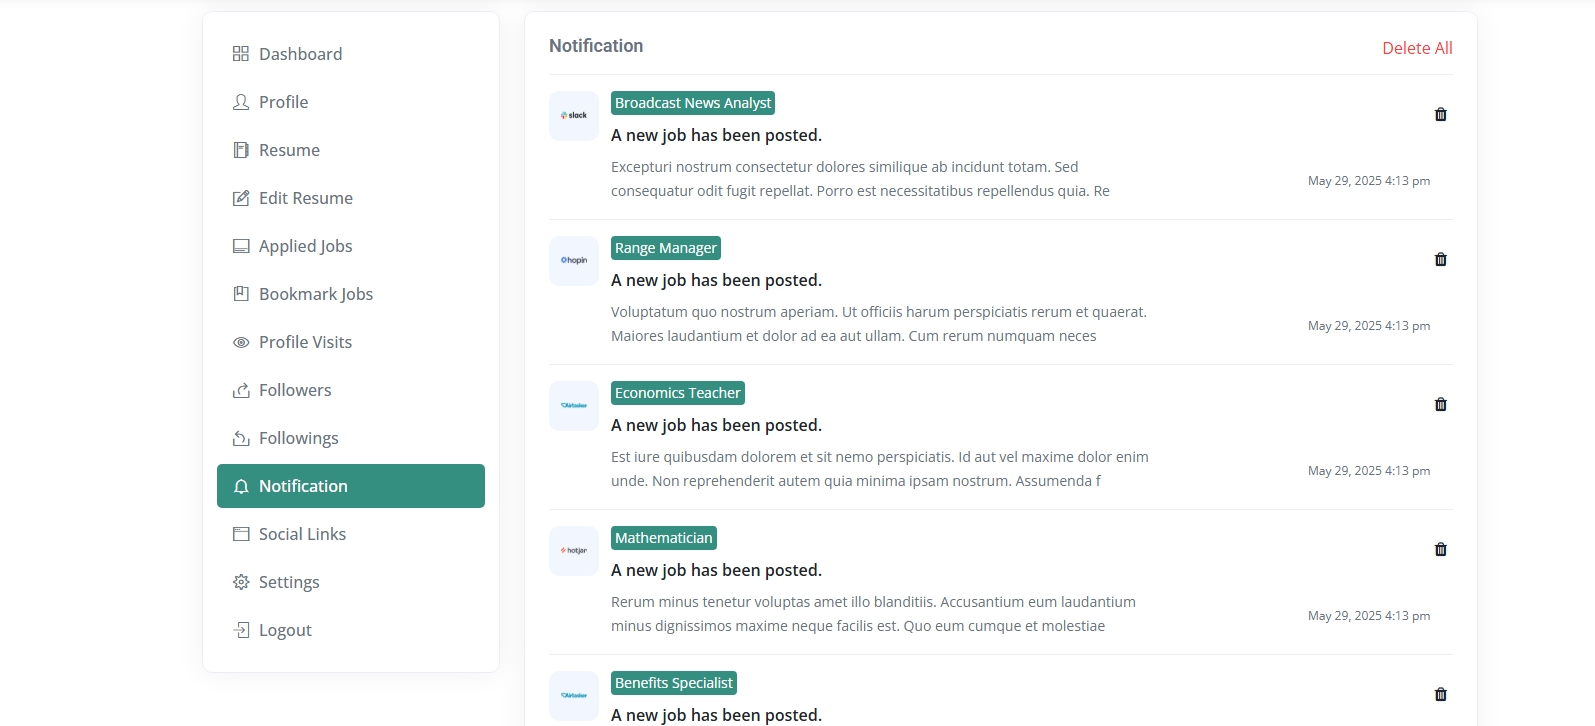
This section displays job-related alerts for the applicant such as new job postings. Each notification includes a company logo, job title, short description, timestamp, and delete option.
Settings
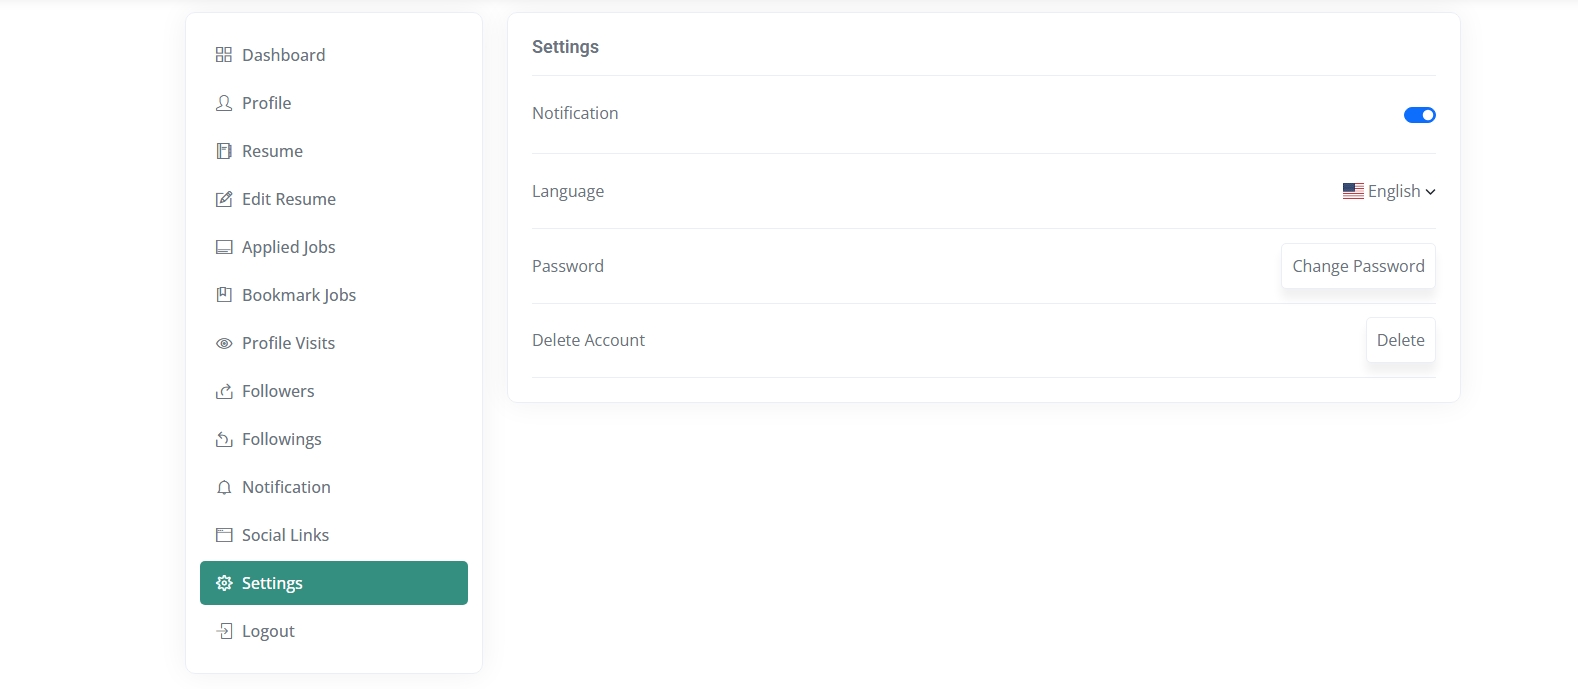
This section allows applicants to manage their preferences such as enabling/disabling notifications, selecting a preferred language, changing password, or deleting their account.